 International
 Singapore
 Malaysia
 Thailand
 Vietnam
รถเข็นของคุณว่างเปล่า!

Creating a 3D Printed QR Code: A Step-by-Step Guide
- Abdulrahman Alhamed
- 14 Feb 2023
- Tutorial
- Beginner
- 2838
In recent years, 3D printing has become increasingly popular as a means of creating intricate and unique objects. Among the many applications of this technology is the creation of 3D-printed QR codes. These codes can be used in a variety of ways, from marketing and advertising to personal art projects and DIY creations. If you're interested in learning how to 3D print your own QR codes, you're in luck! In this article, we'll take you through the process step by step, including how to design and prepare your QR code for printing, and tips for achieving the best results. This guide will provide all the information you need to create your own 3D-printed QR codes.
#1Creating the QR Code
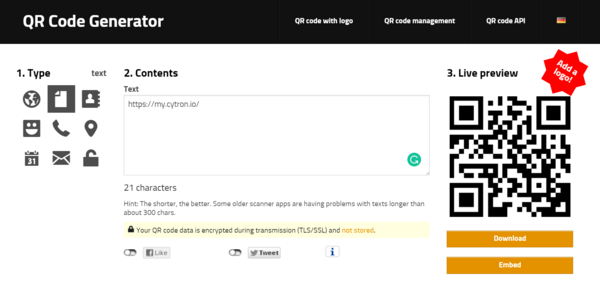
The first step in 3D printing a customized QR code is to create the QR code itself. This can be done by using an online QR code generator and inputting the desired information, such as a URL, image, or plain text, that you want the code to contain. It is important to export the QR code in the Scalable Vector Graphics (SVG) file format, as this is a vector-based format that can be resized without losing quality, which is crucial for later steps in the process.
One recommended free online resource for generating QR codes is goqr.me, which provides the ability to create codes for various types of inputs, such as phone numbers, contact information, and locations. Once the input information has been entered, the code can be generated and saved in SVG format. Once you have the QR code saved in SVG format, you can move on to the next step in the process.
#2 Converting to 3D

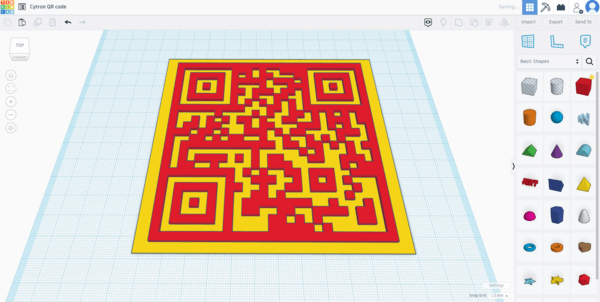
The second step involves using a computer-aided design (CAD) program to transform the 2D SVG file into a 3D model. There are several CAD programs available for this purpose, but in this example, we will use Tinkercad, a user-friendly, web-based software created by Autodesk.
When you import the SVG file into Tinkercad, the program will automatically convert it into a 3D model. To transform your QR code into a 3D model, you need to click the "Import" button, drag and drop the SVG file into the upload box, and adjust the file's settings. It is important to ensure that the width and length dimensions are equal, and the scale is not too small, as this can affect the code's readability. In Tinkercad, the default height of the imported SVG models is 10mm. However, since a QR code is a 2D image, a 10mm height is excessive for 3D printing. Therefore, it's advisable to decrease the height value to a more suitable value, such as 1mm.
#3 Adding a Backdrop to the QR Code
To finalize the QR code 3D model, you need to add a backdrop to contrast and connect the scannable figure. This can be achieved by creating a slightly larger square base with a height of 1-2 mm and placing the code on top of it. In Tinkercad, you can insert a cube 3D model, adjust its height, and align it with the QR code. When you're done editing, export the design as an STL file for 3D printing.
#4 Slicing & Printing
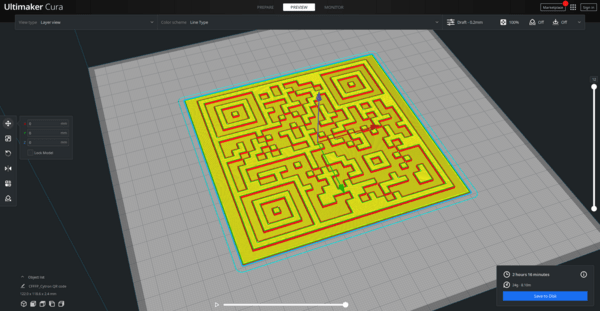
Slice the design and generate G-code instructions for your printer before printing. To slice the design, you need to import the STL file into a 3D slicer like Cura. To ensure high precision, printing at a slow speed and increasing the number of walls or infill to 100% is recommended. The final result should be a solid QR code that will bond better to the backdrop surface and produce a stronger print.
#5 Coloring
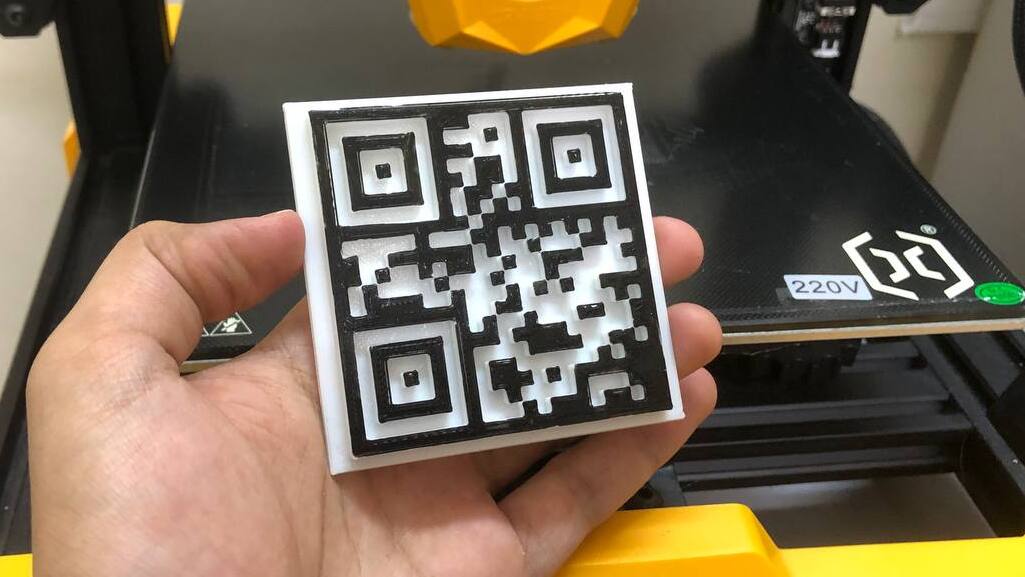
The final step in printing a QR code is to add contrast to the colors of the two components of the print, the backdrop and the code. It is recommended to use a light background and a darker color for the code, as this will make it easier and faster for devices to scan.
There are several ways to achieve color contrast - through filament swapping mid-print, or through painting. Filament swapping requires pausing the print to change the filament color. For painting, coloring the top surface with a brush is possible, but any paint that touches the backdrop will interfere with the precise shape of the code. As a result, the safest method for painting your 3D QR code is to use something flat (such as a sponge) to evenly coat only the top layer of the print. This should produce consistent results.
Reference:
How to 3D Print a QR Code