 International
 Singapore
 Malaysia
 Thailand
 Vietnam
รถเข็นของคุณว่างเปล่า!
Step 3: Execute the AI image processing
- Khairul Nizam Razak
- 10 Apr 2023
- Tutorial
- Beginner
- 584
We'll now establish the bridge between AI model uploaded at Teachable Machine and the microbit connected to our computer.
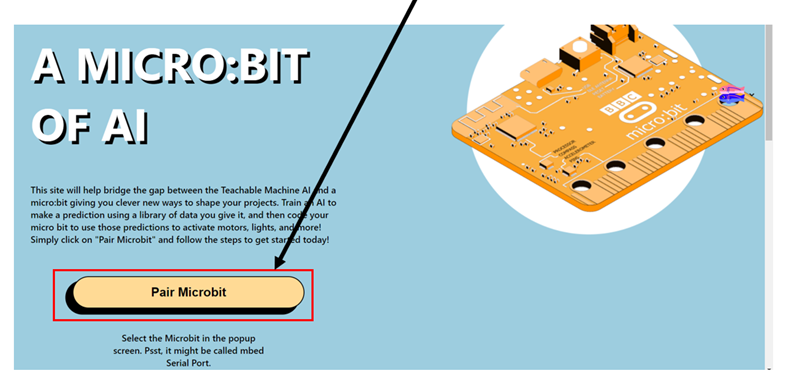
Go to https://ai-training.glitch.me/ and click 'Pair Microbit' button to start. Make sure that the microbit is already connected to your computer via USB cable.
A window will pop-up once the pair button is clicked. Select the micro:bit seial port and click 'Connect'. Once the connection is established, the website will ask for the AI model shareable link which we can obtain at Teachable Machine website during the export model step.
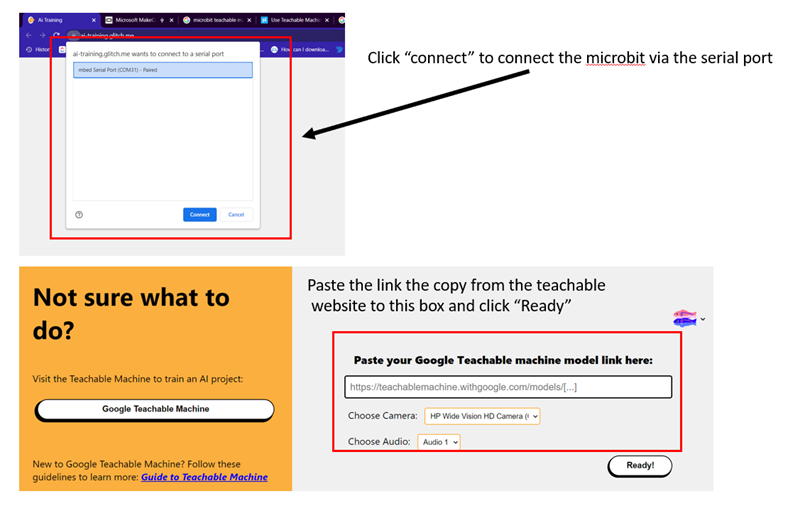
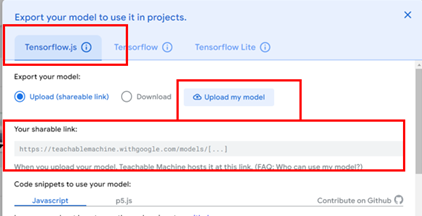
Copy the shareable link and paste it into the box above. Click 'Ready' and the Image processing will start running in no time.

You can see the result in real time at the webpage. When it detects "Nano" object, the Nano meter will fill up to a high percentage of confidence level. The webpage will also send the string "Nano" to the micro:bit via USB serial connection.
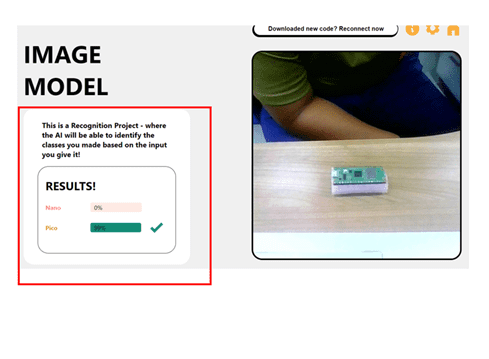
When Pico board is placed in front of the camera, the result will give high confidence level to "Pico" object. A string "Pico" will be sent to the micro:bit via USB serial connection.
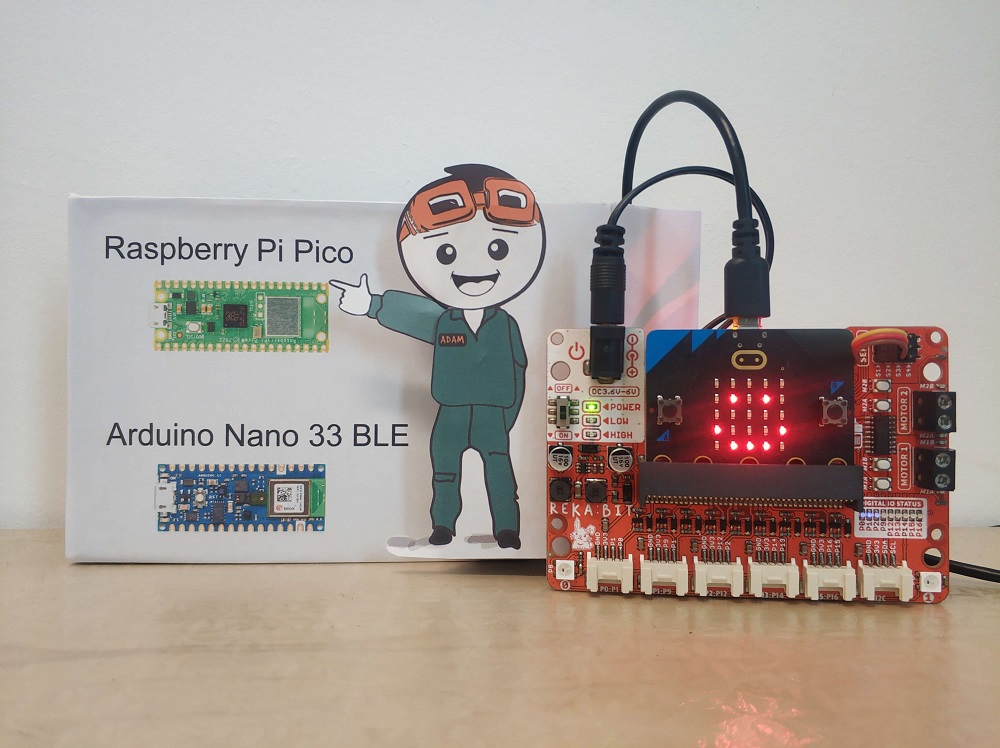
Here we connect the servo to Servo Port 1 on the REKA:BIT expansion board. Based on the serial data received, micro:bit will command the servo to move to specific angle and show icon on its LED matrix.
You can see in the images below that Adam's hand is attached to the servo horn and it will point to the image of Raspberry Pi Pico and show smiley face when "Pico" string is received via USB serial connection.
When "Nano" string is received, Adam's hand will point to Arduino Nano 33 BLE and show ✔️ icon.
