 International
 Singapore
 Malaysia
 Thailand
 Vietnam
รถเข็นของคุณว่างเปล่า!

Sending Data to Helium Console using Grove LoRa-E5
- Hairil Mutalib
- 28 Feb 2022
- 1865
Hardware:
- Seeeduino XIAO
- Seeeduino XIAO Expansion Board
- Grove LoRa E5
- Grove DHT11 Sensor (Any type of DHT sensor should be applicable)
- USB Type C Cable

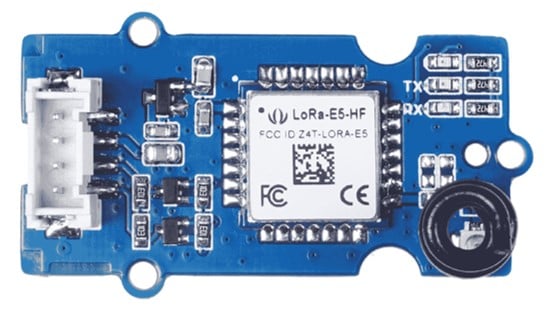
Grove LoRa-E5 embedded with LoRa-E5 STM32WLE5JC, powered by ARM Cortex M4 ultra-low-power MCU core and LoRa SX126x, is a wireless radio module supporting LoRa and LoRaWAN protocol on the EU868 & US915 frequency and (G)FSK, BPSK, (G)MSK, LoRa modulations. Grove - LoRa-E5 can endow your development boards' strong features of ultra-long transmitting range by easily plug-and-play with Grove connector on board.
As an upgrade of the old version - Grove - LoRa Radio - powered by RFM95 ultra-long-range Transceiver Module, Grove LoRa-E5 embedded with LoRa-E5 STM32WLE5JC Module is a high-performance and easy-to-use wireless radio LoRa module supporting LoRaWAN protocol.
By connecting Grove - LoRa-E5 to your development boards, your devices are able to communicate with and control LoRa-E5 conveniently by AT command through UART connection. Grove LoRa-E5 will be a superior choice for IoT device development, testing, and long-distance, ultra-low power consumption IoT scenarios like smart agriculture, smart office, and smart industry. It is designed with industrial standards with a wide working temperature at -40℃ ~ 85℃, high sensitivity between -116.5 dBm to -136 dBm, and power output between 10 dBm to 22 dBm.
Preparations
Here is a demo showing you how to connect the Helium console and Seeeduino XIAO module via Grove - LoRa-E5 module. These modules are able to collect temperature and humidity parameters from the environment and send them back to Helium console. The flashing LED lights on the Seeeduino XIAO indicate the status of the temperature and humidity sensor as connecting to Helium cloud.
Important: The Grove-E5 need to be in Helium hotspot coverage in order to function. You can refer to this map, to check if you are in the Helium hotspot coverage or not.
Note: Please ensure the consistency of the frequency band among the end nodes, gateway, and Helium console configuration you are using by following this instruction. The frequency plan this demo applied is for AS923.
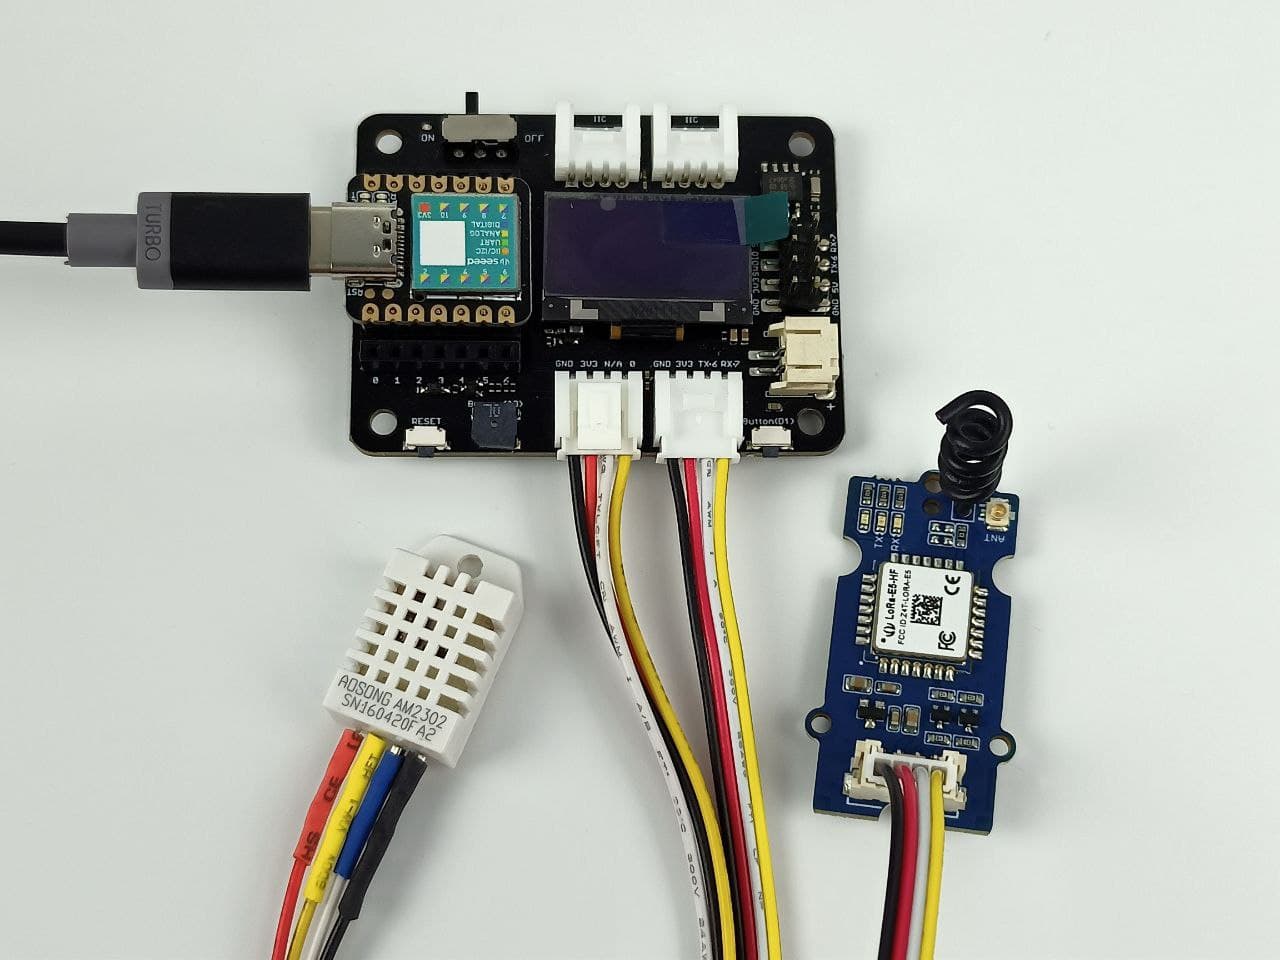
Step 1: Hardware Connection
Connect the Grove LoRa-E5 module directly to the "UART" slot.
Put grove DH11 or DHT22 into the "A0/D0" socket.
Then, connect the Seeeduino XIAO to your laptop using a USB Type C cable.
Step 2: Software Preparation
Open Arduino IDE or you may download the latest version here.
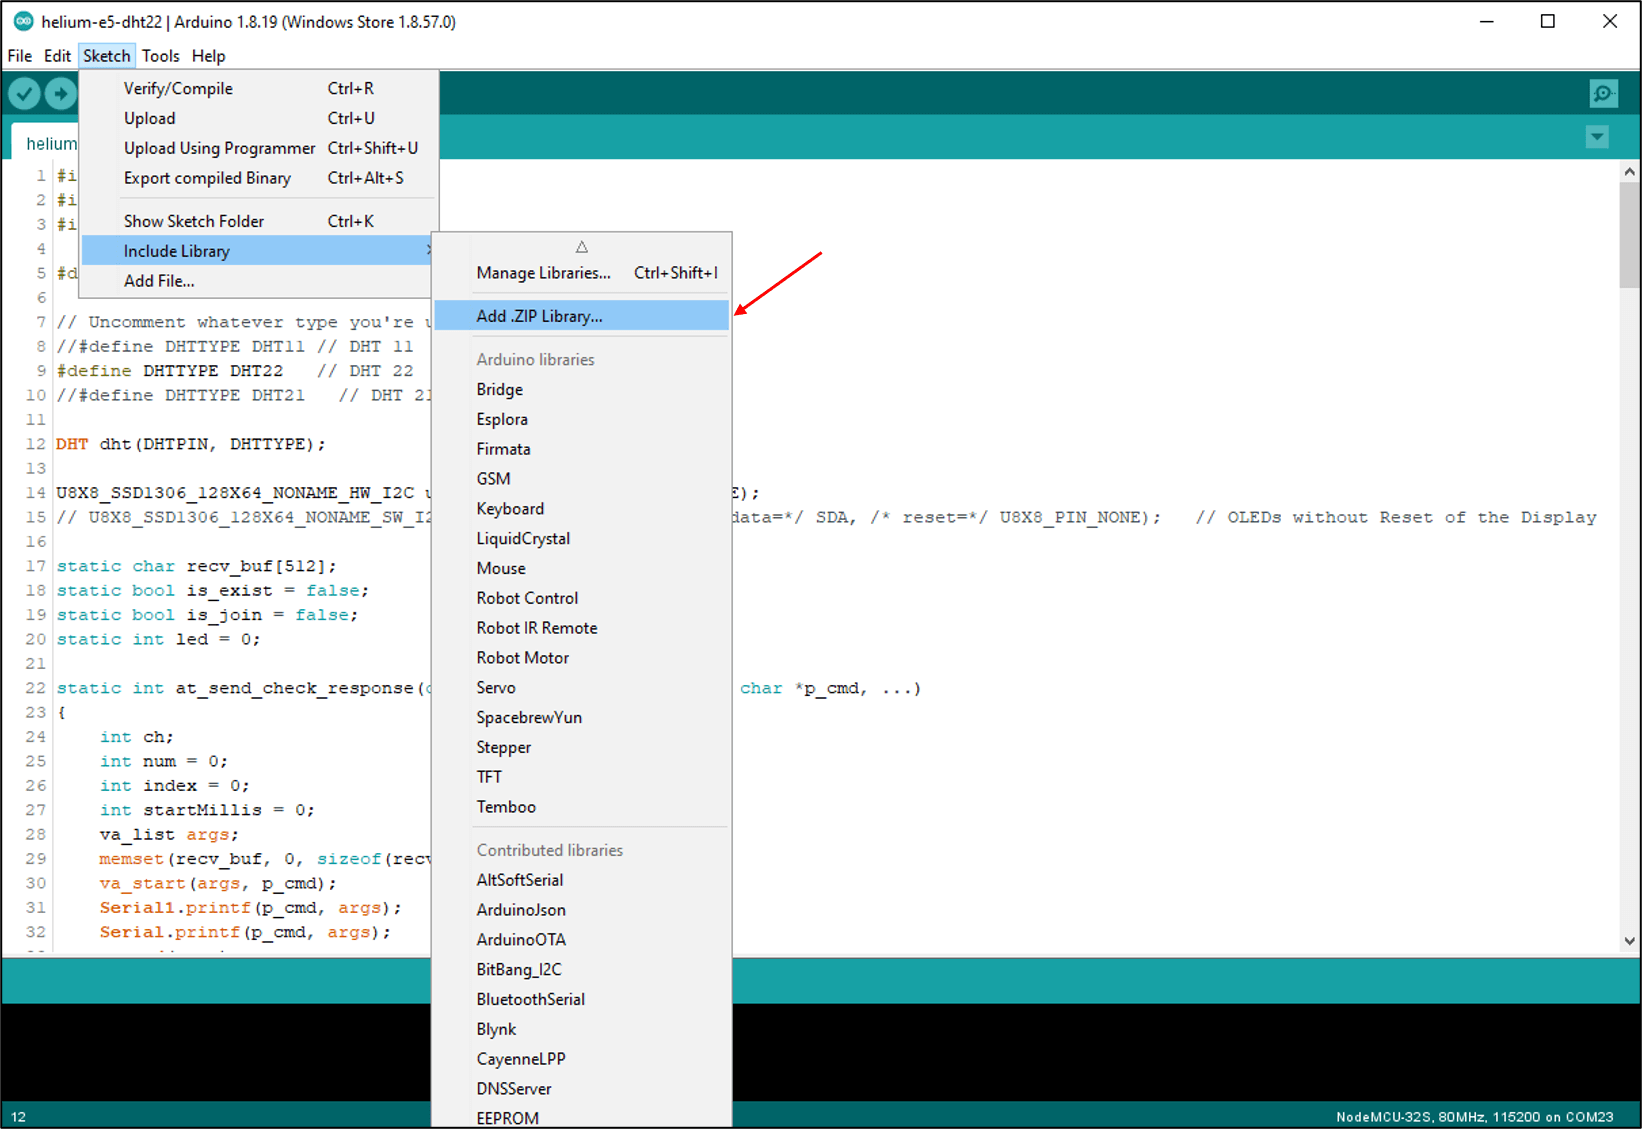
You will need to use these two libraries in your sketch for this demo:
- Download the u8g2 library
- Download the DHT sensor library
Once you have downloaded it, go to Sketch > Include Library > Add .ZIP Library. Then choose both zip files that you have downloaded to add the libraries in the Arduino IDE.
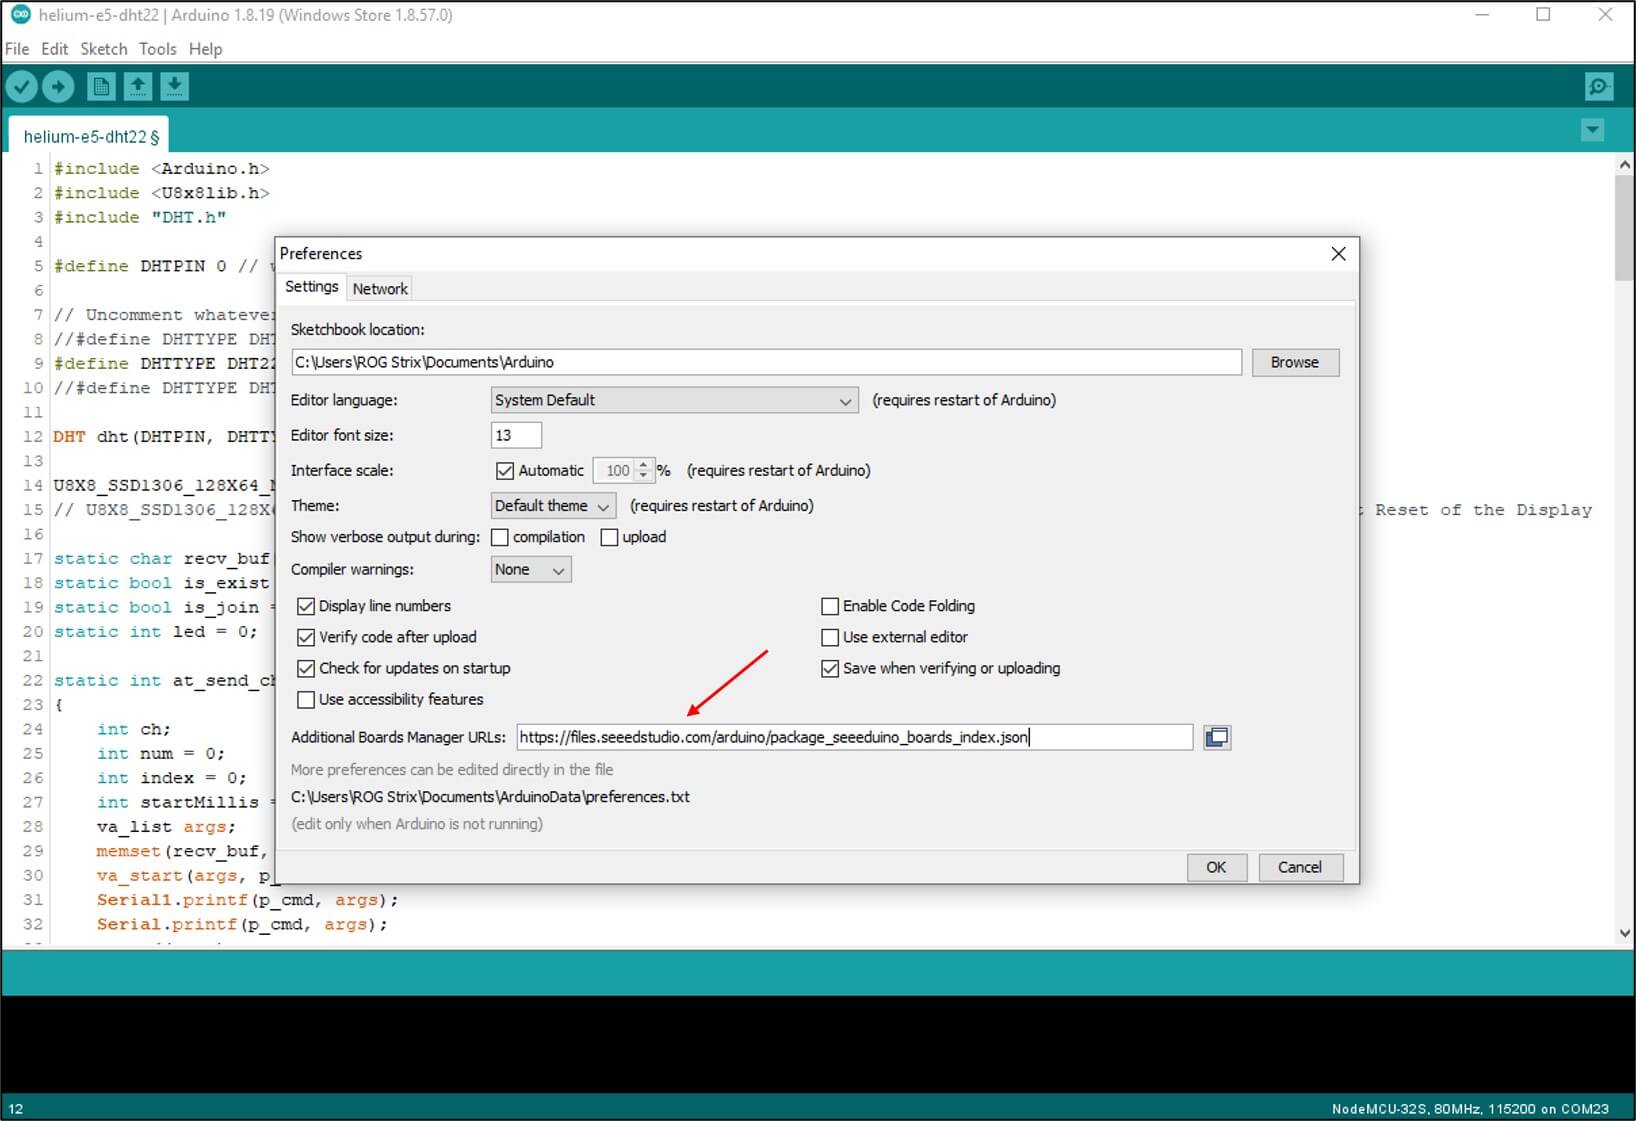
Then add the Seeeduino board to your Arduino IDE. Click on File > Preferences and fill in Additional Boards Manager URLs with the URL below:
https://files.seeedstudio.com/arduino/package_seeeduino_boards_index.json
Click OK.
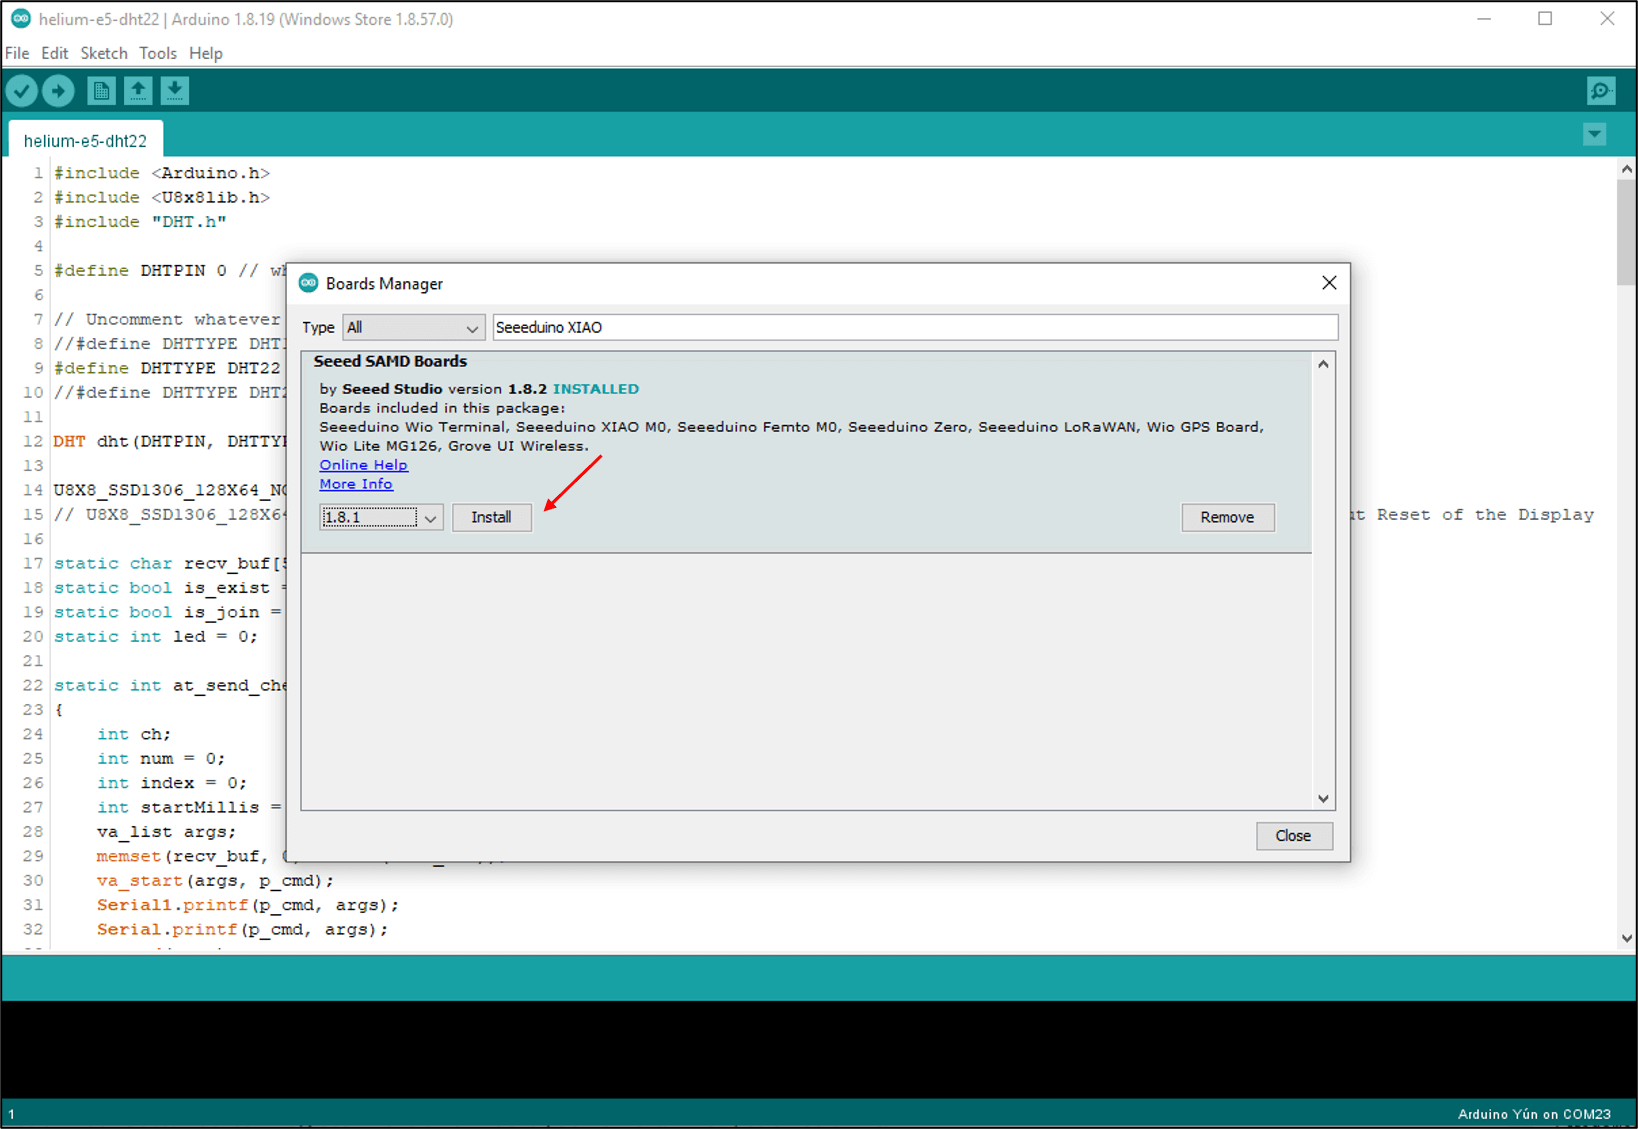
Click Tools-> Board-> Boards Manager, and print the keyword "Seeeduino XIAO" in the search blank. Here comes the "Seeed SAMD Boards". Install it.
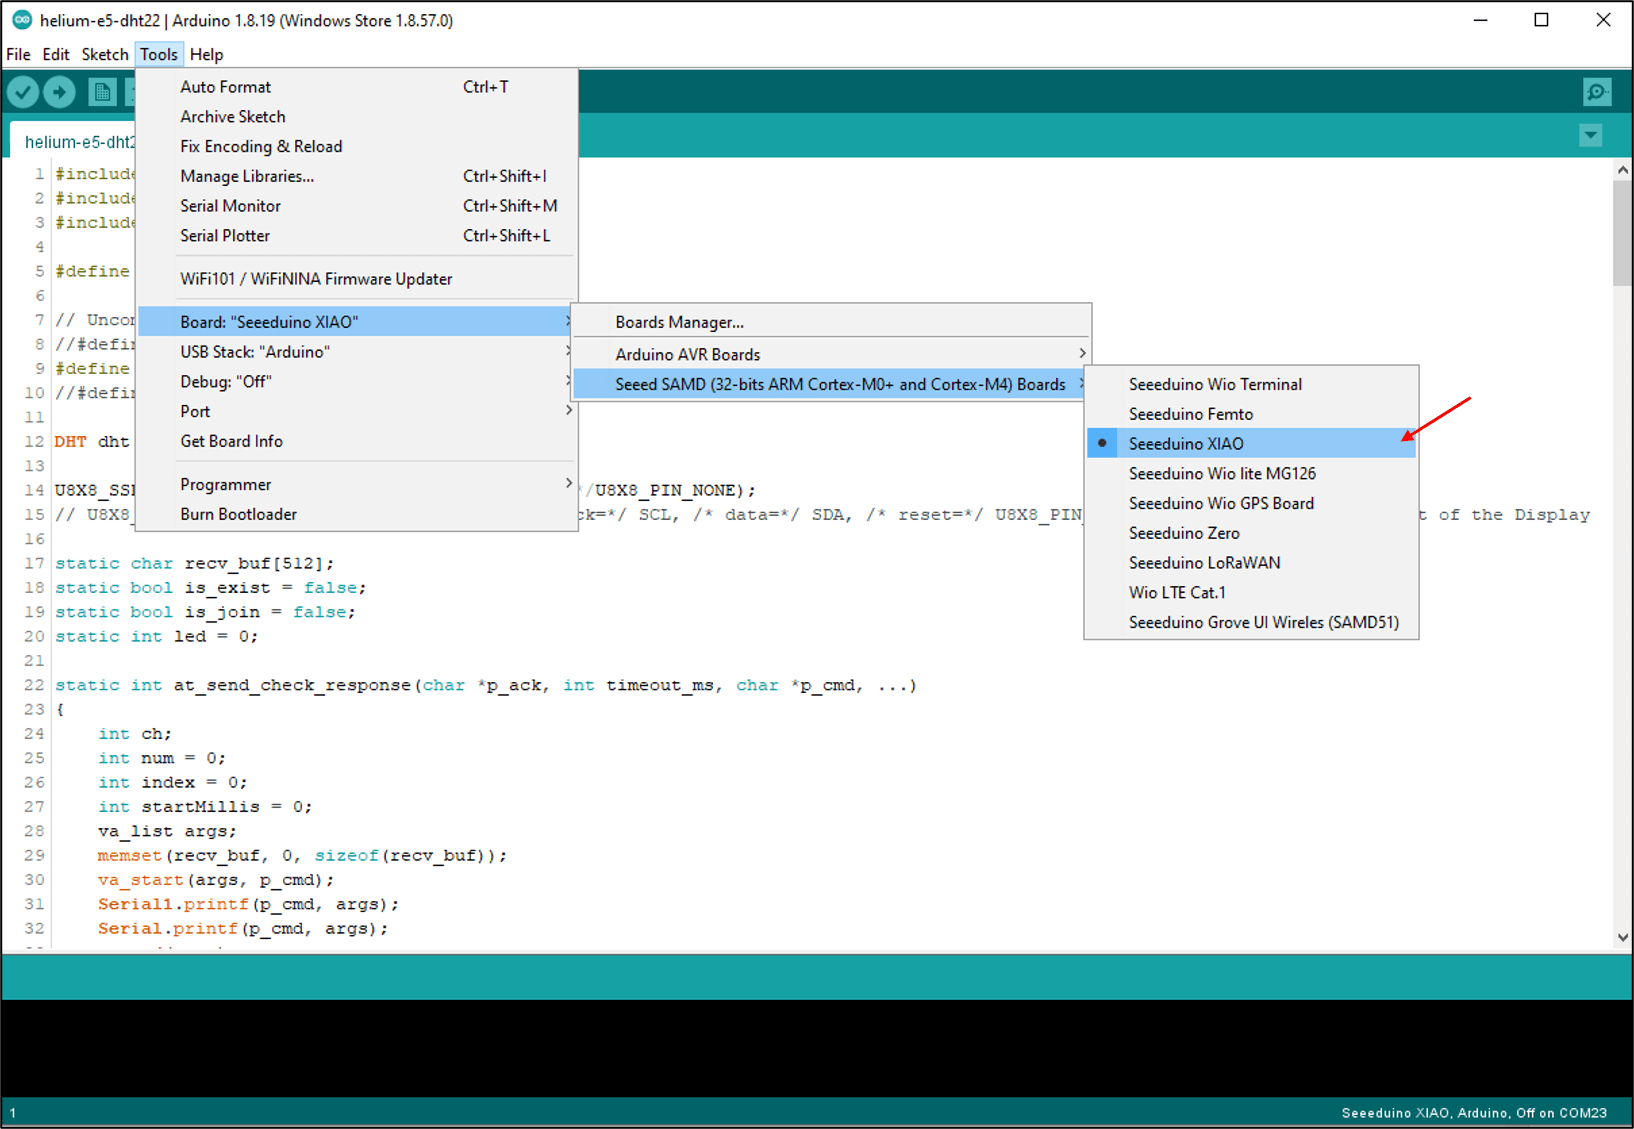
After installing the board, click Tools-> Board, find "Seeeduino XIAO" and select it. Now you have already set up the board of Seeeduino XIAO for Arduino IDE.
For the code, you can copy it from here.
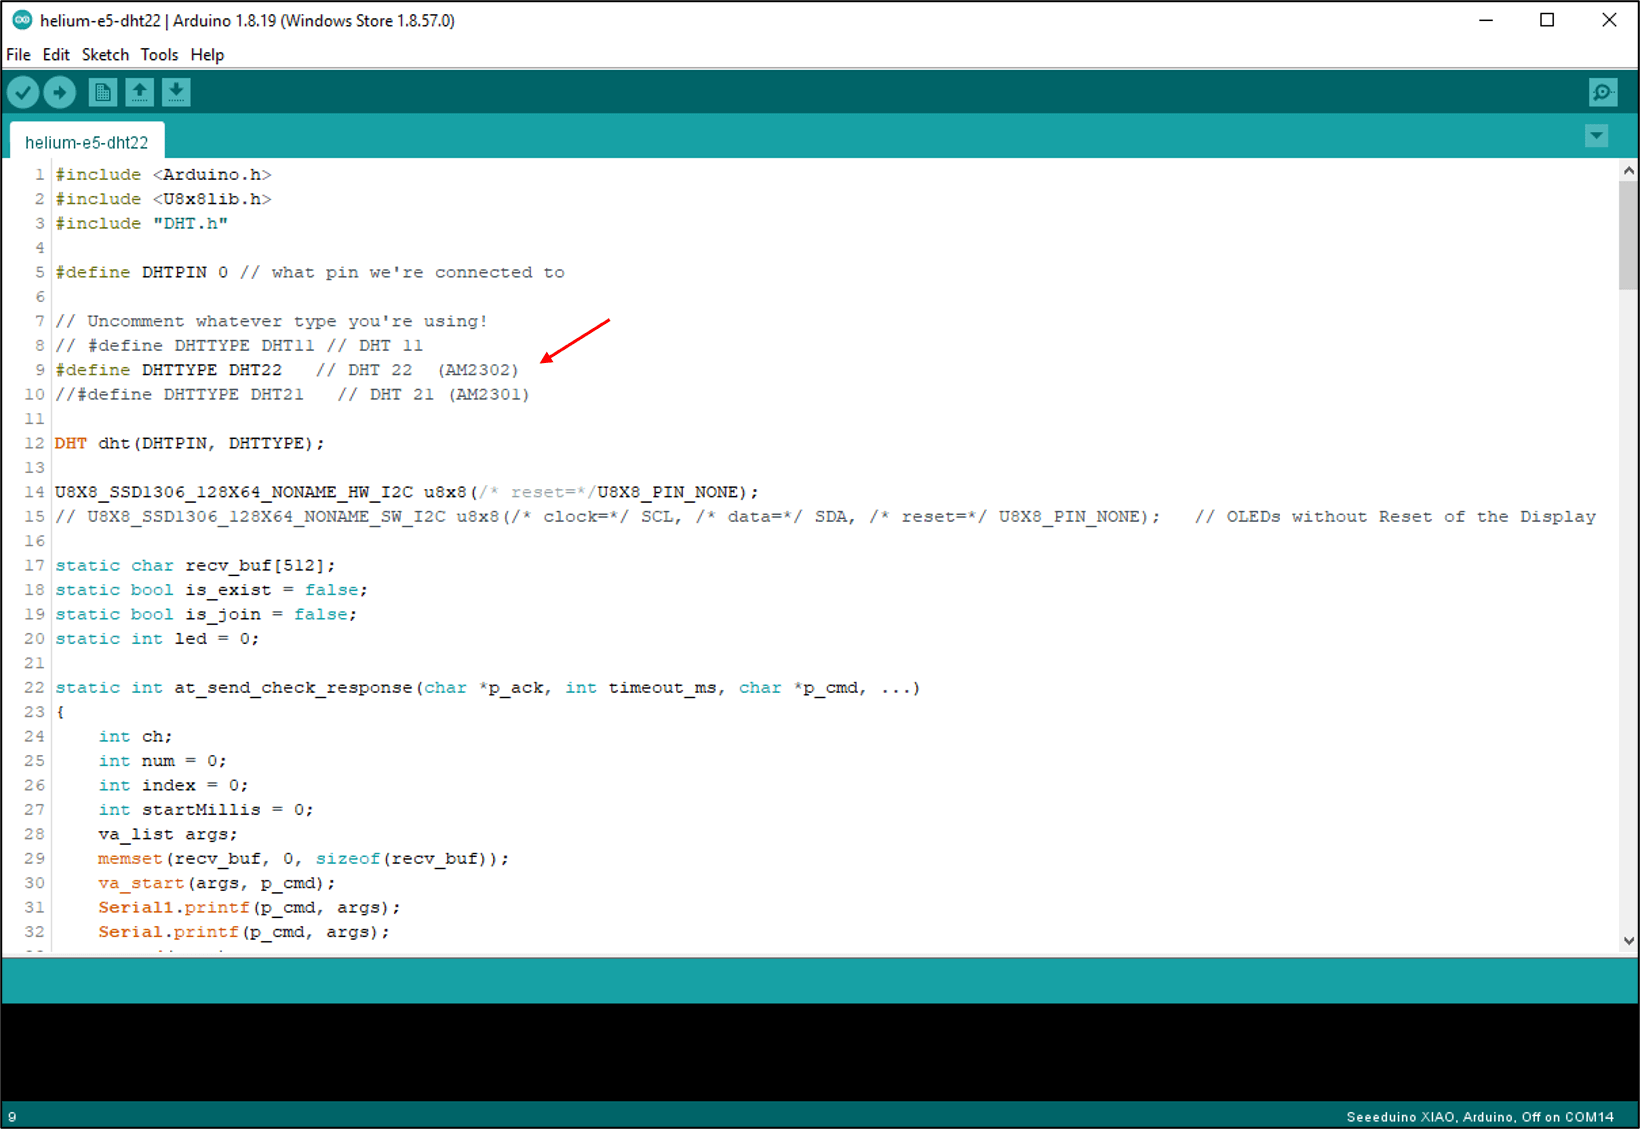
You can make a few changes in the code based on your conditions. For the DHT sensor types, you can uncomment "#define DHTTYPE DHT11" line if you are using DHT11 sensor and comment DHT22 line. In my case, I'm using the DHT22 sensor.
Note: Comment can be done by placing two slashes before the line. To uncomment the line, just delete the slashes.
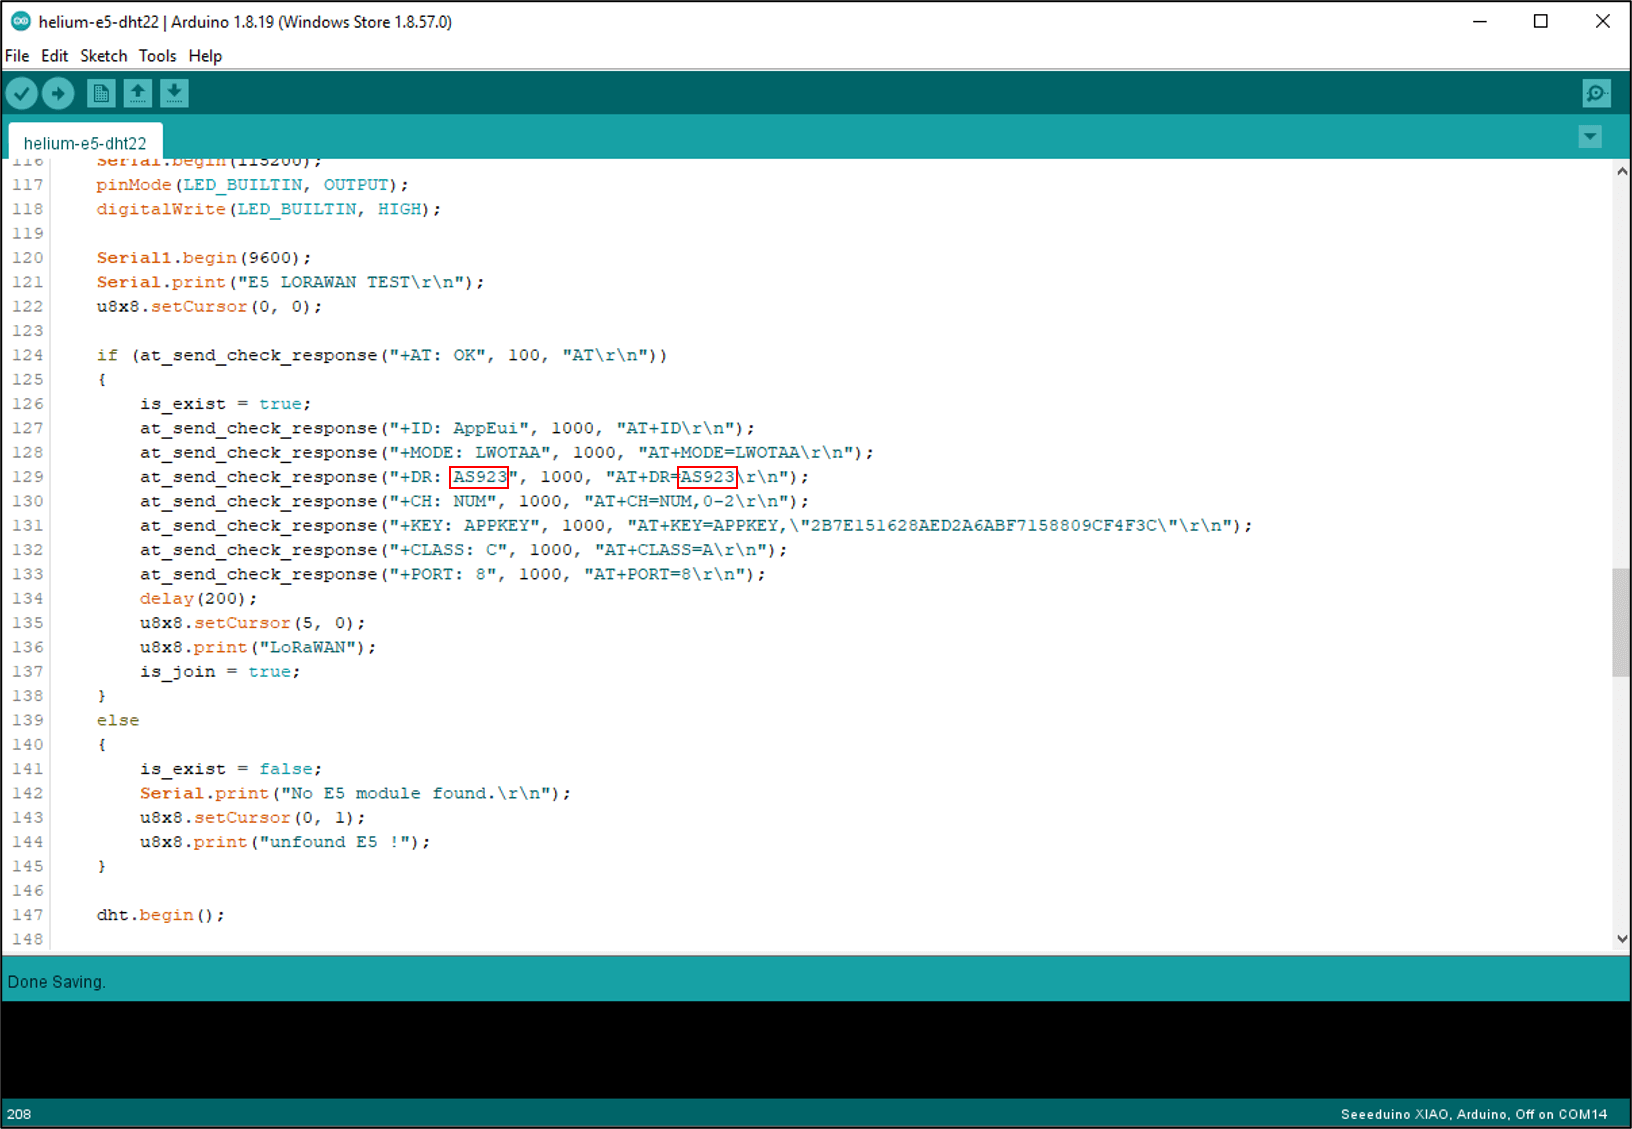
The grove E5 needs to configure what frequency plan to use based on your country. In my case, for Malaysia, we will use AS923 for the frequency plan. If you live in other countries, kindly refer to this page to get more information about the frequency plans.
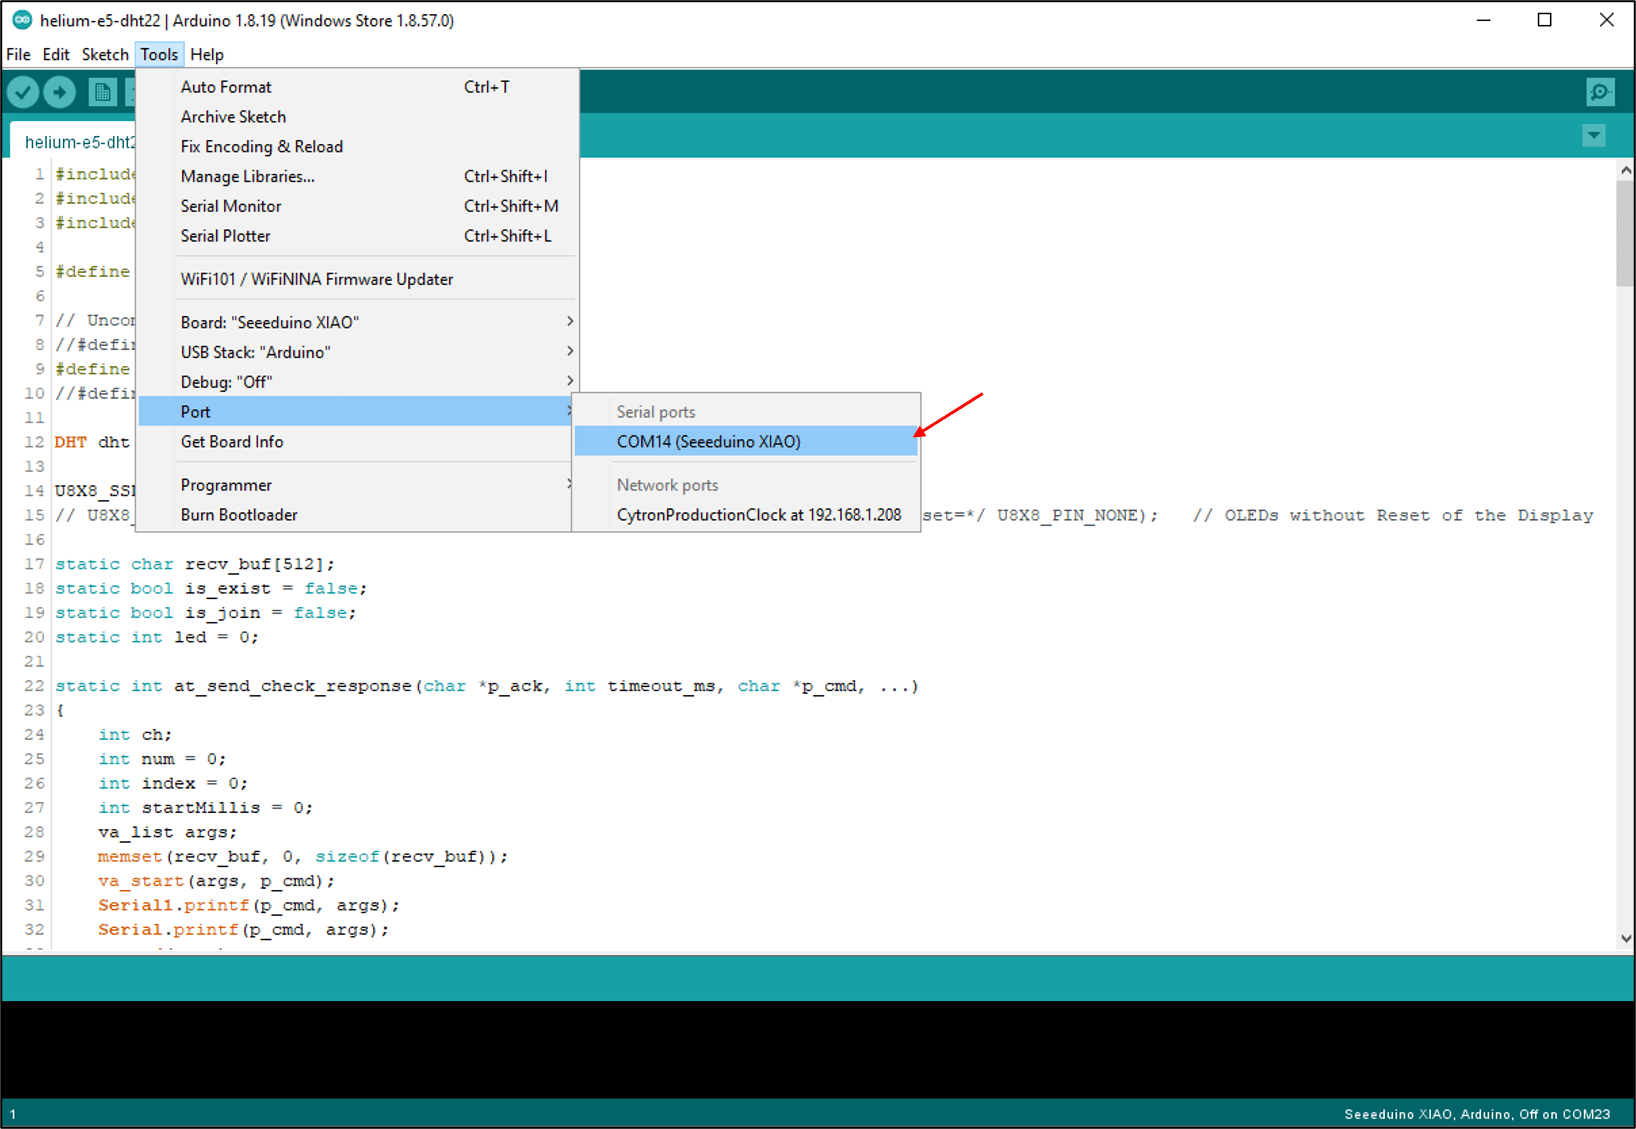
Then, select the serial device of the Seeeduino board from the Tools > Port menu. This is likely to be COM3 or higher (COM1 and COM2 are usually reserved for hardware serial ports). To find out, you can disconnect your Seeeduino board and re-open the menu, the entry that disappears should be the Seeeduino board. Reconnect the board and select that serial port.
Now, simply click the "Upload" button in the environment. Wait a few seconds and if the upload is successful, the message "Done uploading" will appear in the status bar.
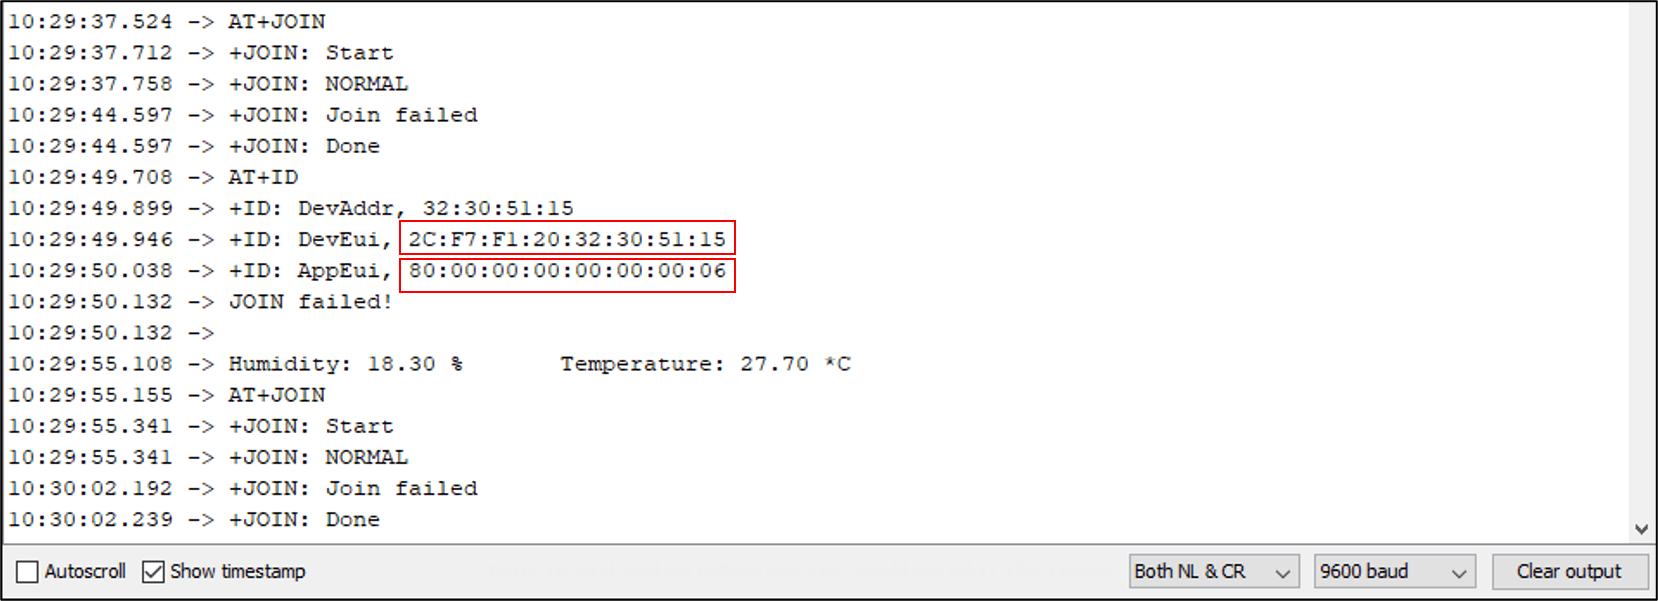
Open the Serial Monitor. Please take note or copy down the value for DevEui and AppEui. We will use this information in the Helium console later.
Step 3: Helium Console Setup
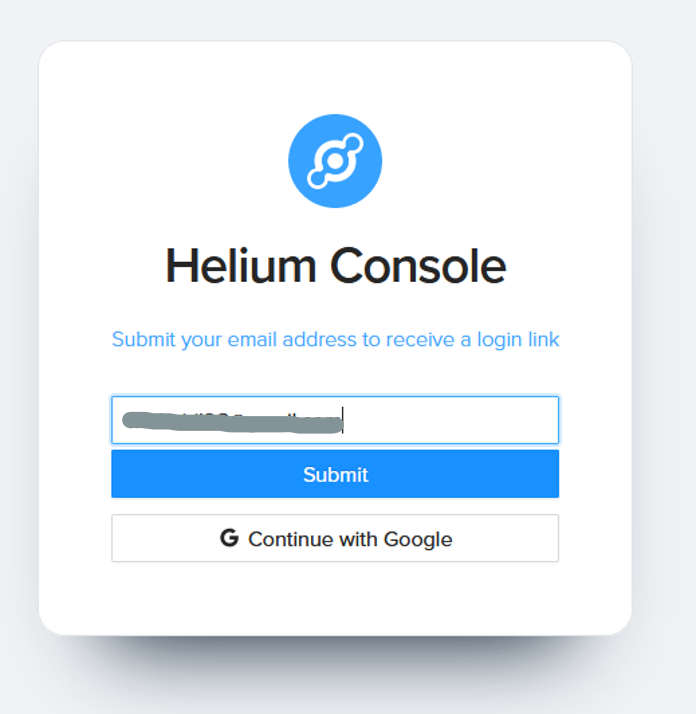
Create an account to use the Helium console. You can register here and insert your email. Then, click submit.
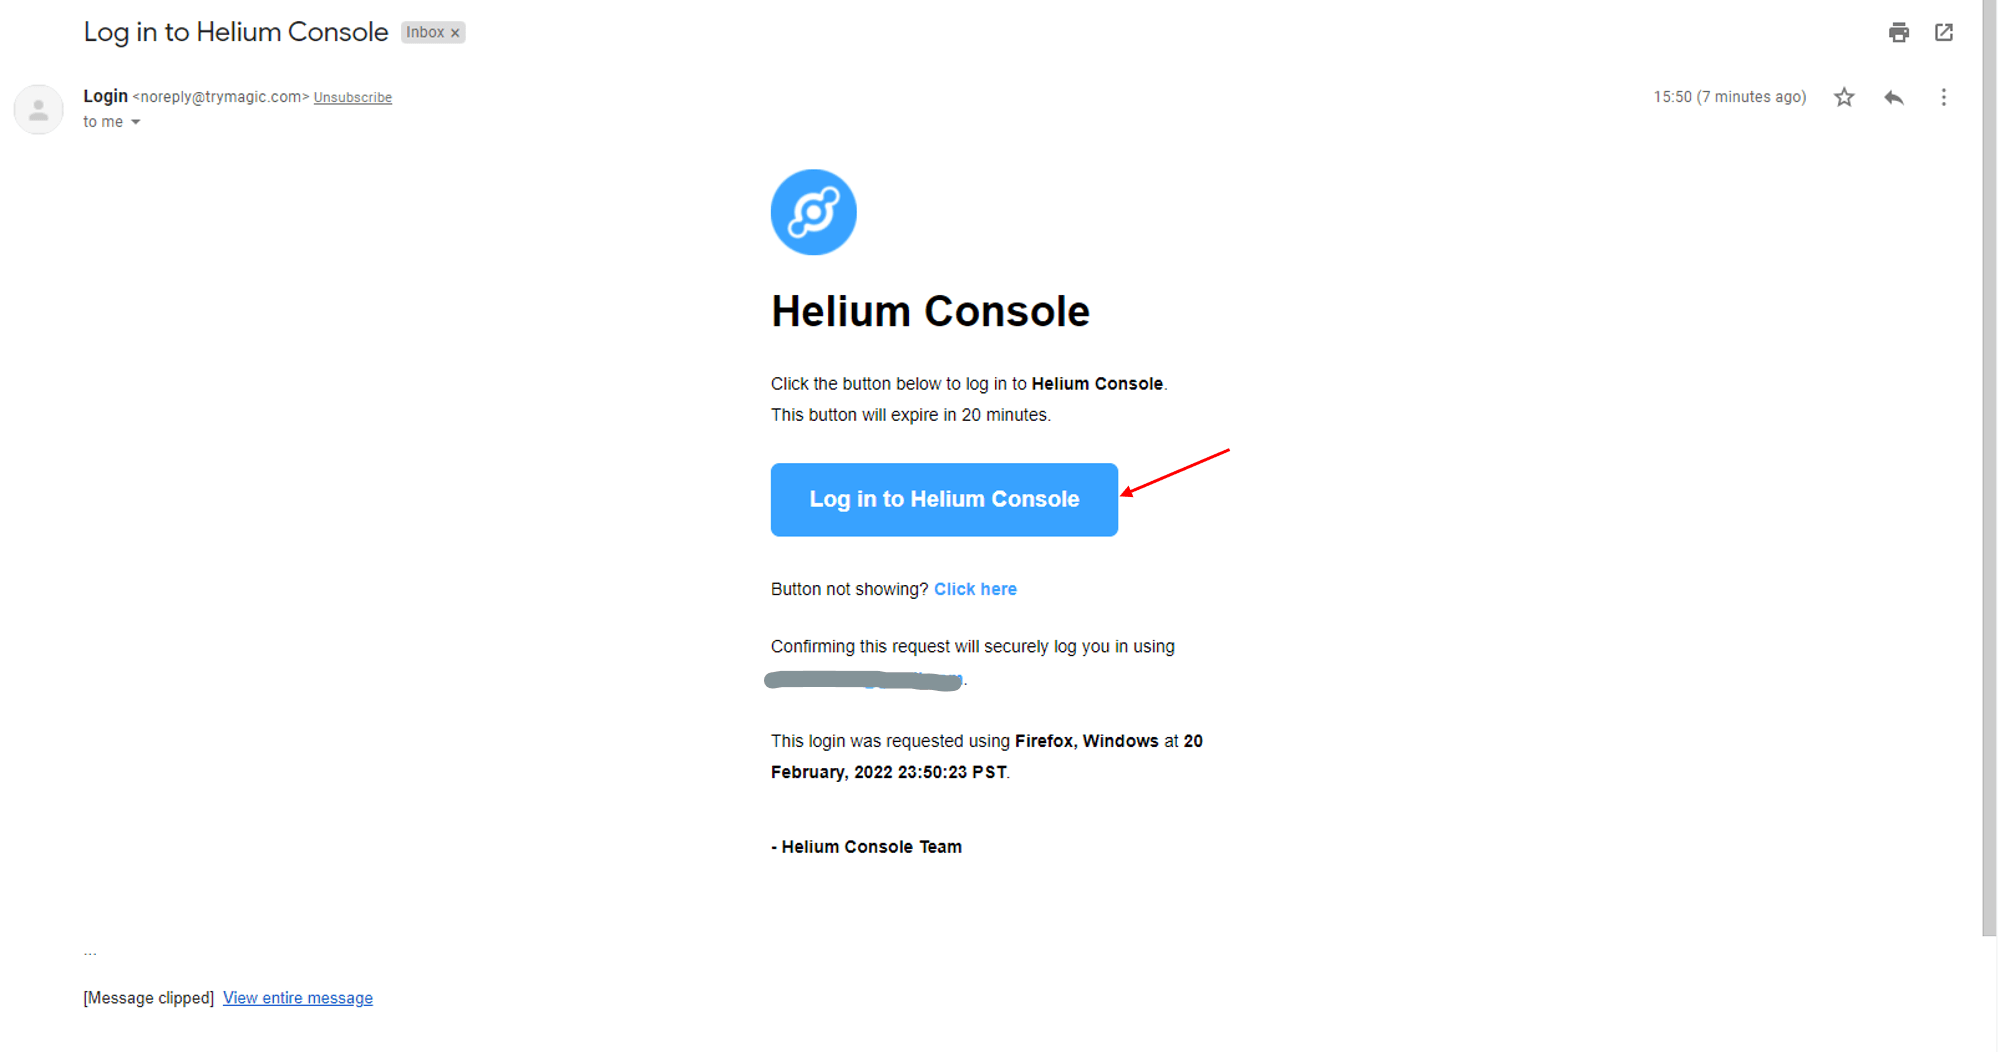
You will be prompted to your email inbox once you click "Check your inbox".
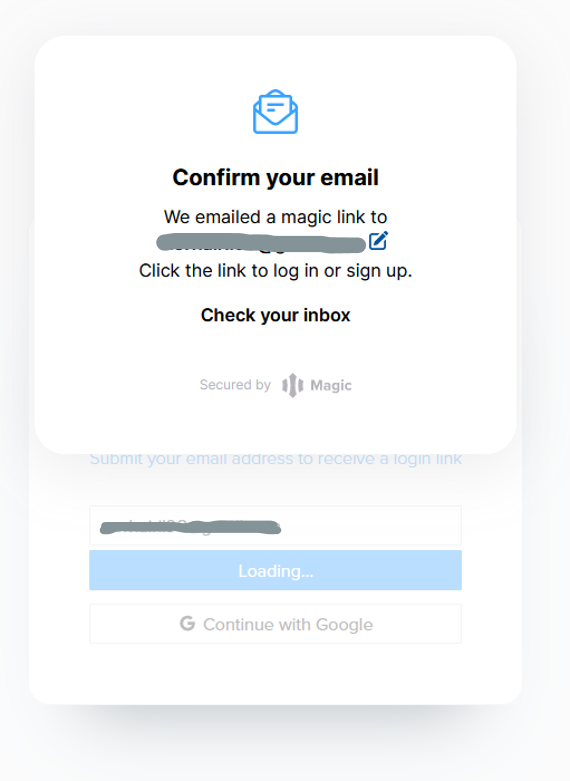
Click "Log in to Helium Console". Please be reminded that this button will expire in 20 minutes.
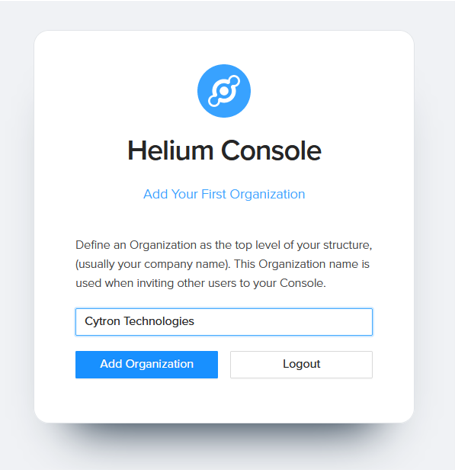
You have successfully logged in to the Helium console. Now go back to the original tab.
To proceed you need to add an organization. It can be anything that you want such as your school or university name.
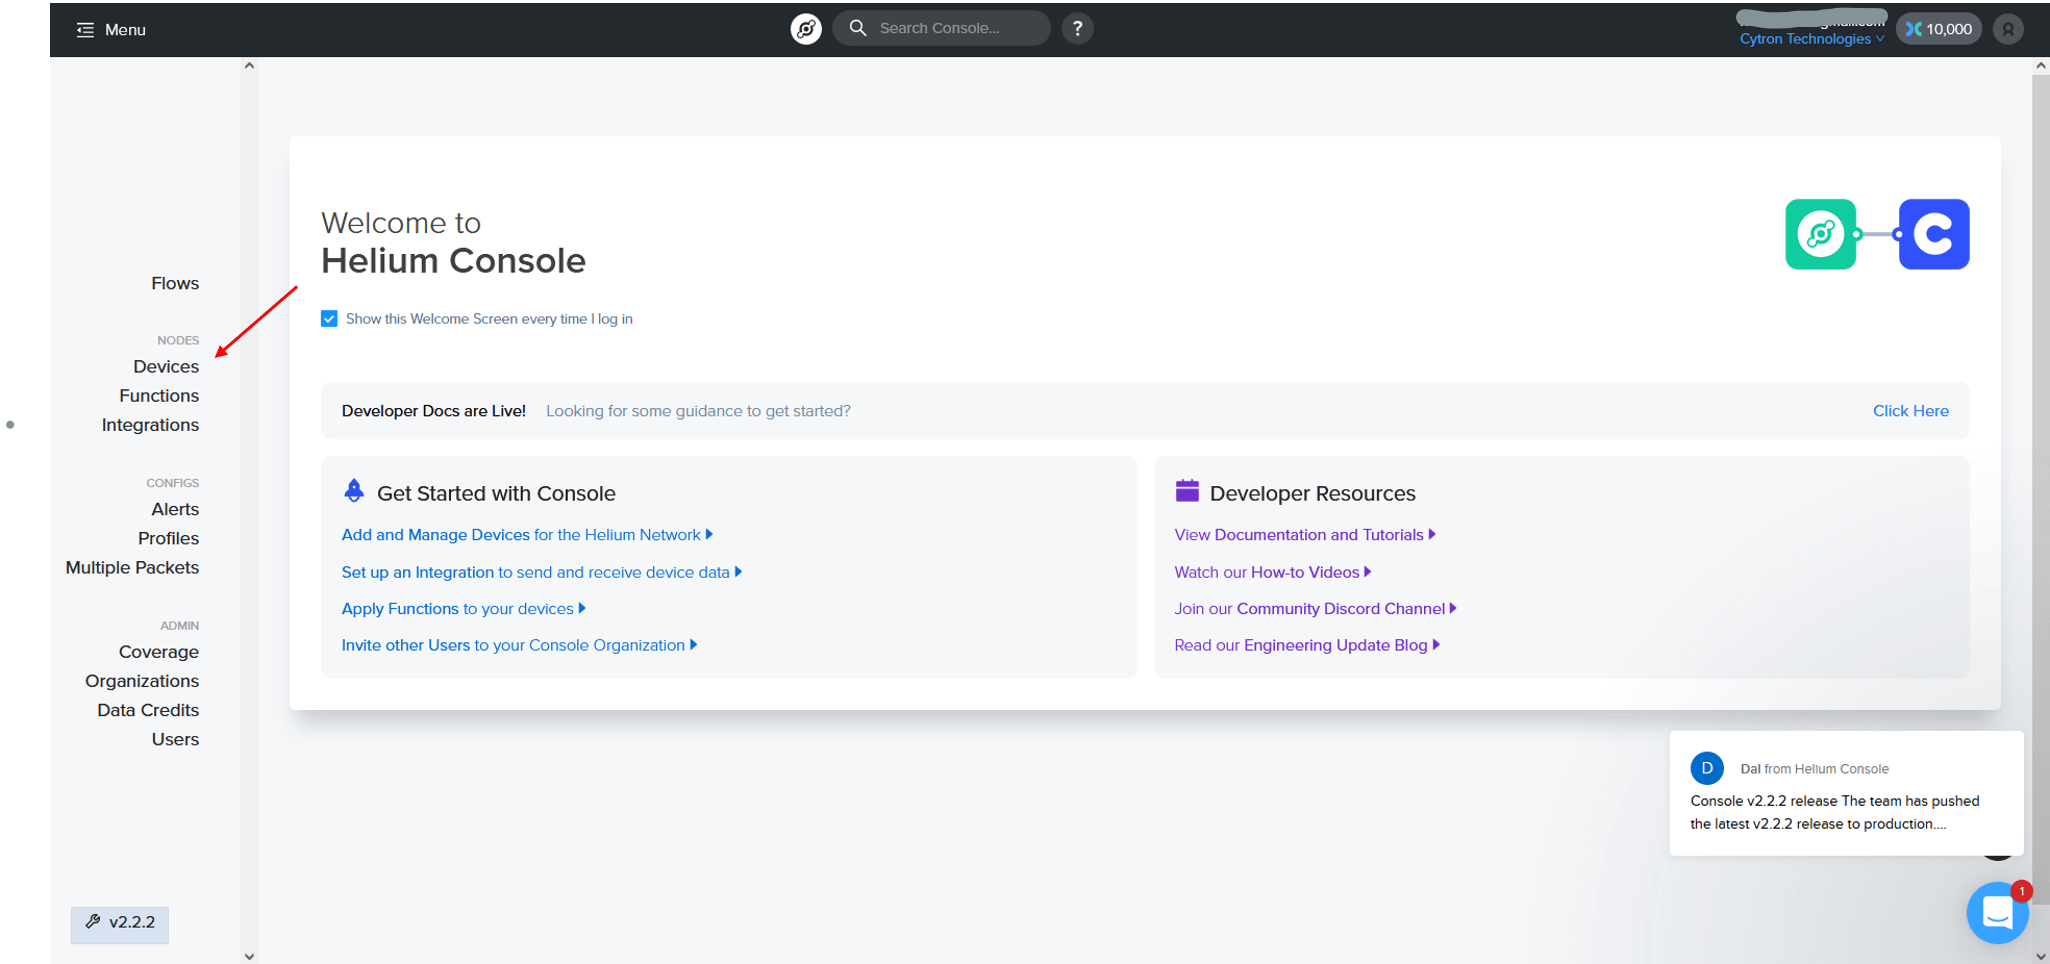
This is the Welcome Screen of the Helium Console. To create device for your grove-E5, click "Devices" on the left side of the screen.
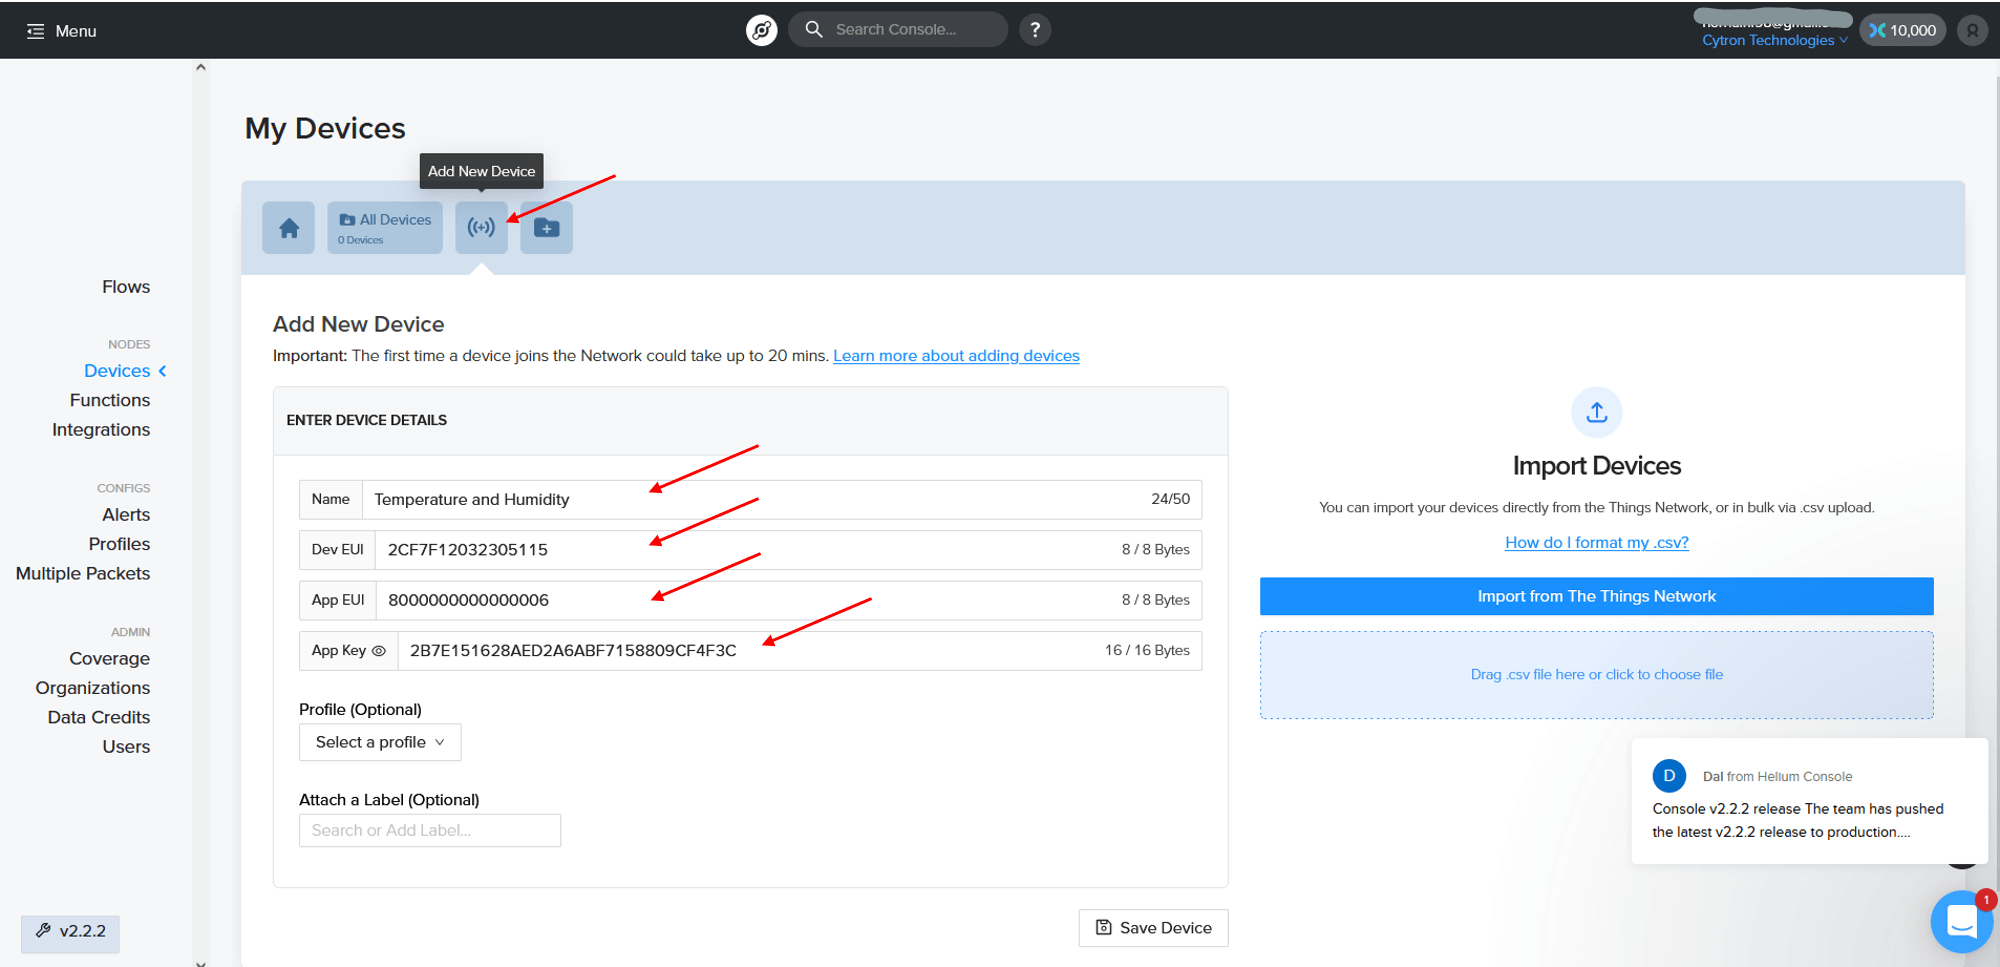
Go to "Add New Device" and fill in the required information. You can put anything that you like for the device name.
Copy and paste the previously obtained information from Step 2 (serial monitor part) into DevEUI and AppEUI fields. For AppKey field, use: 2B7E151628AED2A6ABF7158809CF4F3C.
Please make sure you enter the required amount of bytes for each field. Then, click "Save Device".
Once you have successfully created a device for your Grove E5, you will see a pending status beside of your device name.
Note: The first time a device joins the network could take up to 20 mins.
Just wait until the pending status disappears.
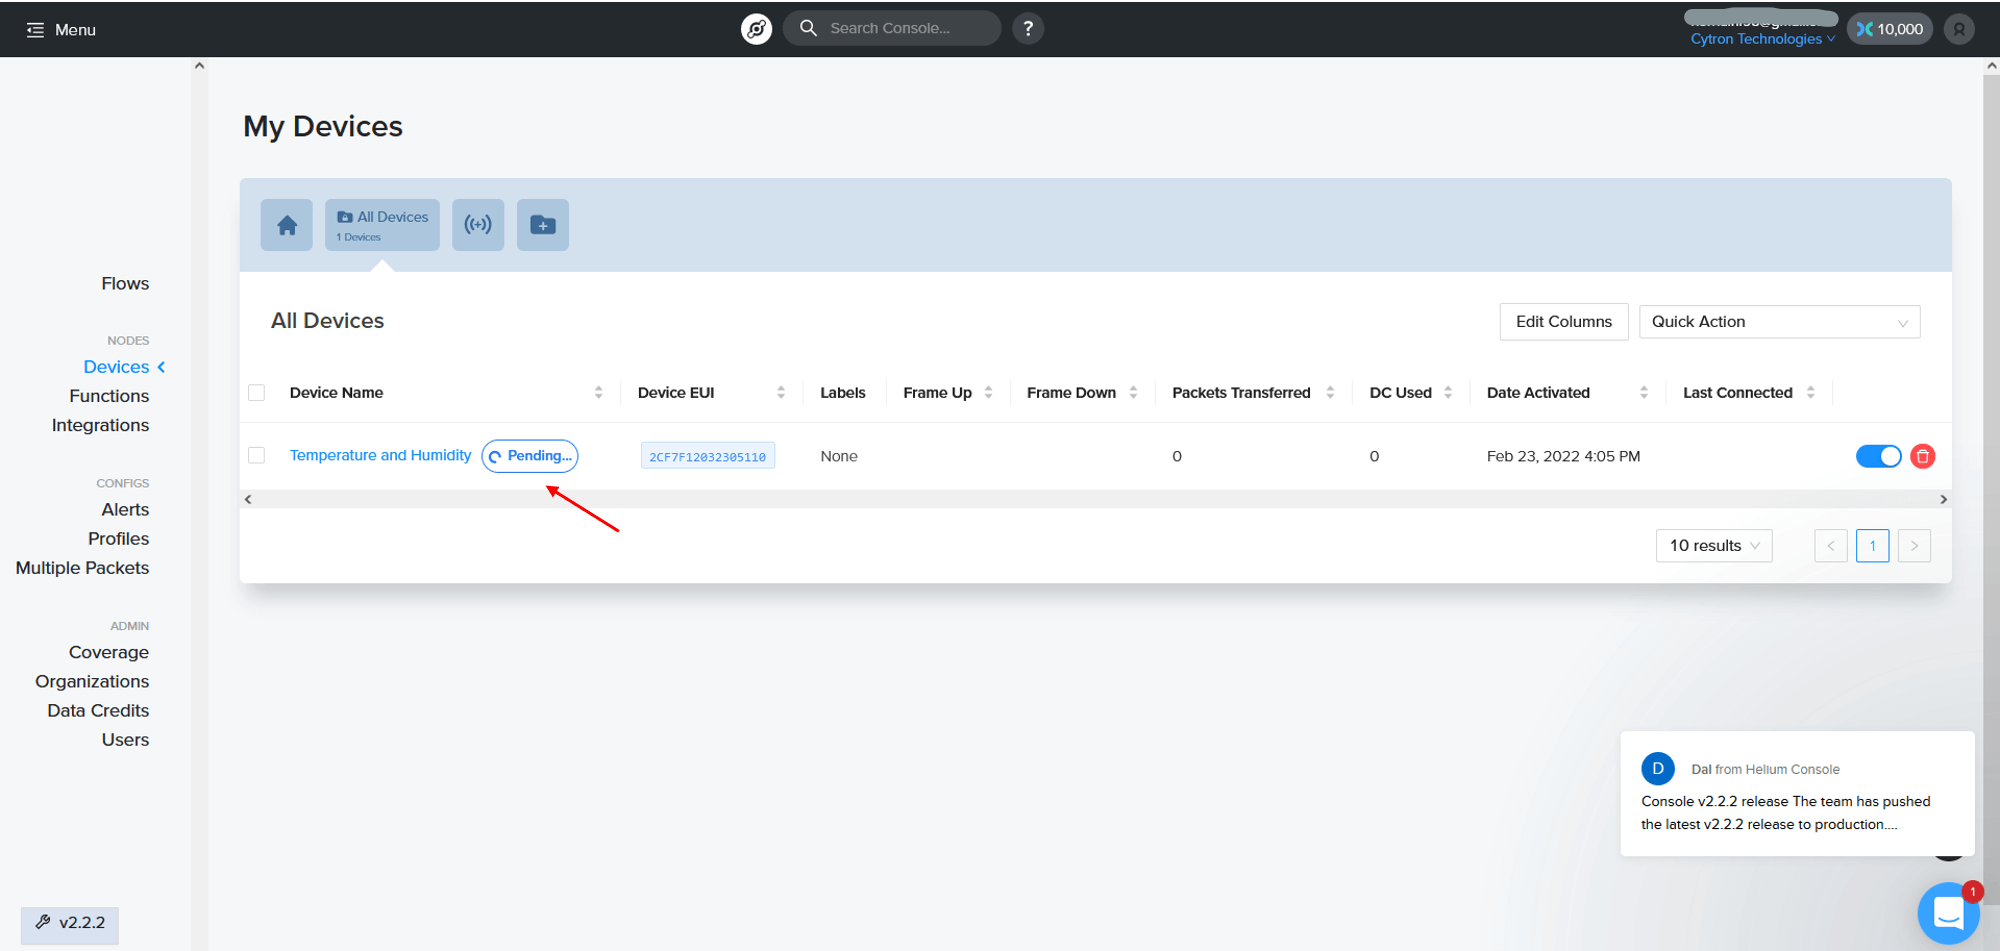
You can click on the device name to see all the details about your device including Live Data and Event Log.
Helium console can only display the temperature and humidity data in bytes. So, we need to decode the data into real values using the "Functions" feature. Then, the values can be displayed in any IoT platform using the "Integrations" feature.
Easily said, it is compulsory to have three components which are devices, functions, and integrations to complete this LoRaWAN project using the Helium console. We have done the device's part, so let's proceed to the functions and integrations parts. In this tutorial, we will use Google Sheets as integration to display the DHT22 sensor data.
Step 4: Create Google Sheet Integrations
Go to Integrations tab and click "Add New Integrations". You can see that there are so many options that you can choose for integrations in Helium console. For the time being, let's just choose Google Sheets for the integrations.
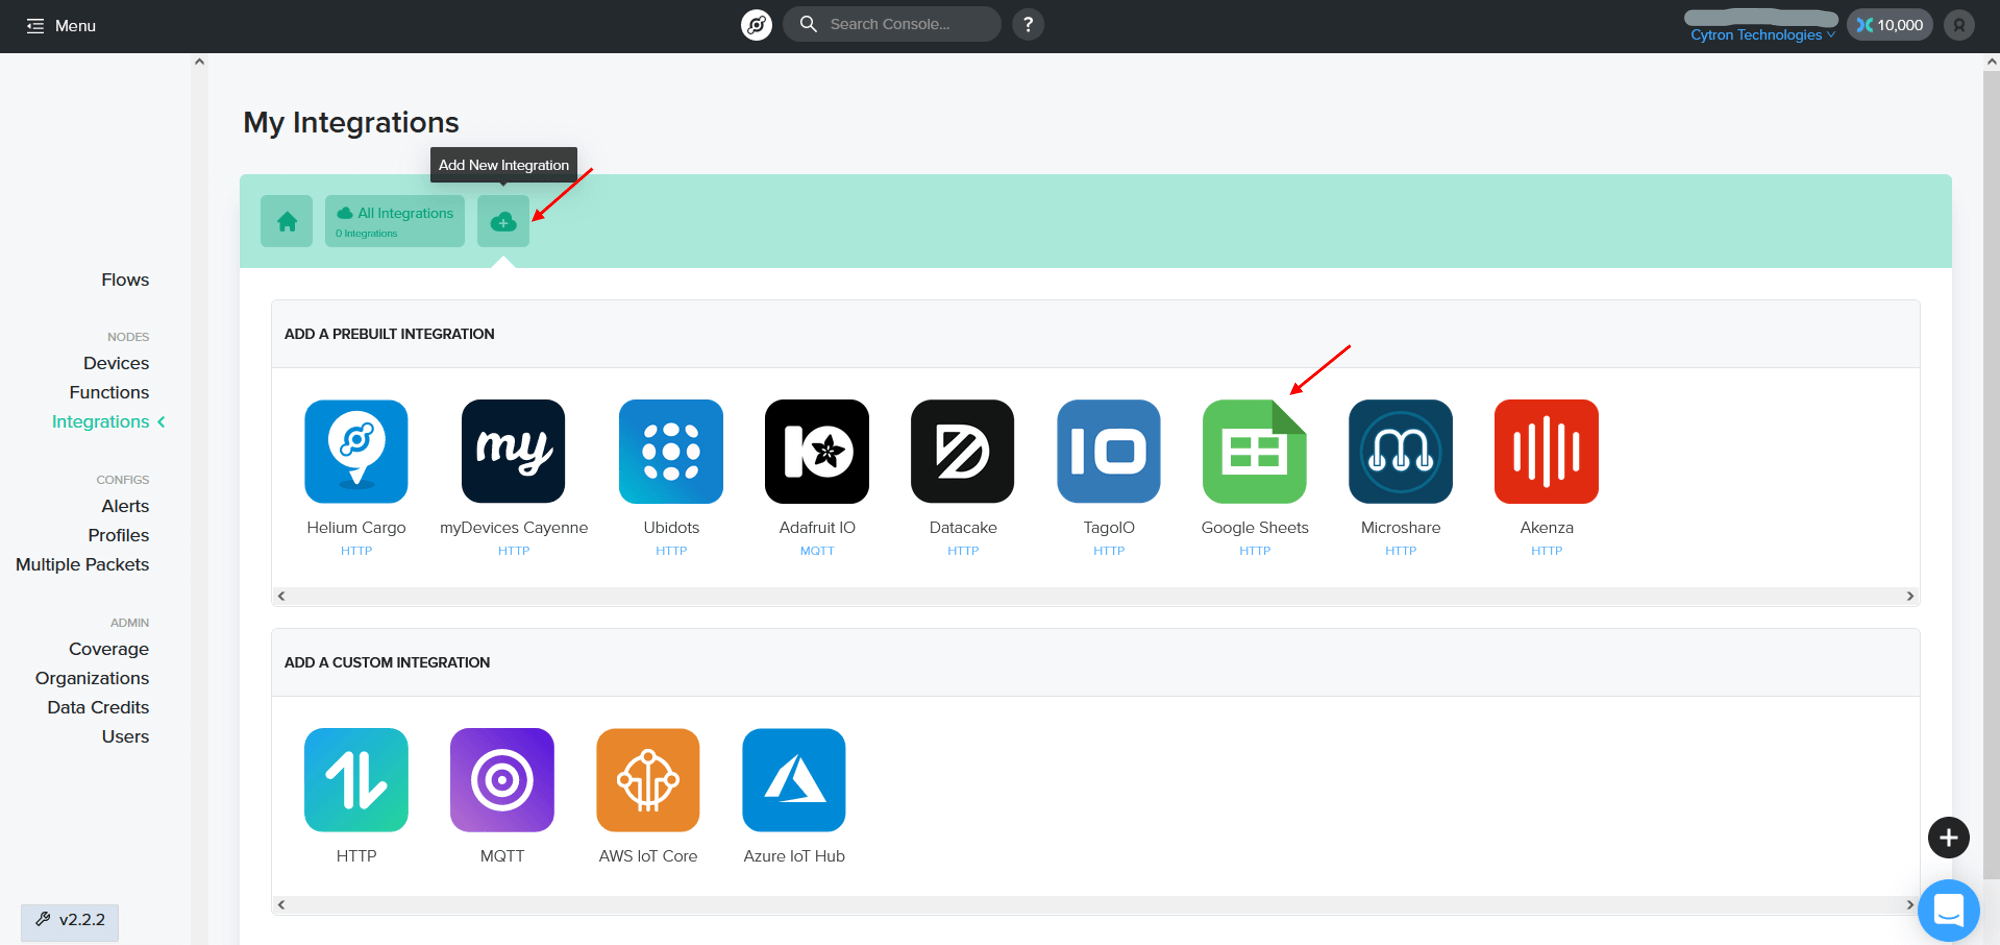
To create the integrations, it will ask for Google Form ID. So before proceed, we need to create a Google Form to collect the temperature and humidity data.
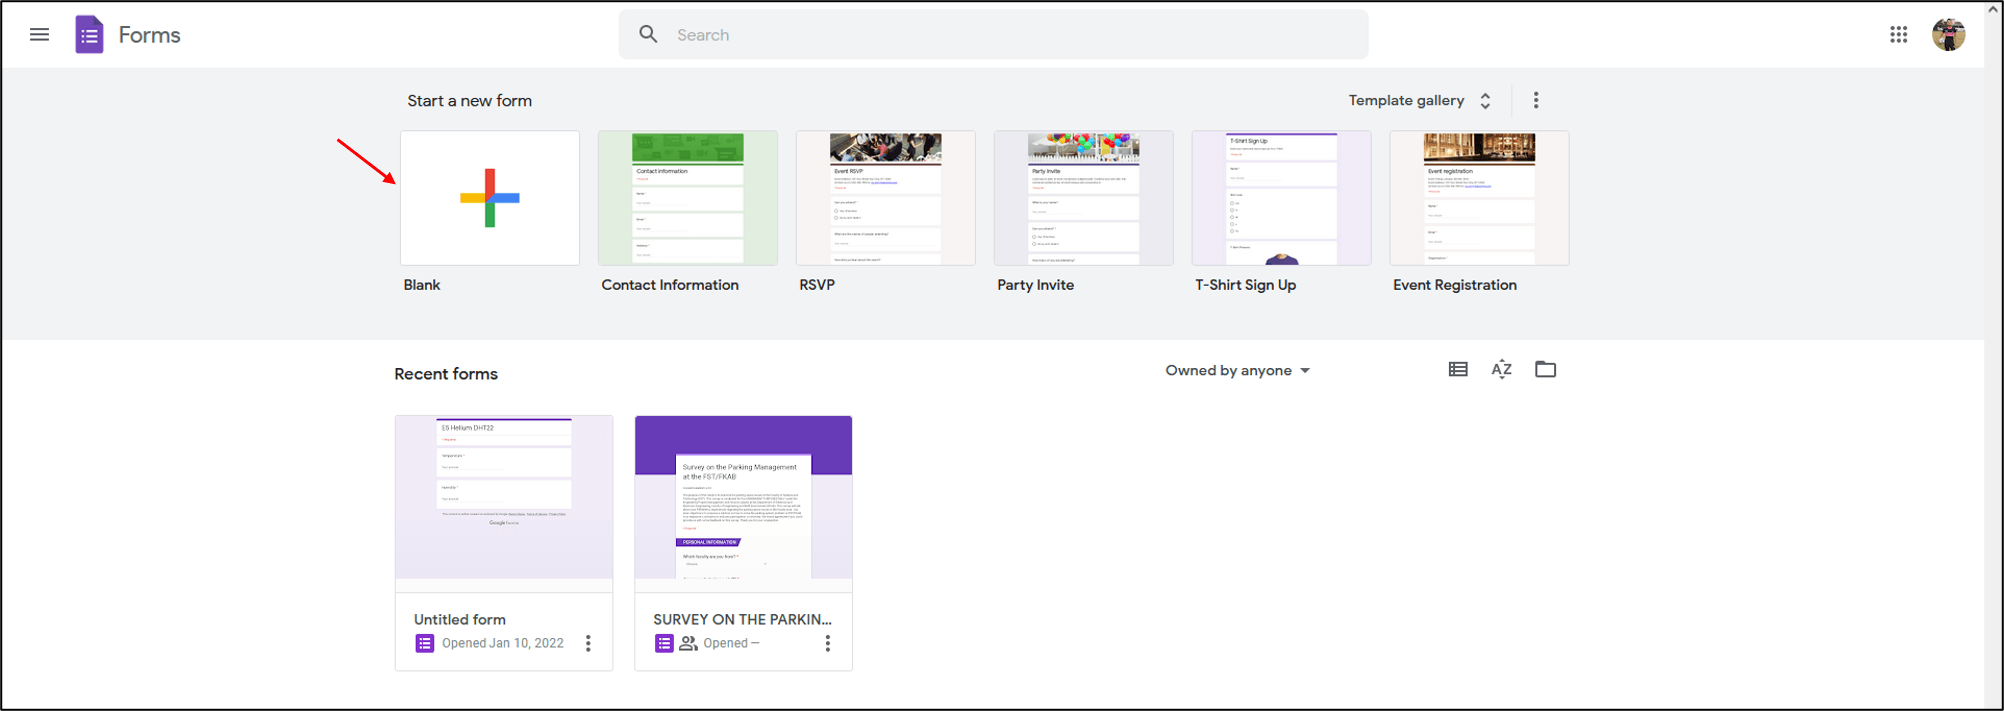
Go to Google Form that is linked to your Google account. Click "Start a new form".
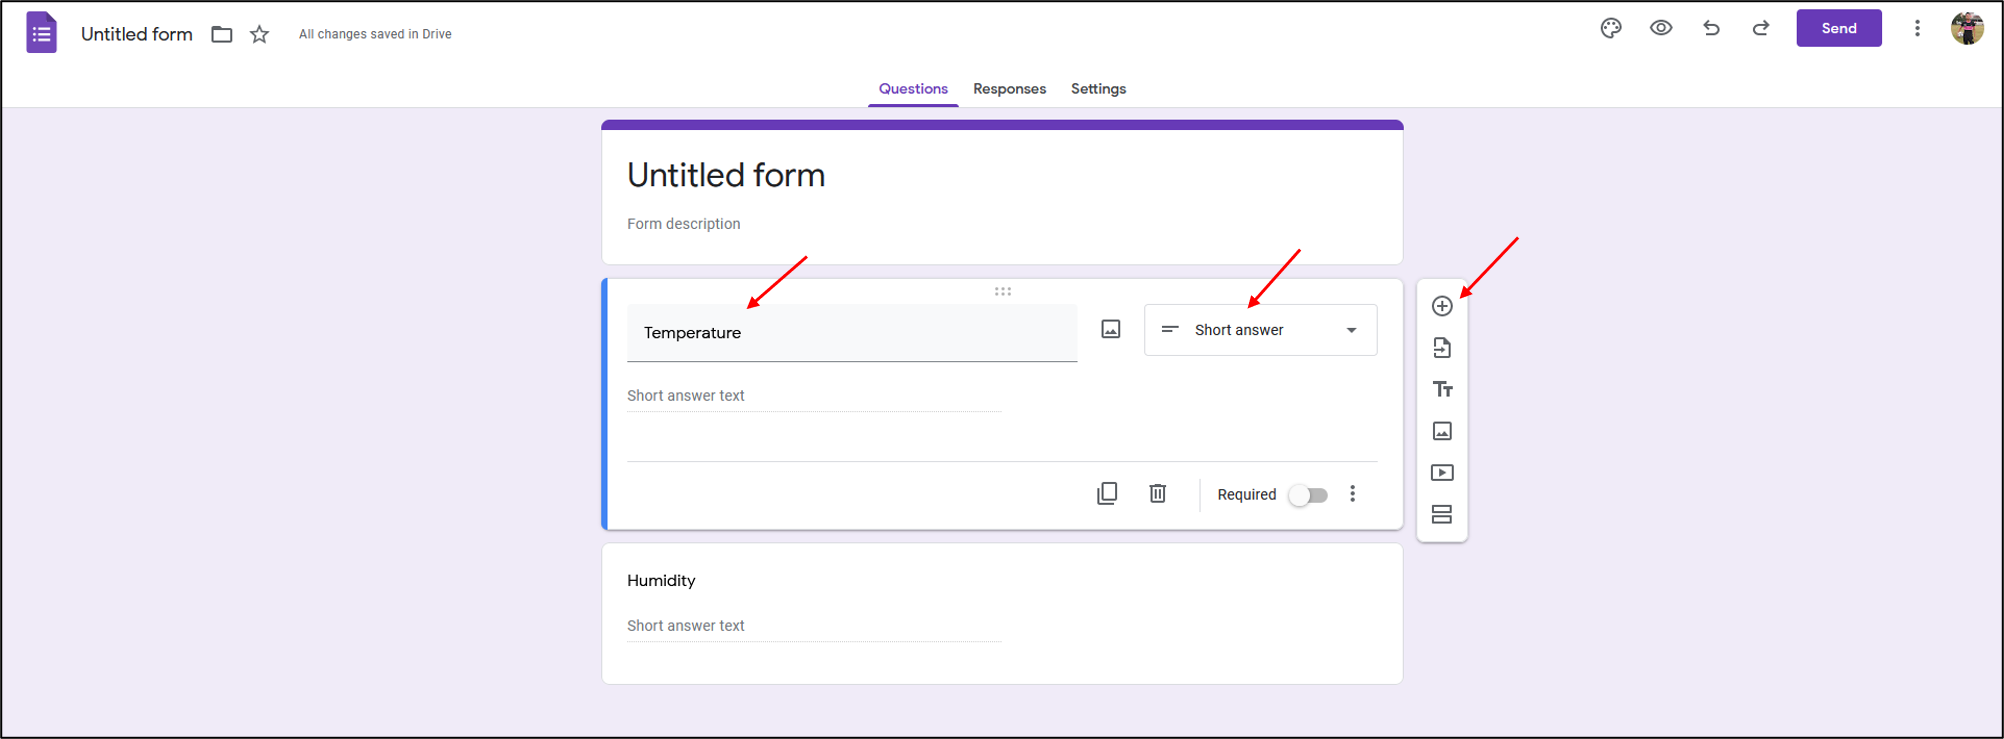
Insert data types (temperature) in the Question space. Then, choose "Short answer" for the answer type.
Click "Add question" to add a field for humidity.
Click the "Send" button on the top right of the page and copy the link.
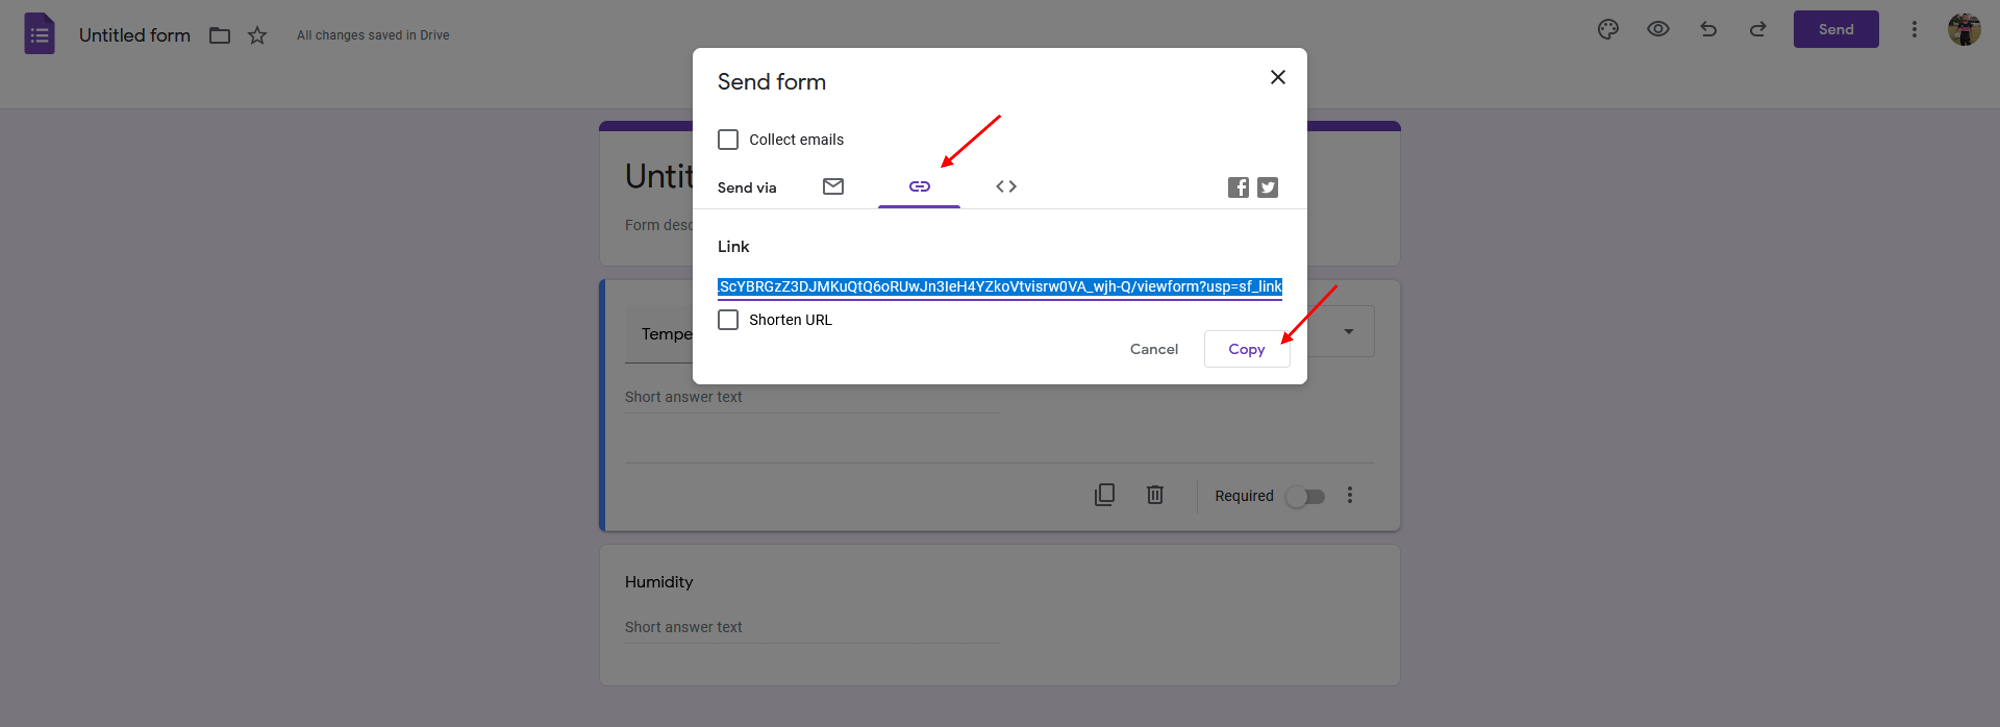
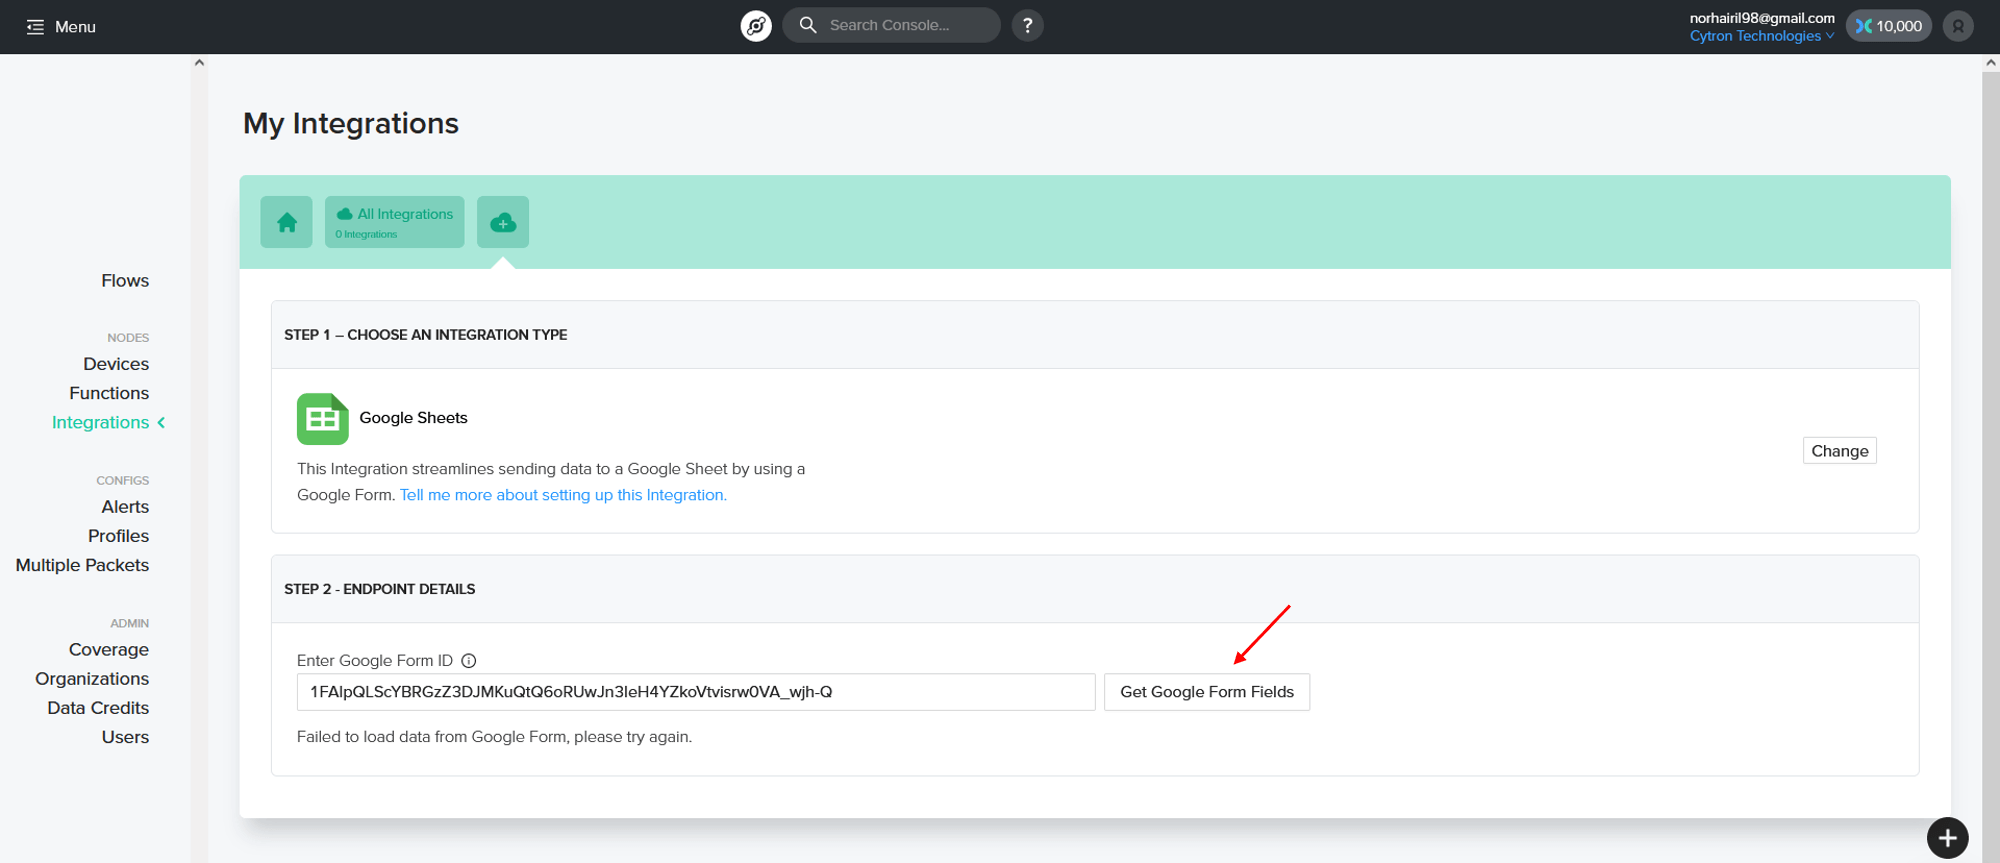
Go back to the Helium console and paste the link. We need to remove the beginning and ending slash to obtain the Google Form ID only. Remove "https://docs.google.com/forms/d/e/" and "/viewform?usp=sf_link".
Note: The Google Form ID should not have any forward or back slashes.
Then, click "Get Google Form Fields".
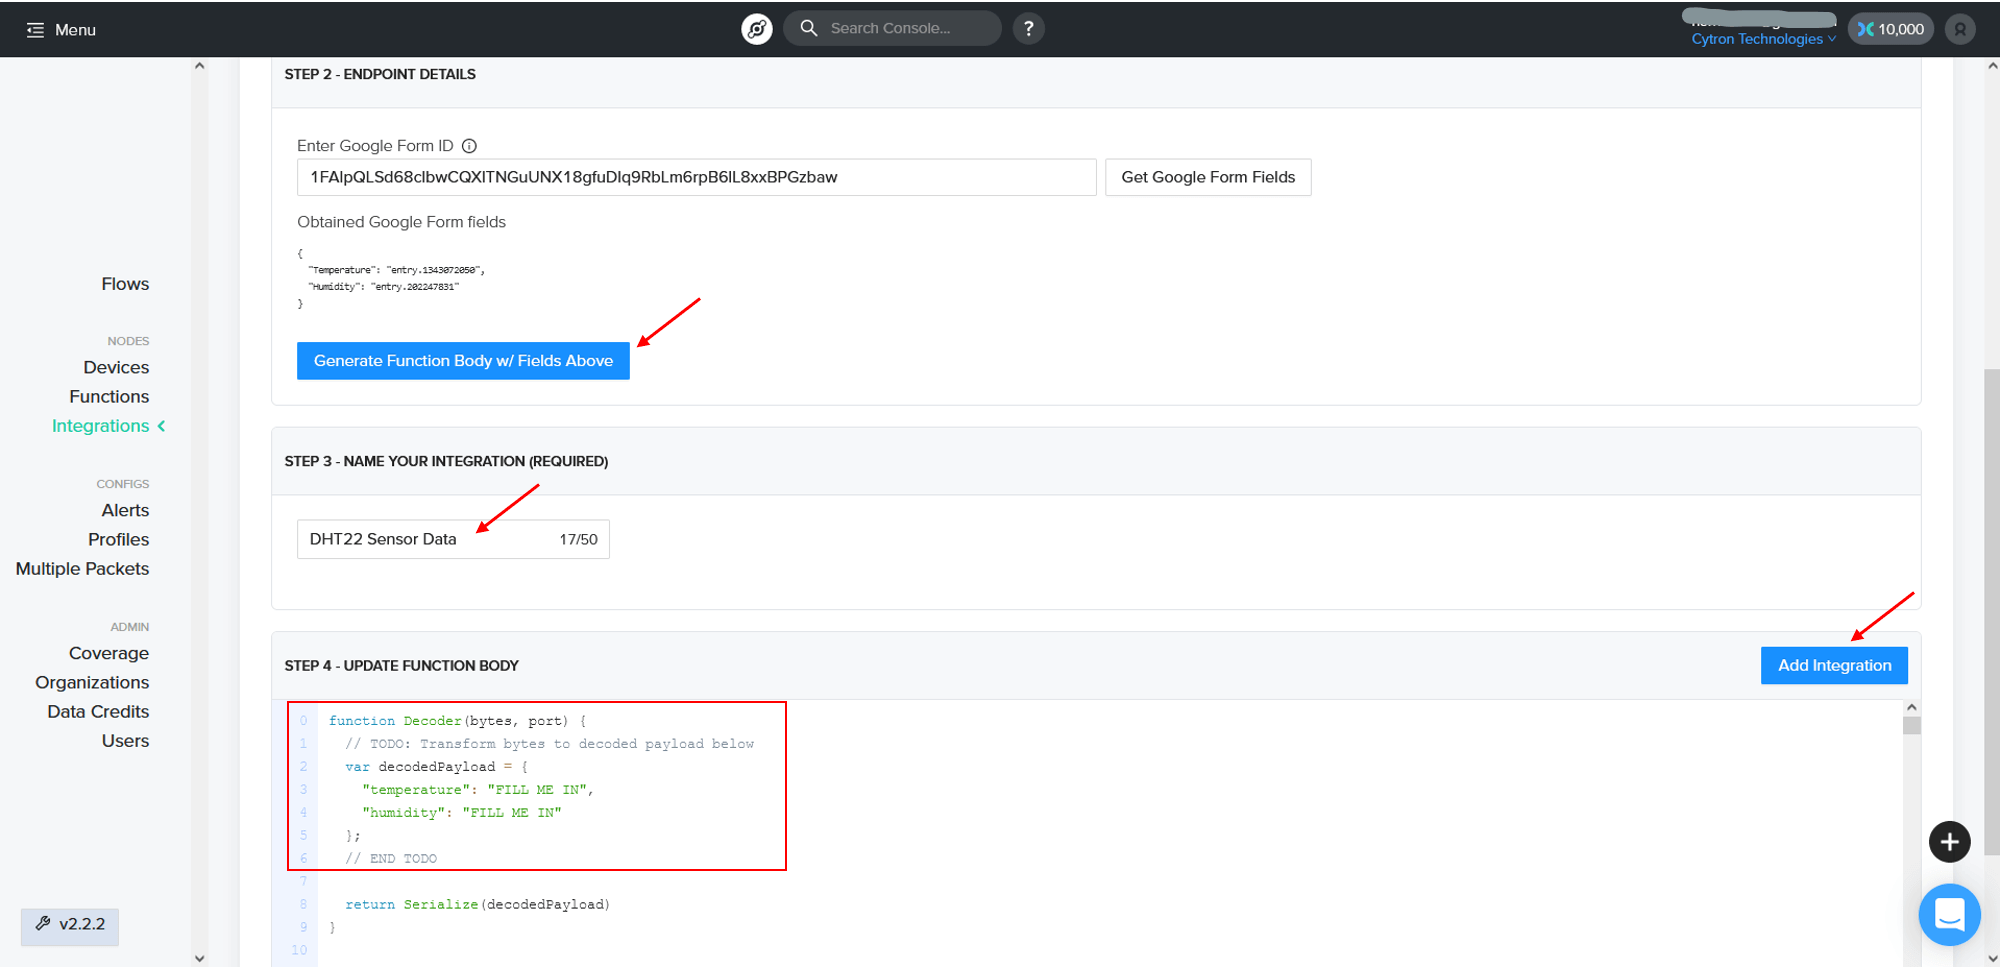
Once you obtained the Google Form fields, click "Generate Function Body w/ Fields Above".
Insert integration name. It can be anything that you like.
For the function body, remove lines 0 to 6 and replace them with the code here.
Note: Do not edit or change other parts of the function body!
Lastly, click "Add Integration".
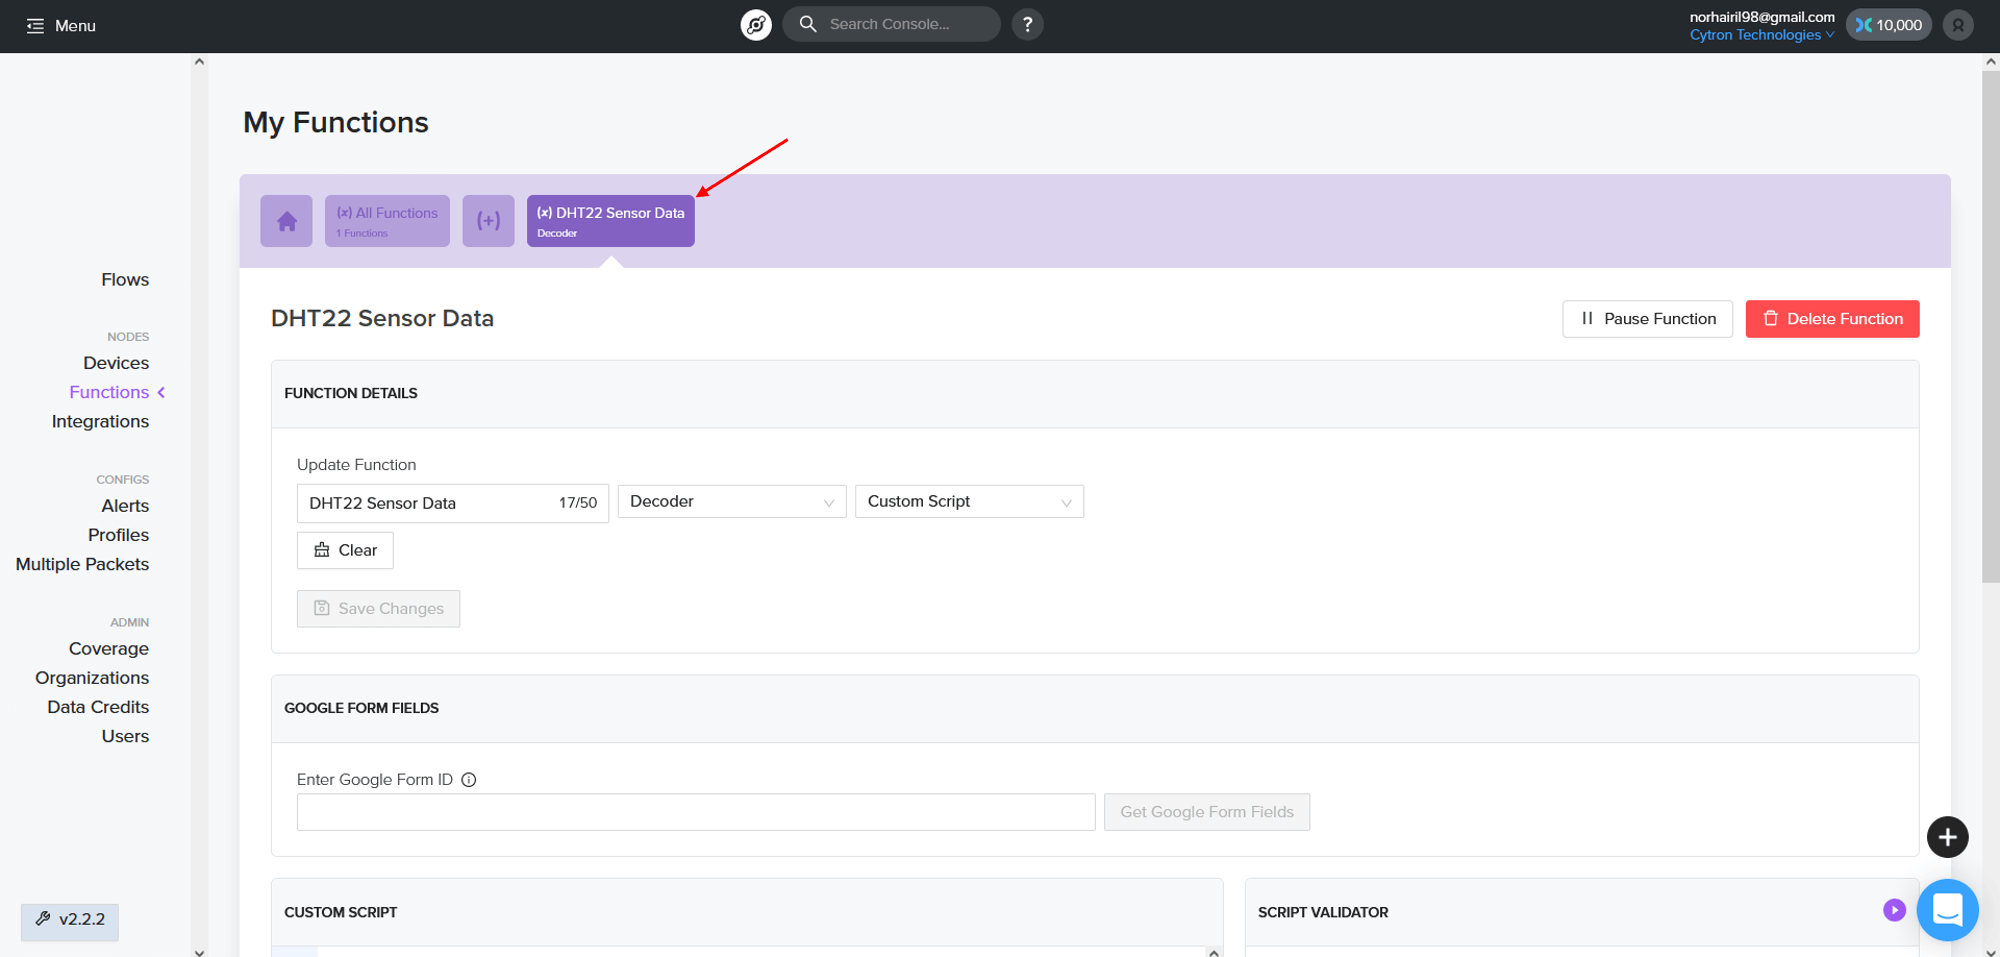
Helium console automatically creates the function once you have successfully added the Google Sheet integration. You can go to the "Functions" tab and click your integration name to observe the details of the function.
Step 5: Create Flows
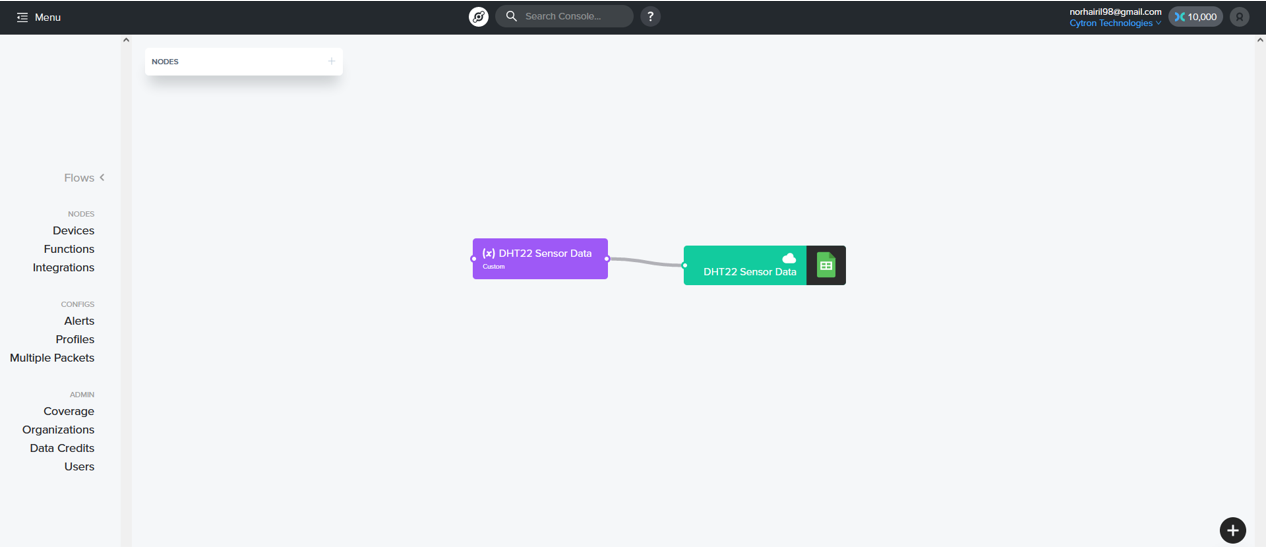
Go to "Flows" tab. You should see something like this.
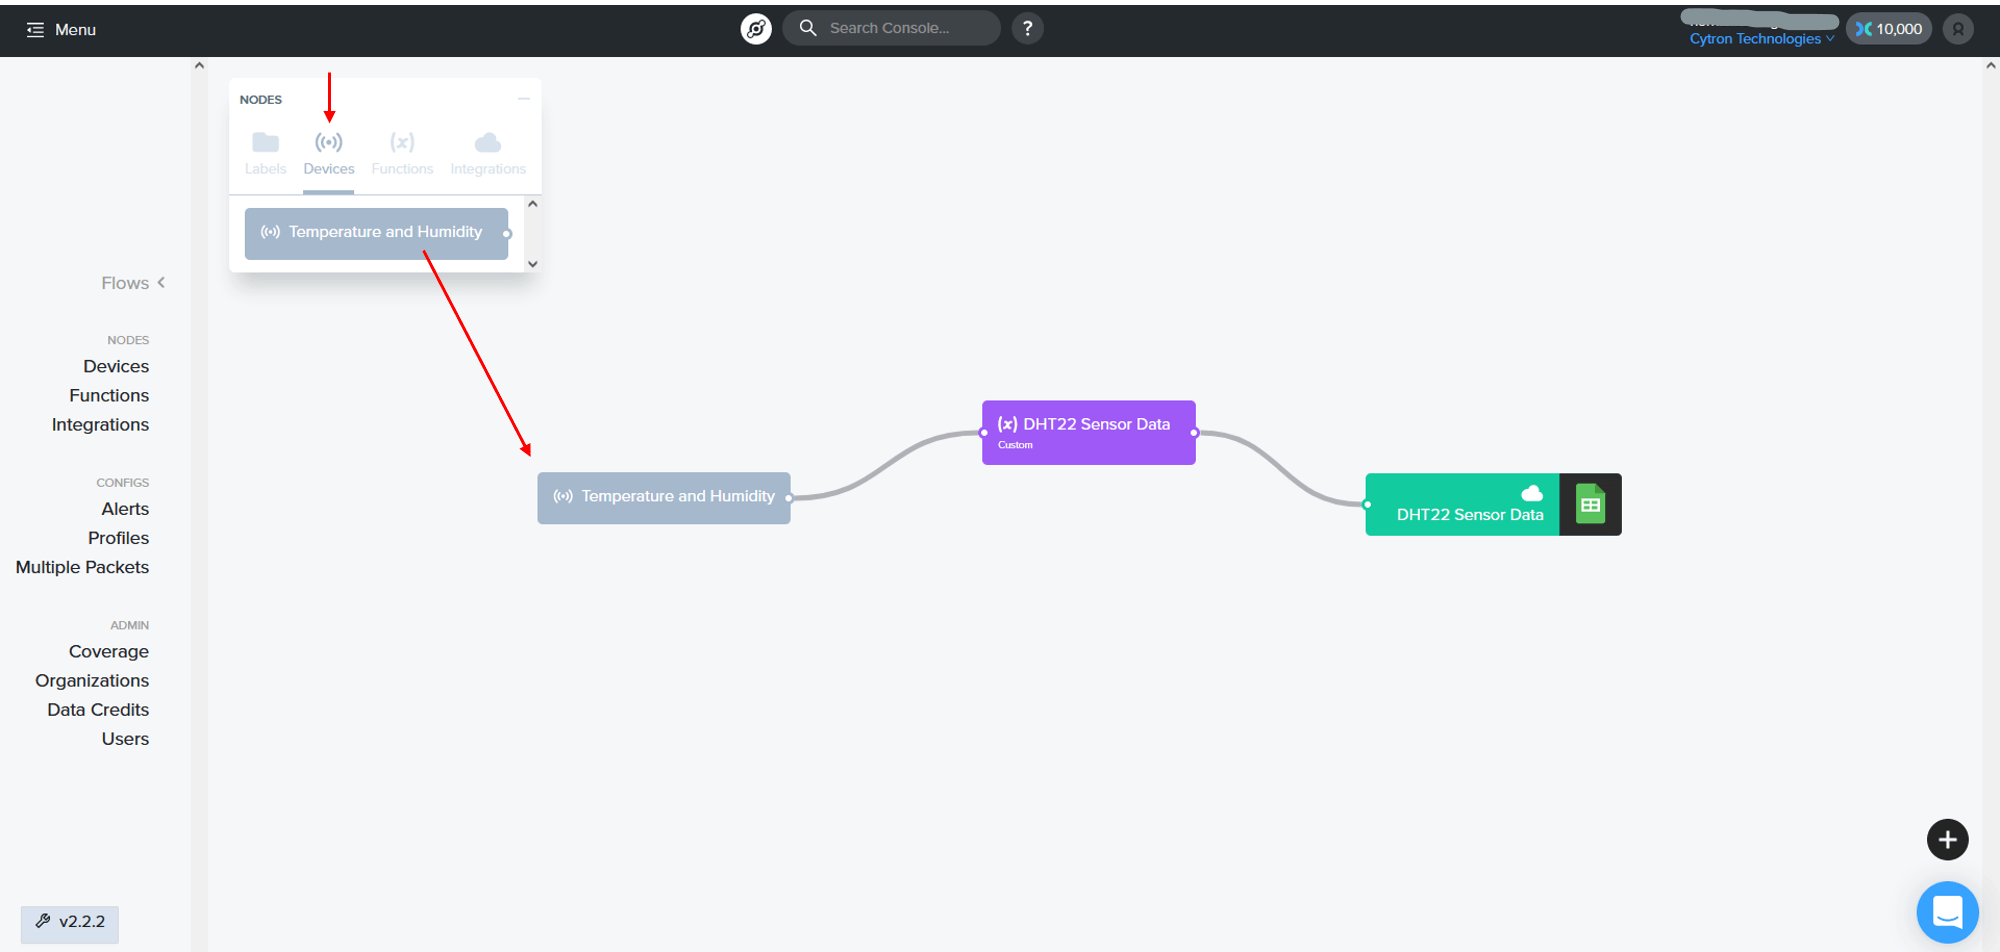
Remember that we need to have 3 components to complete this Helium project. So, the missing part is the devices. To add devices to the flows, just drag it and connect a line from devices to the functions.
Step 6: Result
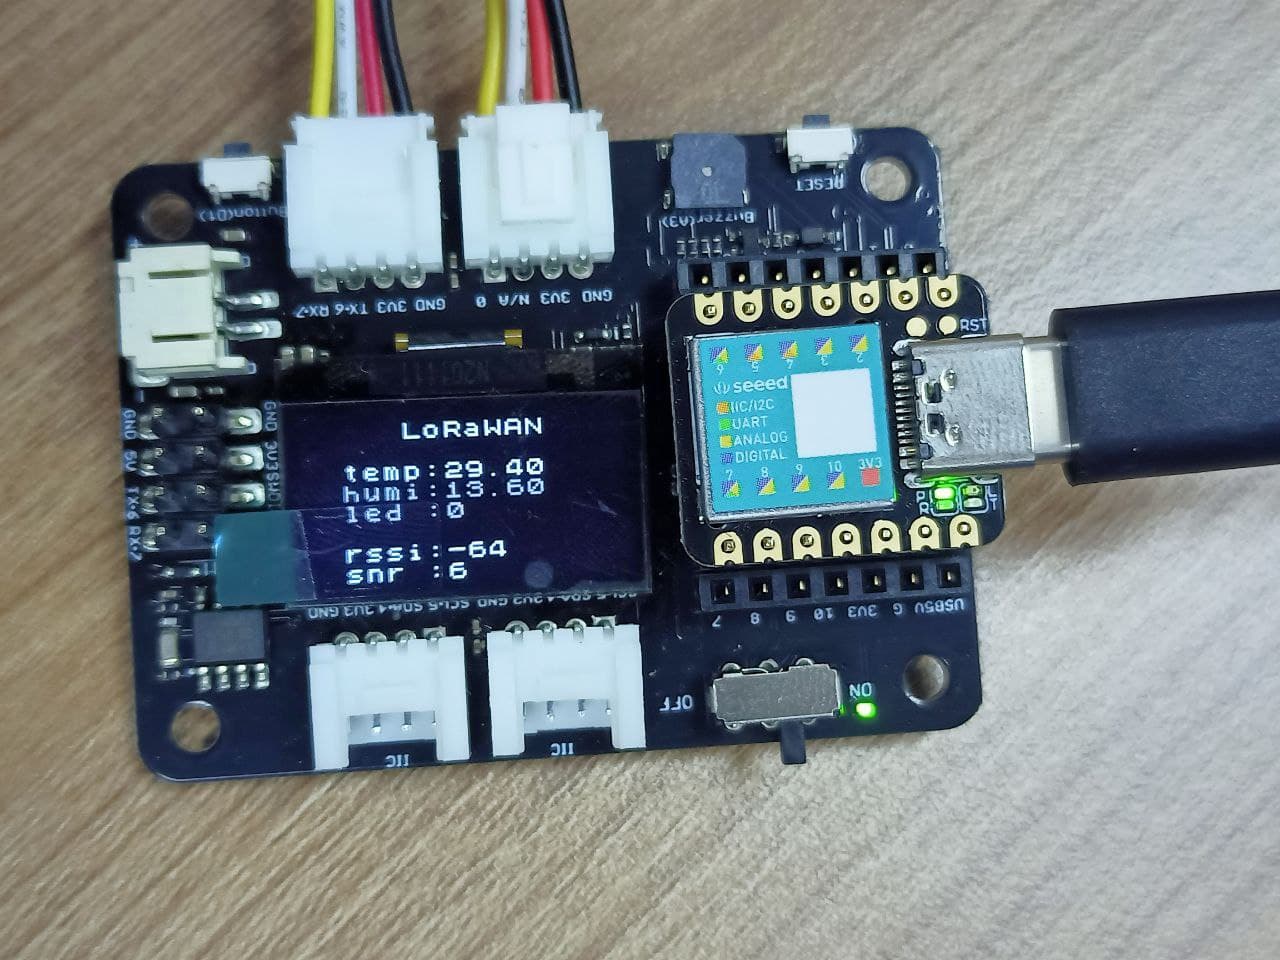
If you have correctly uploaded the code from Arduino IDE, the Helium console should have received the data. From the hardware parts, the screen will display the values of RSSI and SNR which means that the data has been received by the Helium console.
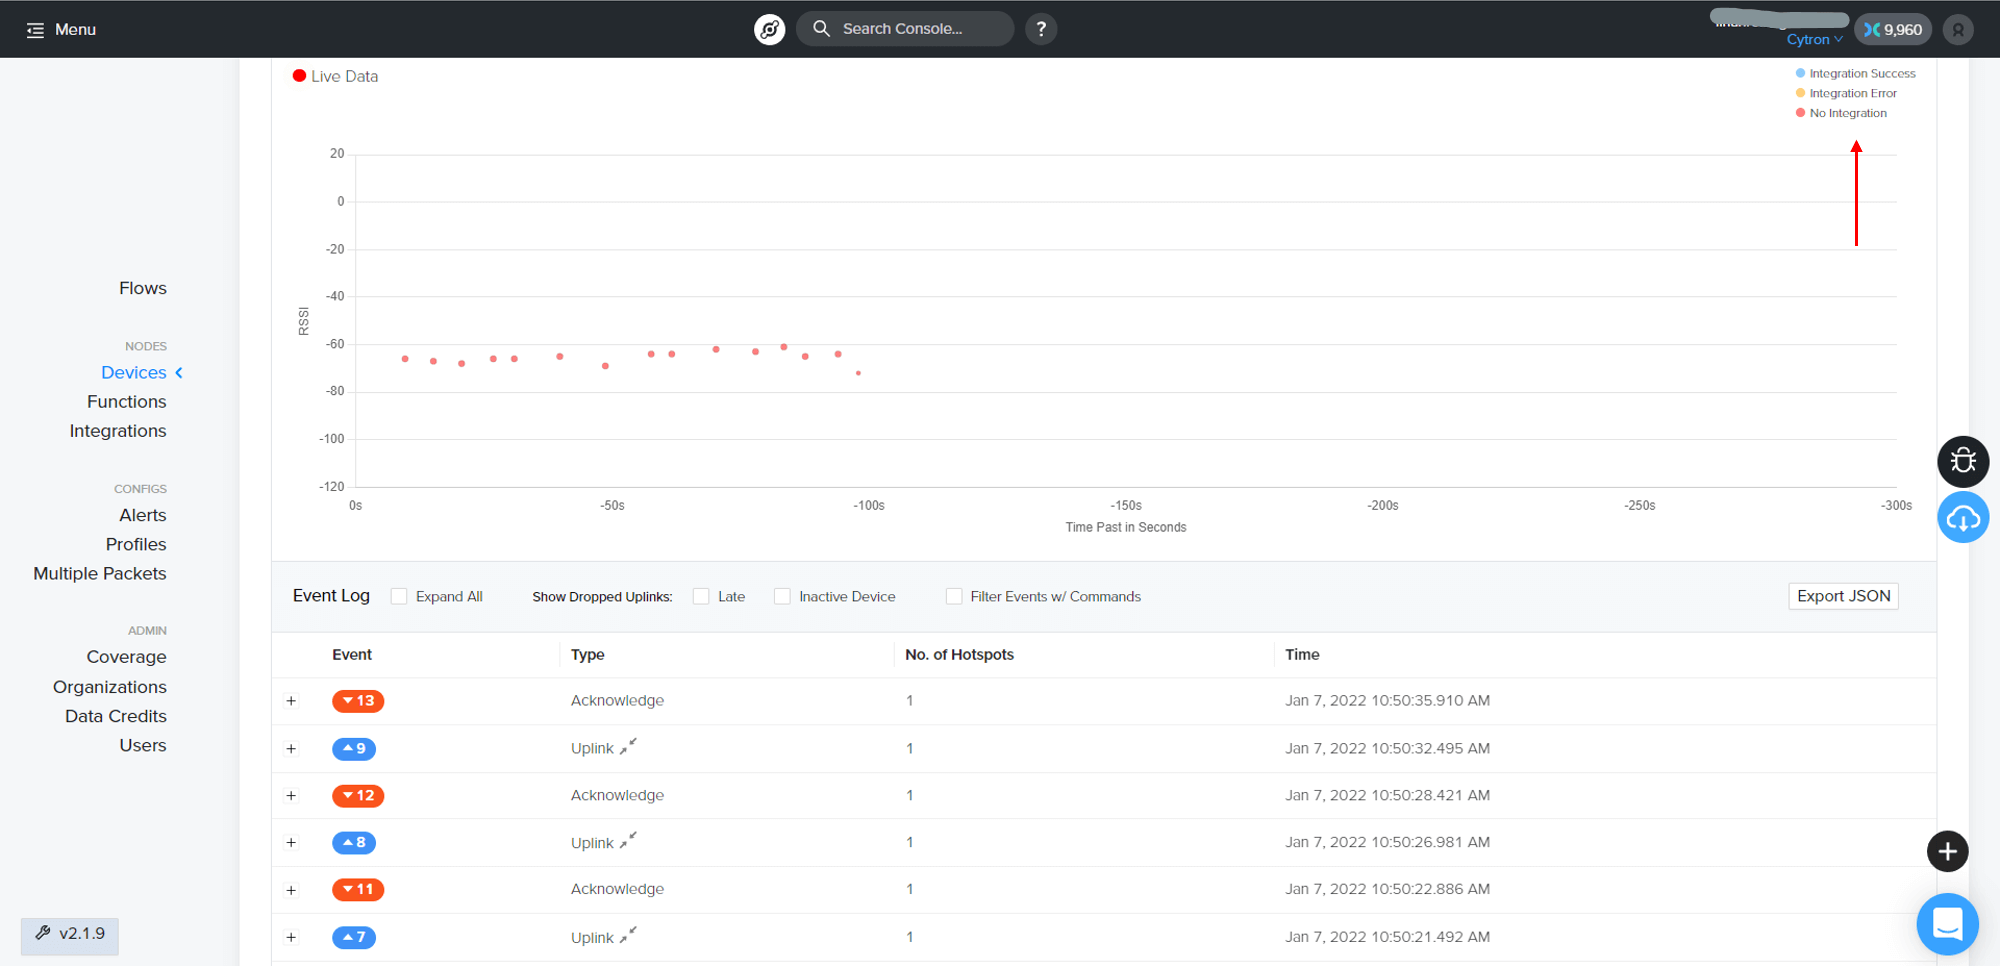
In the Helium console, go to your device. The live data in bytes will show like this.
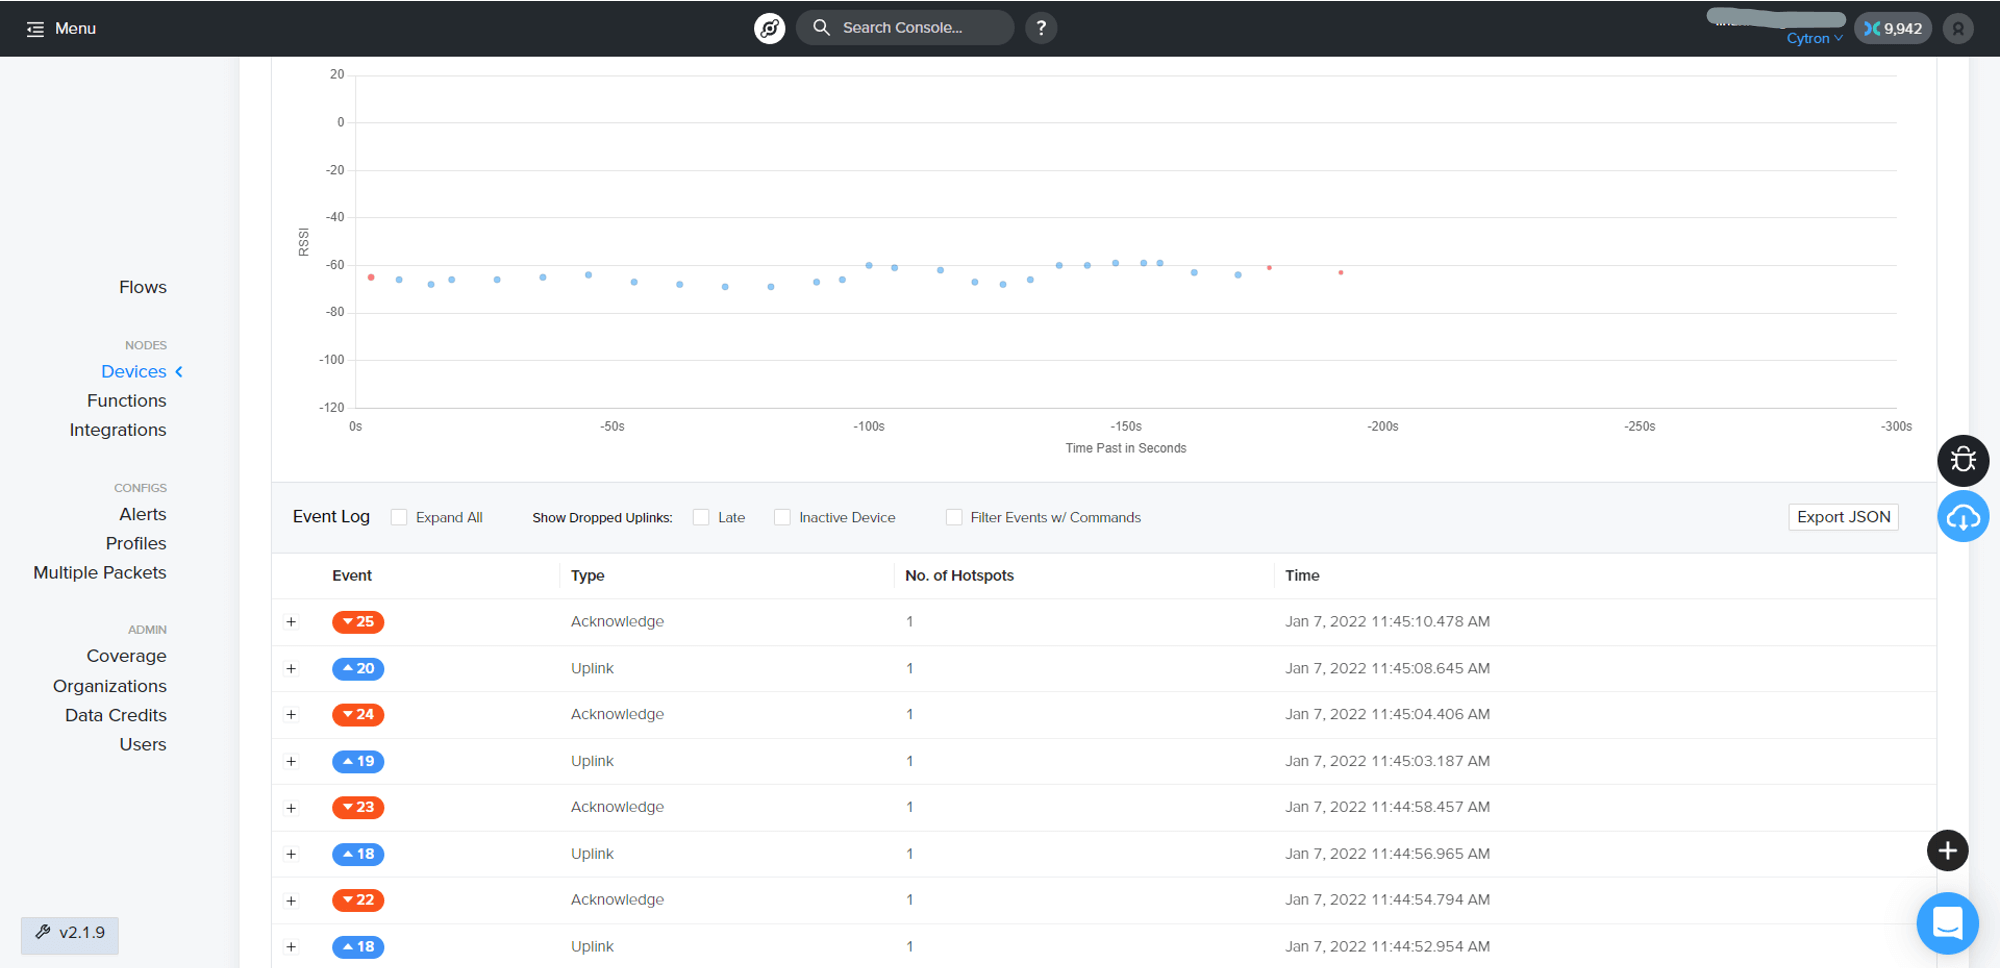
Note: The blue color dots indicate that the integration is success. Red color dots means no integration applied while yellow color dots means there is an error occurs in your integrations setup.
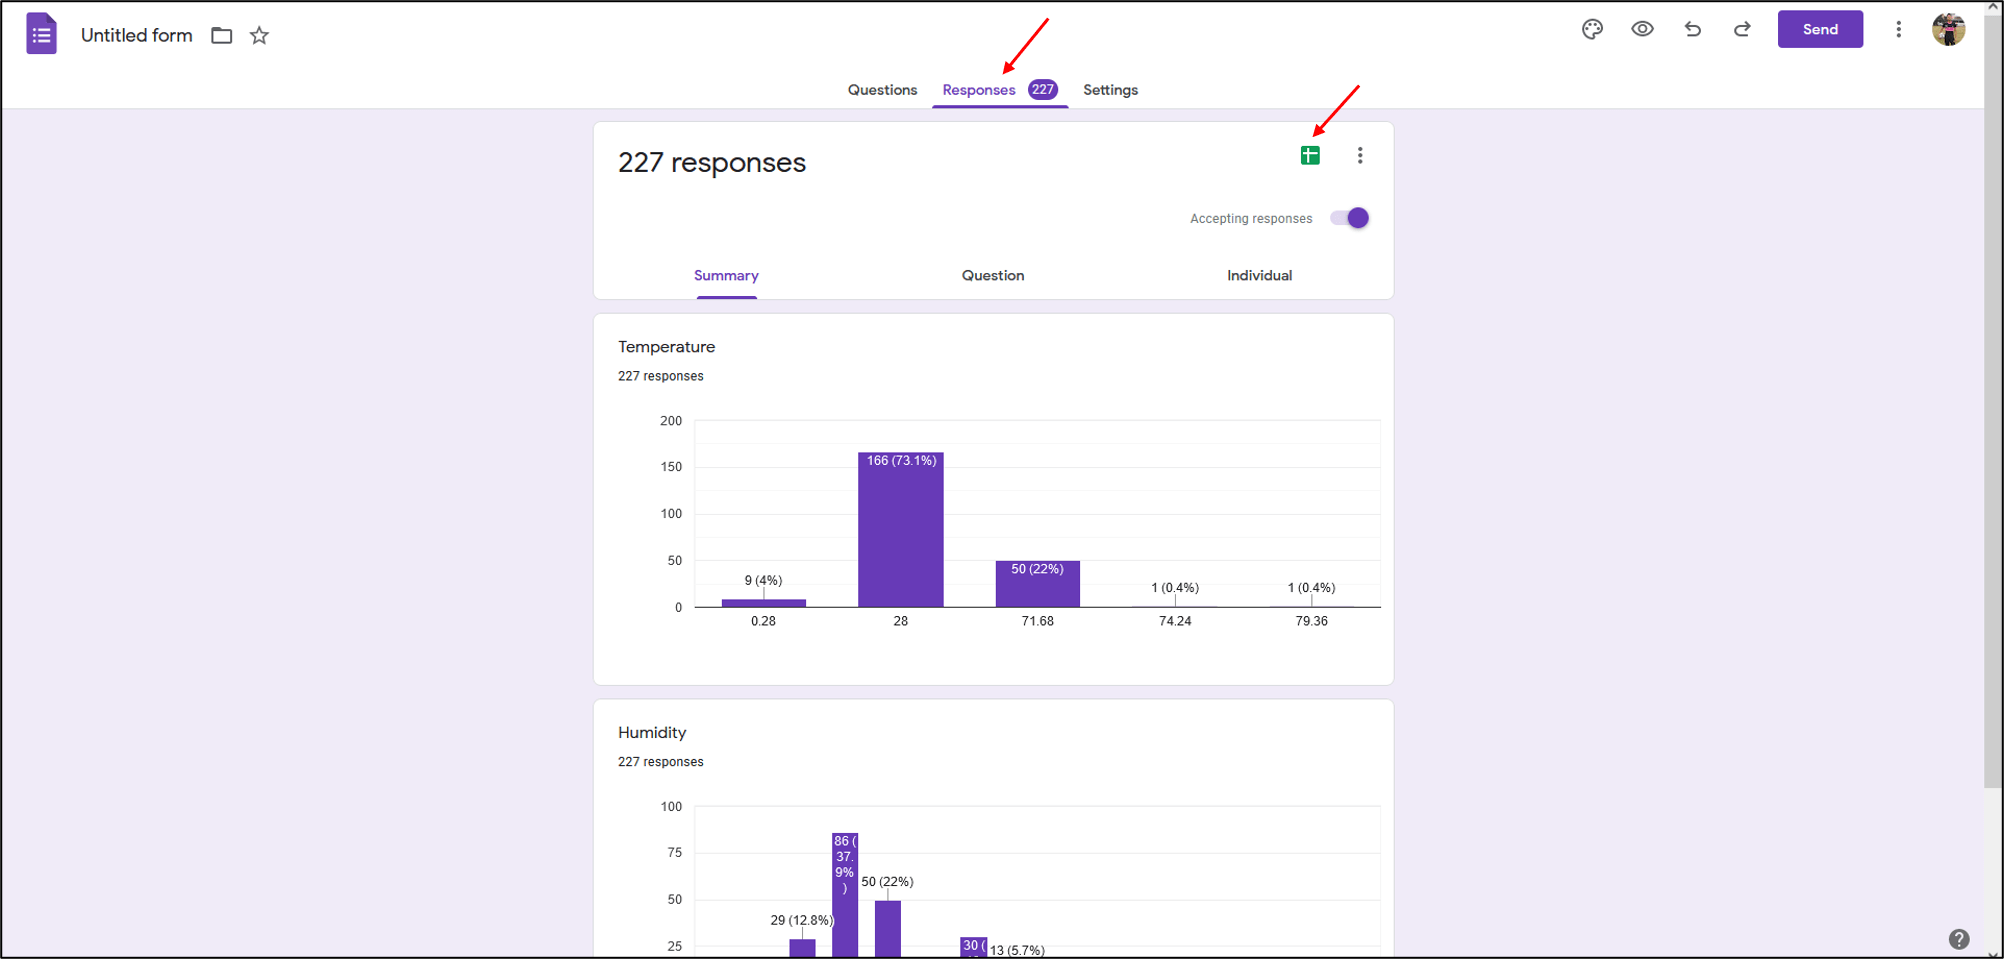
To observe the real values of the temperature and humidity data, go to the Google Form that you had created before this. Click "Responses" and open Google Sheets to see the live data.
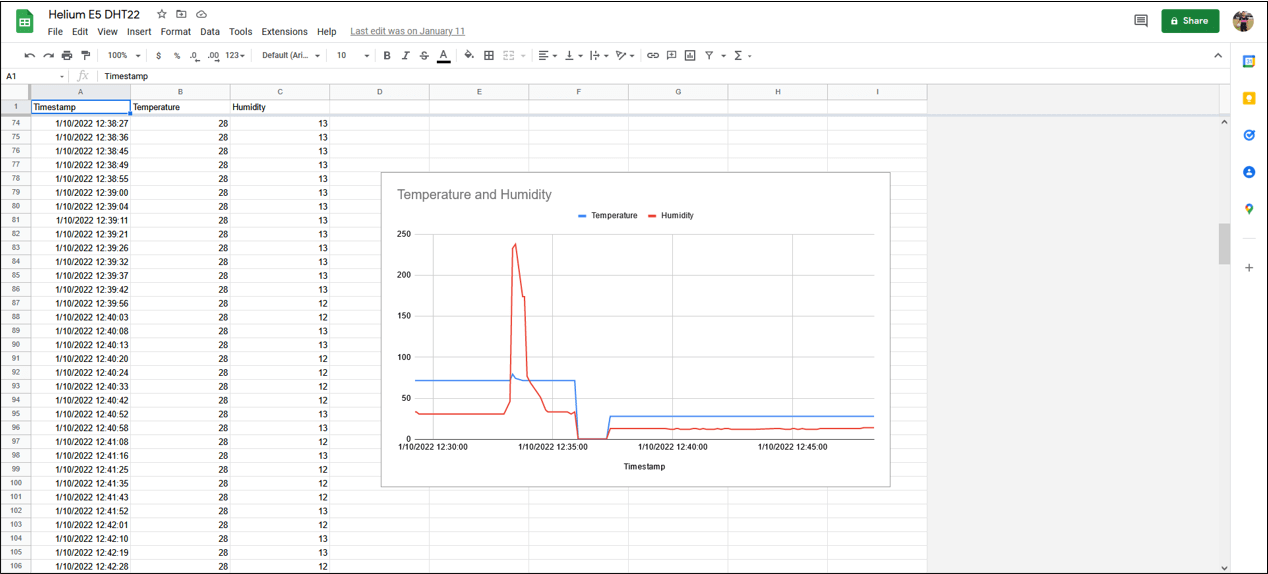
You can create a graph or something like that to observe the data pattern. The graph also can update live data!
The tutorial ends here but you can try to explore other IoT projects that use the LoRaWAN network for low power consumption and long-range projects up to 100km range!
Resources:
https://wiki.seeedstudio.com/Seeeduino-XIAO/
https://wiki.seeedstudio.com/Grove_LoRa_E5_New_Version/