 International
 Singapore
 Malaysia
 Thailand
 Vietnam
รถเข็นของคุณว่างเปล่า!

Displaying DHT22 Sensor Data at Thingspeak with LoRaWAN Network
- Hairil Mutalib
- 20 Dec 2021
- 2164
Hardware:
- Cytron UNO (You can also use the common Arduino UNO board)
- Cytron LoRa-RFM Shield
- USB Micro B Cable
- DHT22 Sensor Module
- Grove 4 Pin Buckled to Female Cable
When doing an IoT project, for sure you want to have a graphical data of your sensor and observe the pattern of the data collected. In The Things Stack platform, we can just view the live data update but the data wont last long. Even if you refresh the browser, the live data can be disappear.
This tutorial is focusing on how to display data from the node device to the ThingSpeak IoT monitoring platform. The most important part is you must have a function gateway nearby and a TTN account that has been setup. If you just start exploring the LoRa world, kindly refer to these two tutorials on how to create the TTN account and setup your own gateway.
- LoRa Gateway Setup for RHF0M301 Raspberry Pi with Basic Station
- Sending Data from Node to The Things Stack
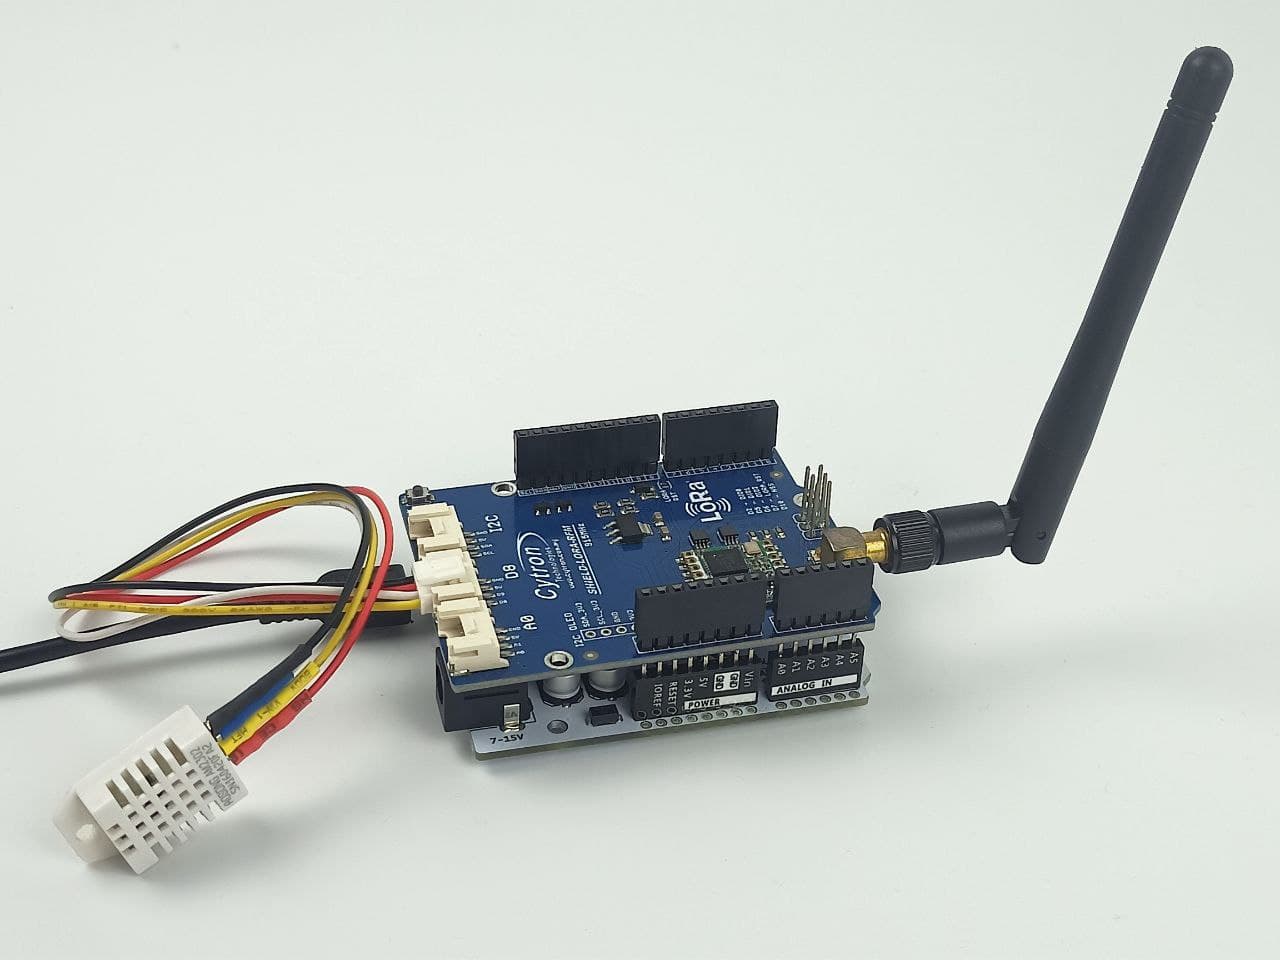
Step 1: Hardware Setup
Attach the Shield-LoRa-RFM to Arduino UNO board. I am using the CT-Uno from Cytron Technologies. Then, connect the DHT22 sensor at the middle port (digital pin) of the shield. Connect Pin 8 of LoRa shield to the DAT pin of the DHT22 sensor.
ALWAYS remember to connect an antenna to the Shield-LoRa-RFM before powering up the Arduino board.
Make sure a LoRa gateway is active in your area and the LoRa node can send messages to that gateway. You can build your own gateway or use any available gateway from this map. Kindly refer to this tutorial if you want to build your own gateway.

Step 2: Arduino IDE Setup
Install the latest open source Arduino IDE here.
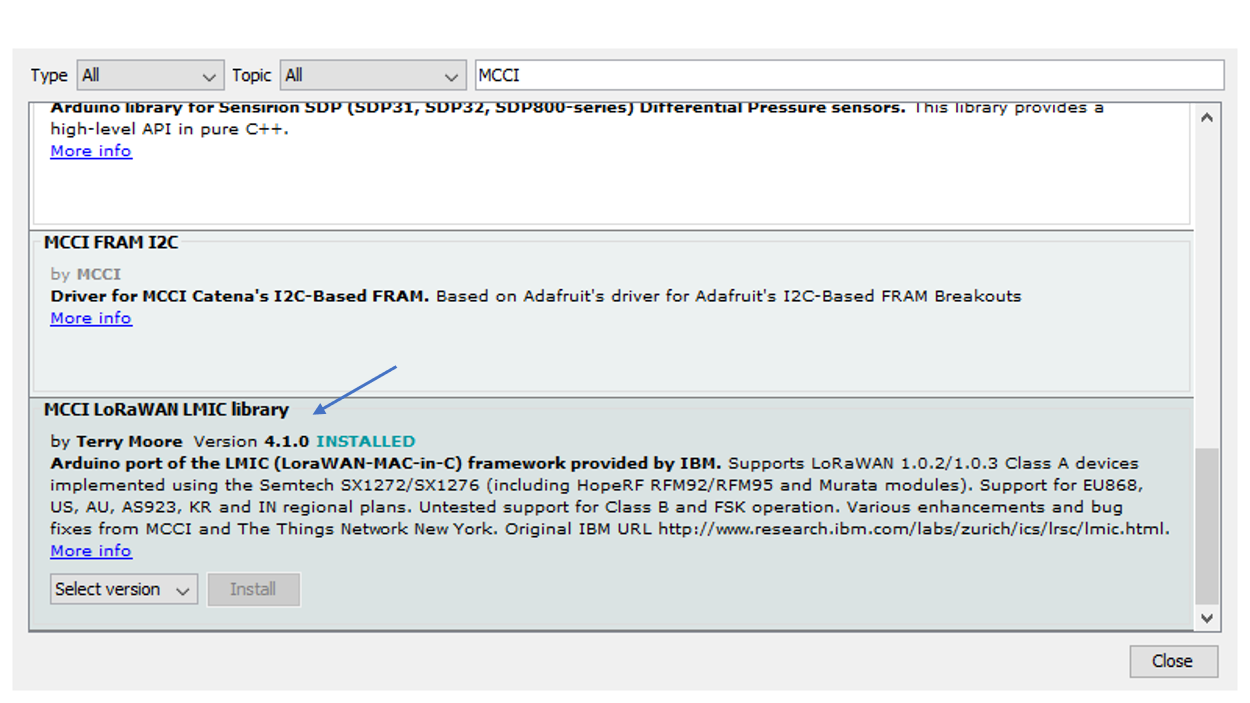
Install the MCCI LoRaWAN LMIC library.
- In the Arduino IDE, select menu Sketch | Include Library | Manage Libraries
- In the search box enter: MCCI
- Click the MCCI LoRaWAN LMIC library by Terry Moore.
- Select the latest version and press the Install button.
- For this tutorial I installed version 4.1.0
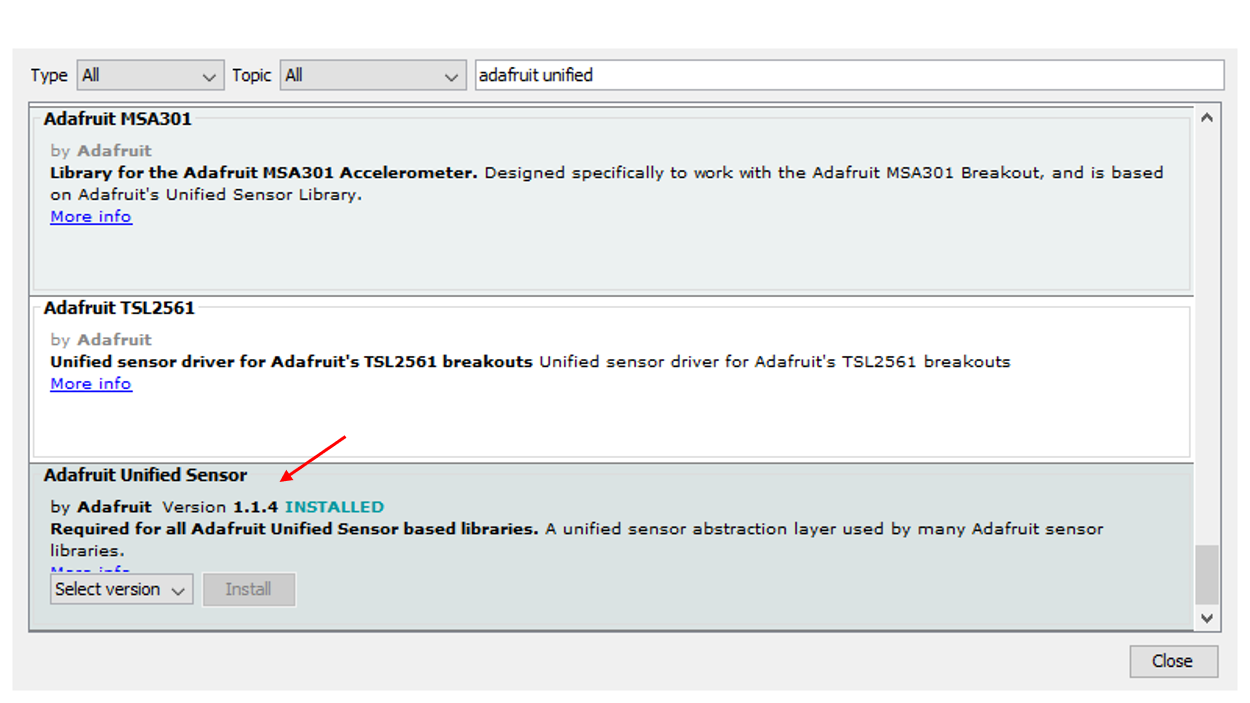
Install the Adafruit Unified Sensor library.
- In the Arduino IDE, select menu Sketch | Include Library | Manage Libraries
- In the search box enter: adafruit unified
- Click the Adafruit Unified Sensor library by Adafruit. More info: https://github.com/adafruit/Adafruit_Sensor
- Select the latest version and press the Install button. For this tutorial I installed version 1.1.4
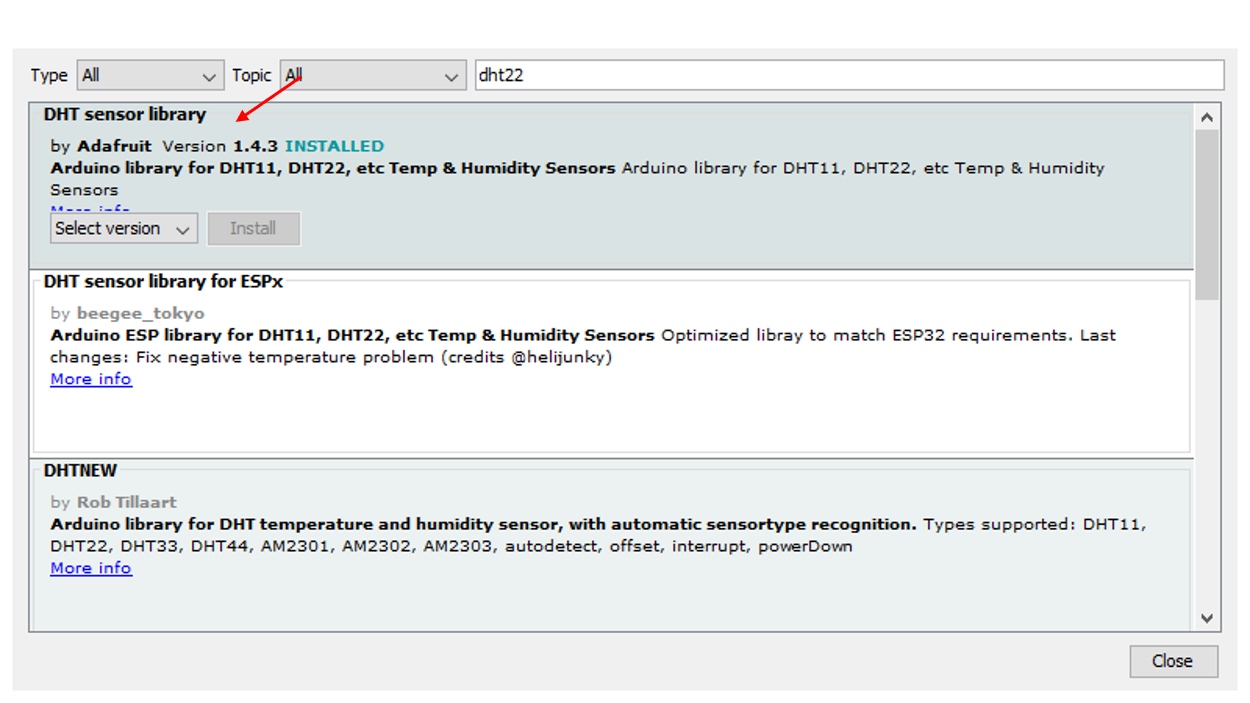
Install the DHT sensor library.
- In the Arduino IDE, select menu Sketch | Include Library | Manage Libraries
- In the search box enter: dht22
- Click the DHT sensor library by Adafruit. More info: https://github.com/adafruit/DHT-sensor-library
- Select the latest version and press the Install button. For this tutorial I installed version 1.4.3
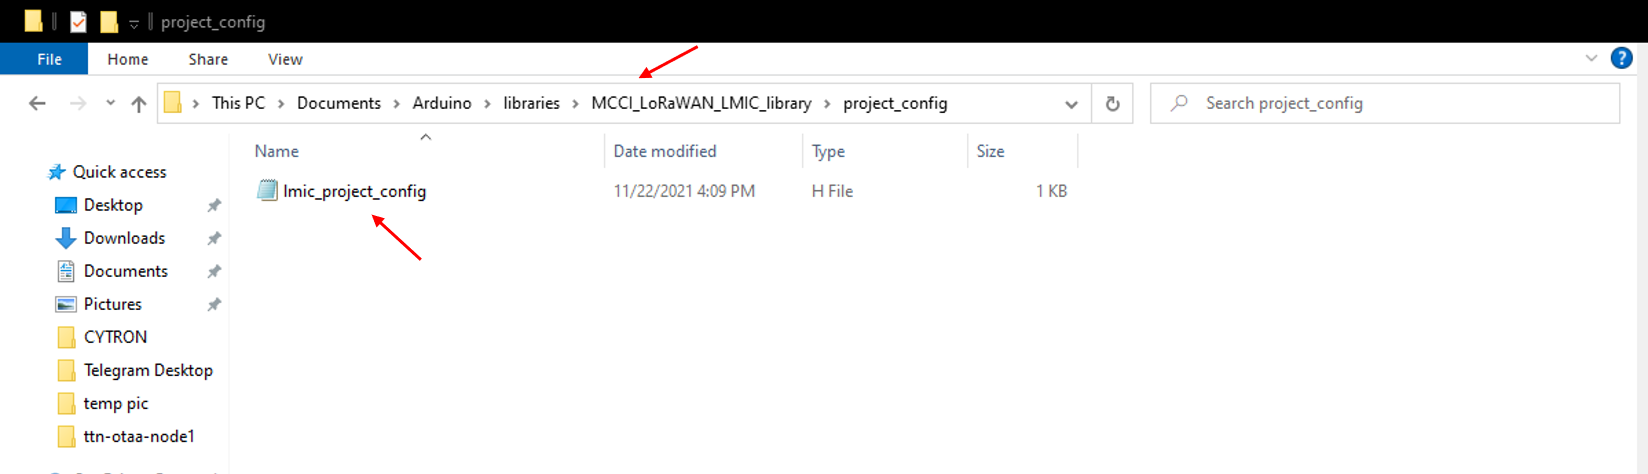
Configure the MCCI LoRaWAN LMIC Library according to your situation.
Edit file lmic_project_config.h. This file can be found at:
.../libraries/MCCI_LoRaWAN_LMIC_library/project_config
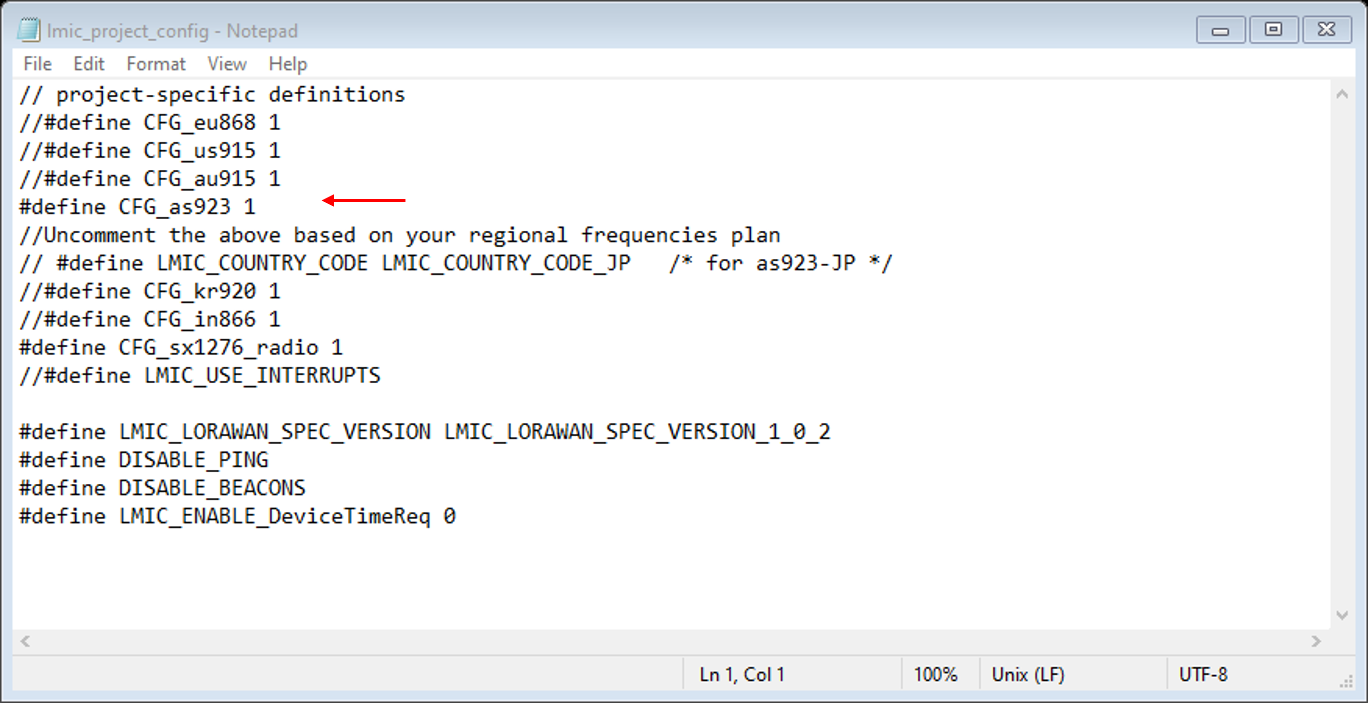
I made the following changes to MY lmic_project_config.h file.
Make changes according to YOUR situation by uncomment your related region.
Step 3: The Things Stack Setup
Create an account on The Things Stack Community Edition (TTS CE).
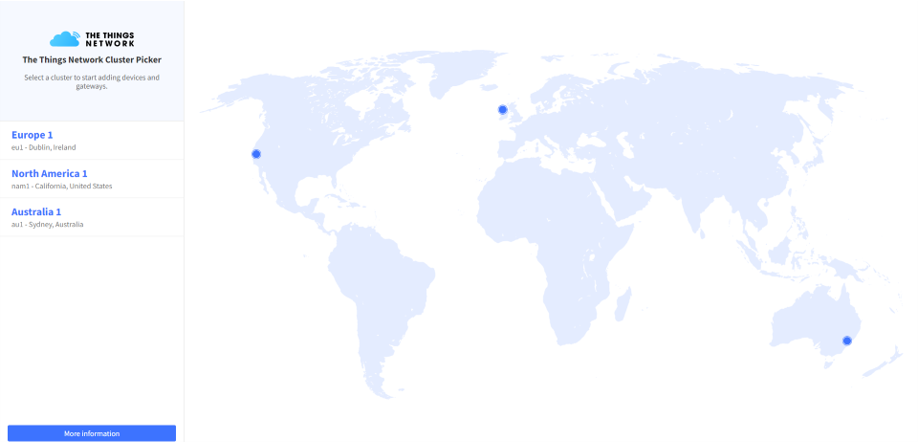
Login The Things Stack Community Edition console.
Make sure you select a cluster (Europe, North America, Australia) near your location.
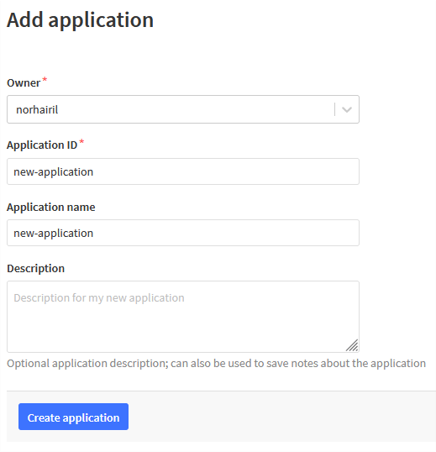
Add an application. For example:
Application ID: new-application (must be unique)
Application name: new-application (can be anything)
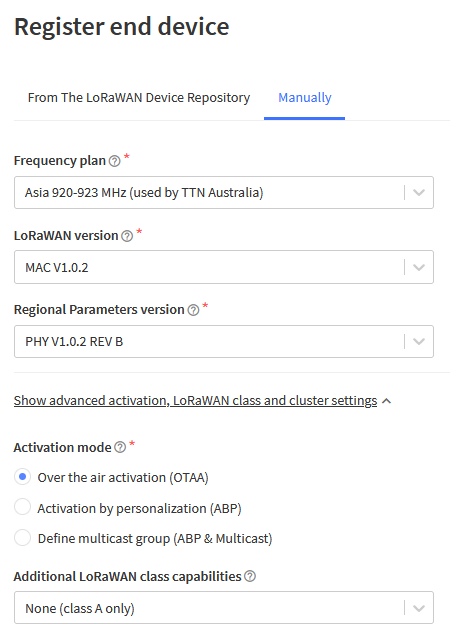
Then, register end device (choose manually) :
- Frequency plan: Choose based on your region
- LoRaWAN version: MAC V1.0.2
- Regional Parameters version: PHY V1.0.2 REV B
- Activation mode: Over the air activation (OTAA)
- Additional LoRaWAN class capabilities: None (class A only)
Note: Why use MAC V1.0.2?
Because the MCCI LoRaWAN LMIC Library has only been tested with LoRaWAN 1.0.2/1.0.3 networks.
The HopeRF RFM95 LoRa transceiver module does not have a built-in DevEUI or AppEUI. In such a case you should let the TTSCE console generate the required DevEUI or AppEUI. Herebelow is an example of generated AppEUI, DevEUI and AppKey in the TTSCE console.
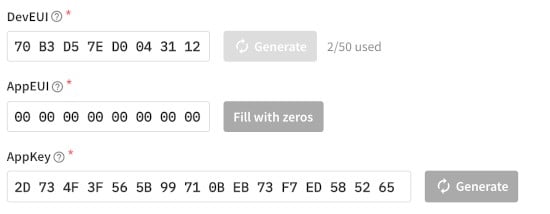
The AppEUI, DevEUI and AppKey are used in the Arduino sketch. In this Arduino sketch, the DevEUI or AppEUI must be converted to an array of 16 bytes in LSB order. The AppKey must be converted to an array of 32 bytes in MSB order. I have found an online tool which converts these values to a bytes array in its correct order (LSB/MSB). Kindly use this online tool to prevent any negligence.

Step 4: Upload The Code in Arduino
Open Arduino IDE. Copy and paste the code from here. You need to do some adjustment to the code later.
From the online tool, copy DevEUI, AppEUI and AppKey that you had converted and paste to the sketch .

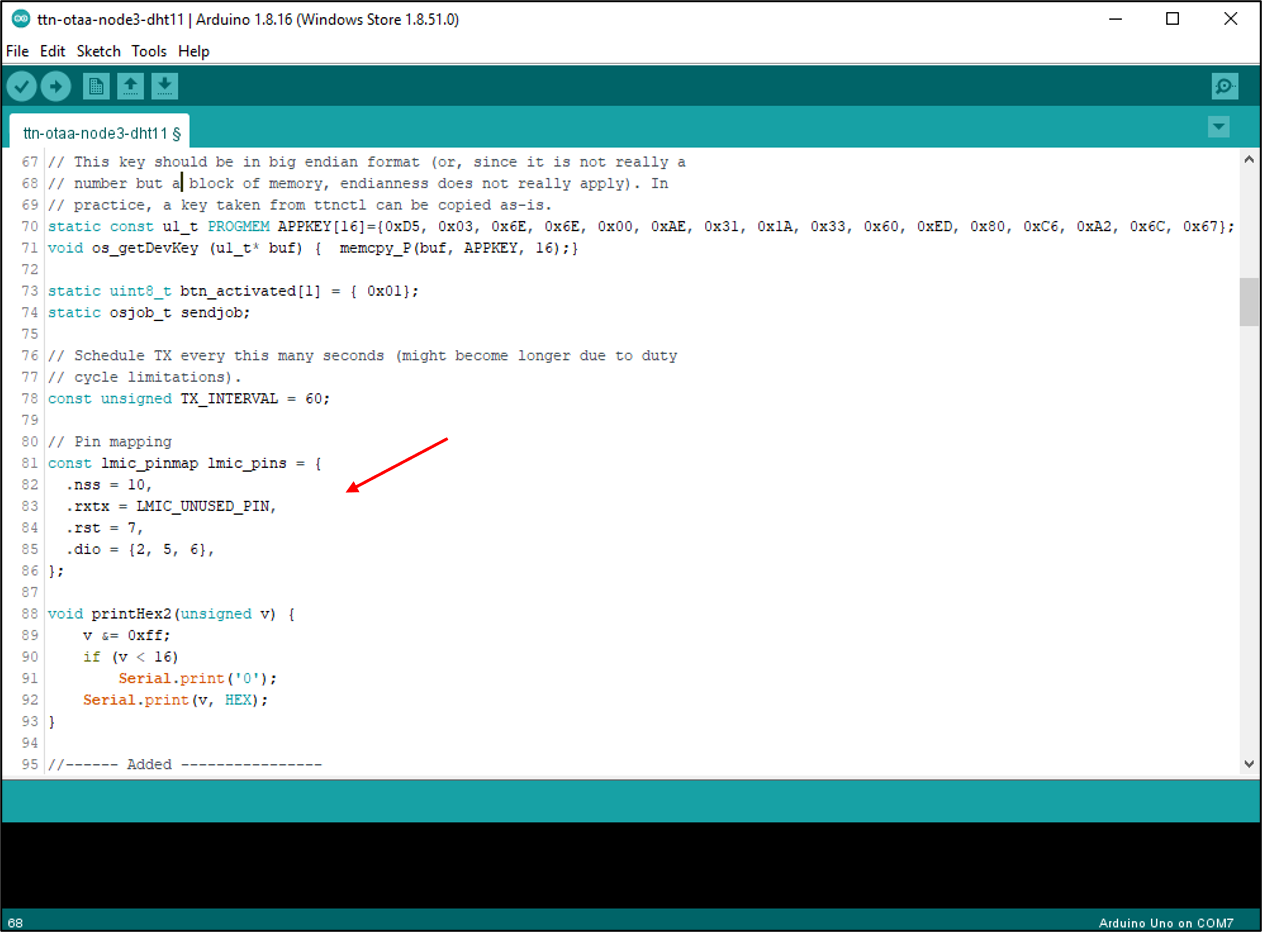
For this part, you can double check by checking on the shield board itself to find the correct pin mapping. This is the pin mapping for Cytron Shield-LoRa-RFM board.
// Pin mapping
const lmic_pinmap lmic_pins = {
.nss = 10,
.rxtx = LMIC_UNUSED_PIN,
.rst = 7,
.dio = {2, 5, 6},
};
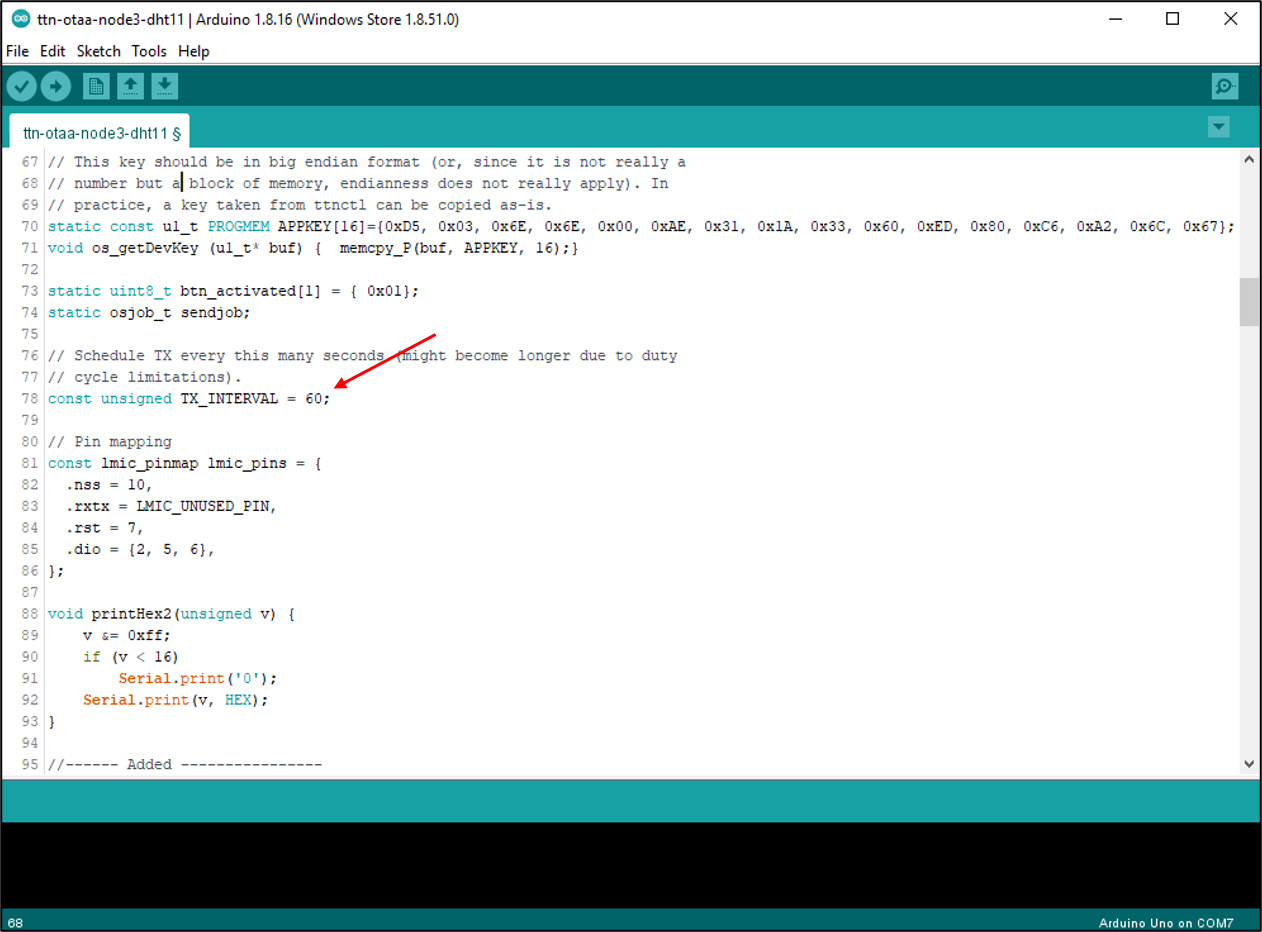
In this sketch, the temperature and humidity data will be transmitted every 60 seconds.
See variables TX_INTERVAL. You can change to other values to increase/decrease the transmission interval if you want to.
Check if you are using the right pin for you DHT sensor. In my case, I'm using digital pin 8 on CT Uno board.
Then, define the type of your DHT sensor wether it is DHT11 or DHT22.

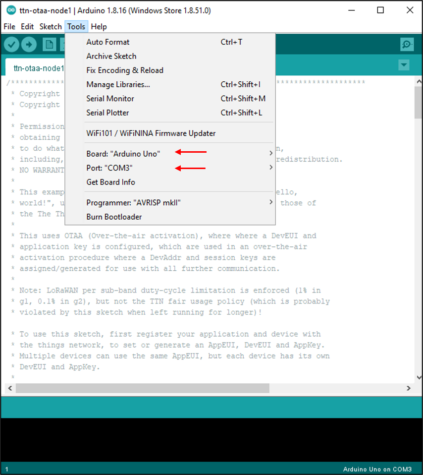
Connect the Arduino board to your computer using the USB cable.
In the Arduino IDE, select menu Tools > Board and select: Arduino Uno. Then, select menu Tools > Port: your port.
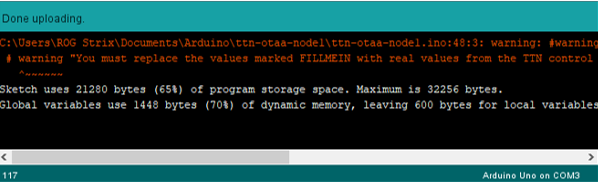
Compile ttsce-otaa-helloworld sketch. You should not see any errors (but there are warnings).
Upload the ttsce-otaa-helloworld sketch to the Arduino board. You should not see any errors.
You can open the Serial Monitor to check if your node is successfully connect to The Things Stack. In a few seconds, the Serial Monitor will show your NWSKEY and APPSKEY of your node if you have successfully connect to The Things Stack.
Step 5: Display Data on The Things Stack
In The Things Stack Community Edition console, the temperature and humidty data (in hex) is received every 60 seconds.
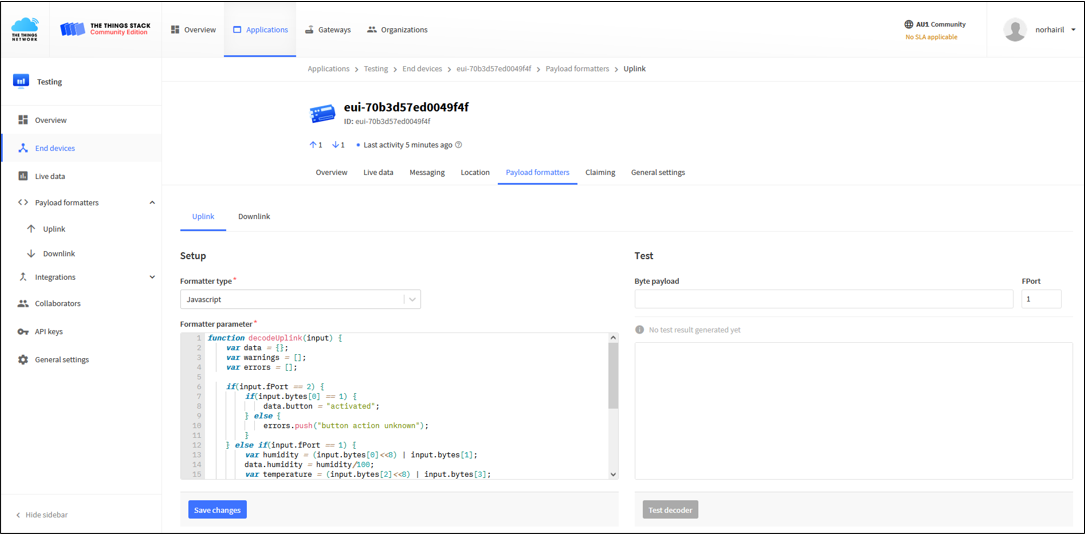
If you want to convert the payload into a readable text:
- Select your end device in the “End devices Overview” screen.
- Select “Payload formatters”.
- Select “Uplink”.
- Select “Formatter type: Javascript”.
Copy and paste the decode uplink payload formatter in the textbox.
On the bottom of the page press the “Save changes” button.
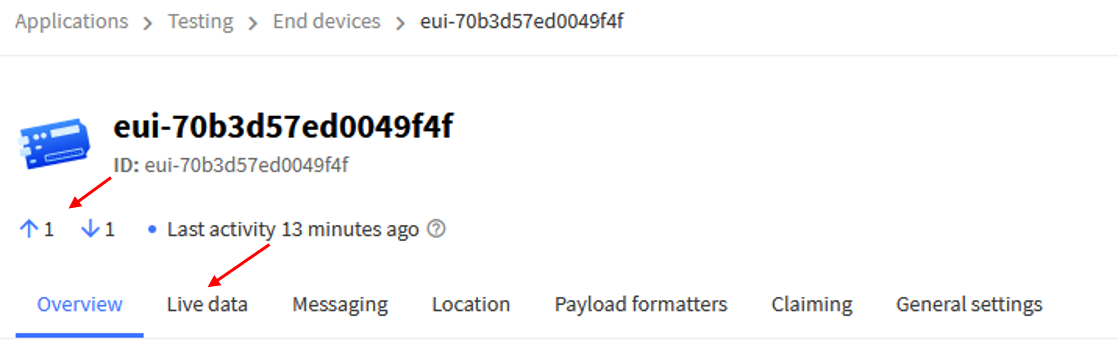
Finally, if both your node and gateway functioning well, you should see the number of sent uplinks and received downlinks updated each minute with the humidity and temperature values displayed in the live data.
Step 6: Display Data on the Thingspeak
The data received in The Things Stack Community Edition console cannot be stored. So we need another IoT monitoring platform to store the data and organize it in a nice way. In this tutorial, I will be using the ThingSpeak to display the humidity and temperature data in graphical forms.
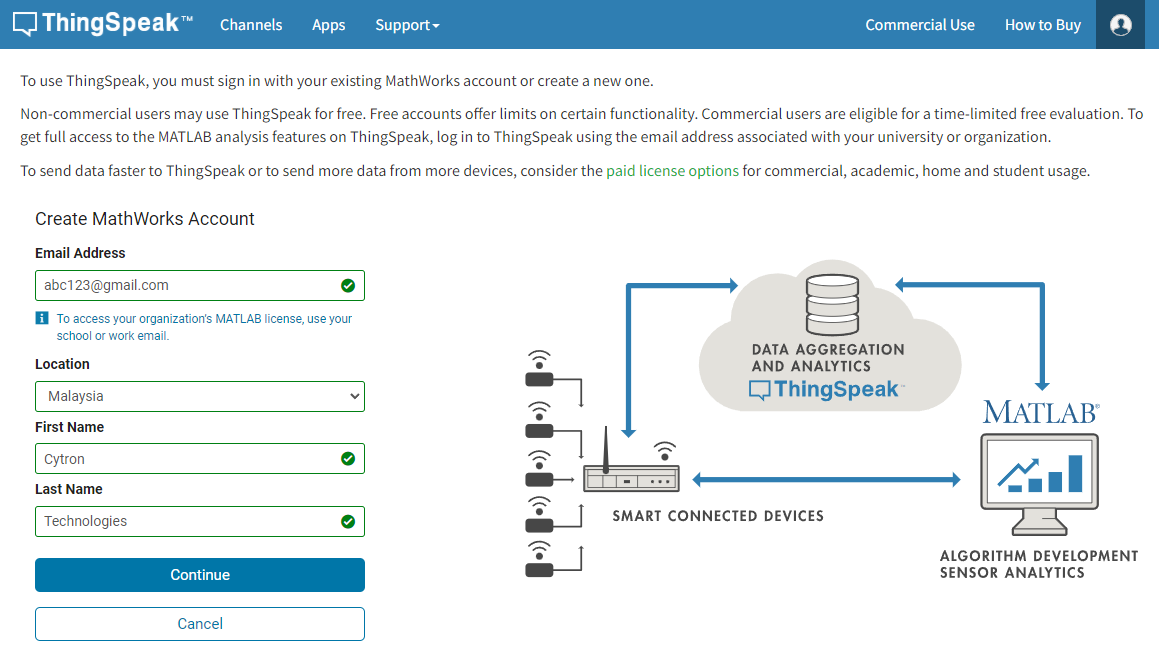
First, you need to create an account for the ThingSpeak. To access your organization’s MATLAB license, use your school or work email. Fill in the required informations and create an account.
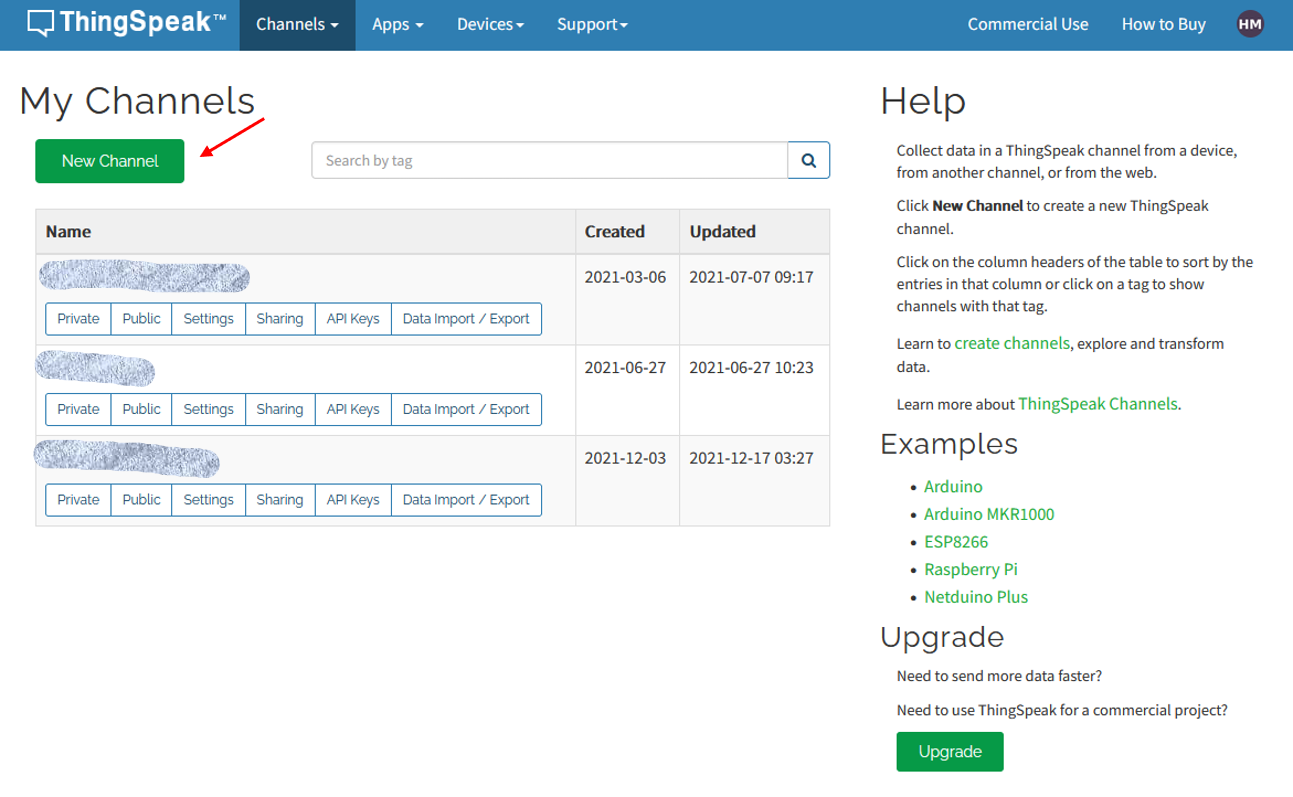
In the ThingSpeak menu, go to Channel > My Channel > New Channel to create a channel for the LoRaWAN network.
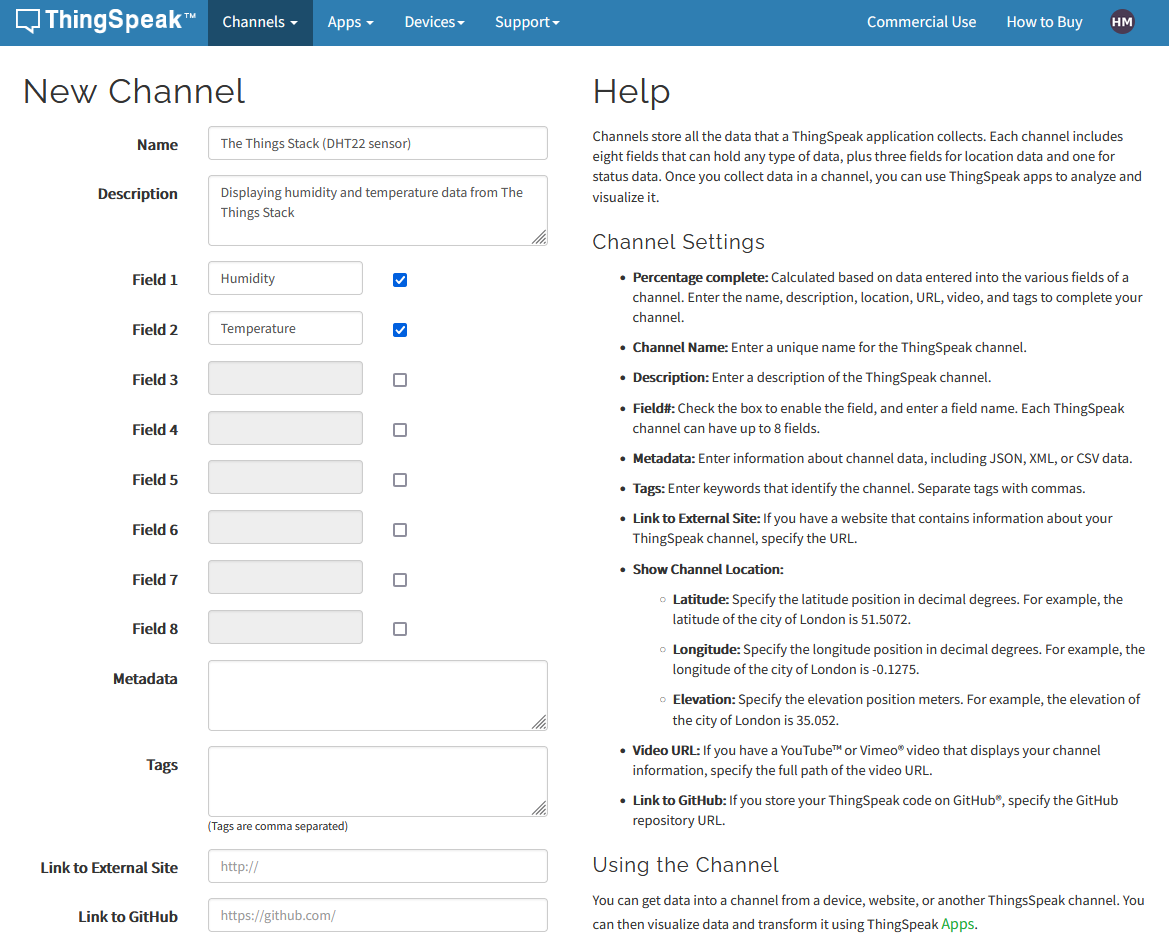
Fill in the name and description of your channel. It can be anything that you like.
Check the tickbox for Field 2 since we want to display two types of data. Rename both of the fields, Humidity for Field 1 and Temperature for Field 2.
Then click Save Channel at the bottom of the page.
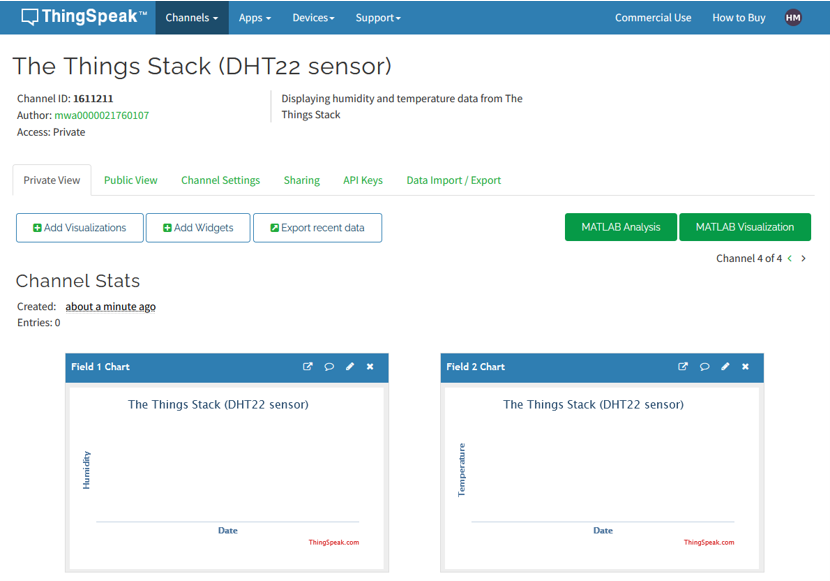
You had successfully created a channel for your LoRaWAN network and you will see something like this.
Go back to The Things Stack console. We need to edit some parts of the payload formatter so that the data send to The Things Stack can be transmit to the ThingSpeak too.
But first you need to create a webhooks that connect The Things Stack to the IoT monitoring platform (ThingSpeak).
- Select your applications in the “Applications Overview” screen.
- Select “Integrations”.
- Select “Webhooks”.
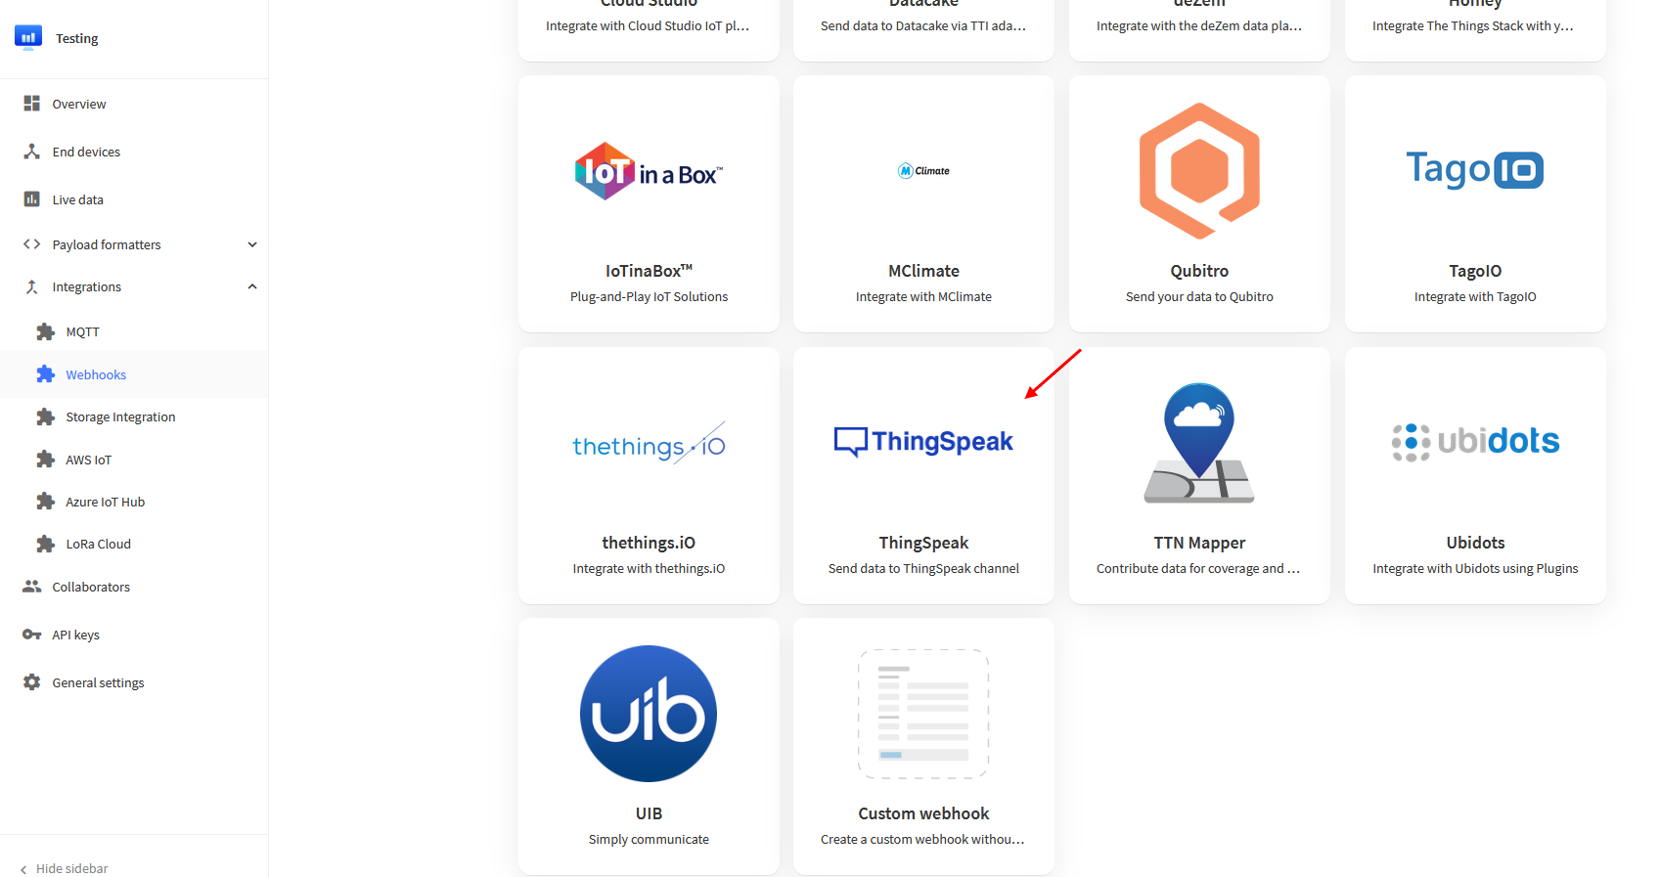
- Select “Add webhook”.
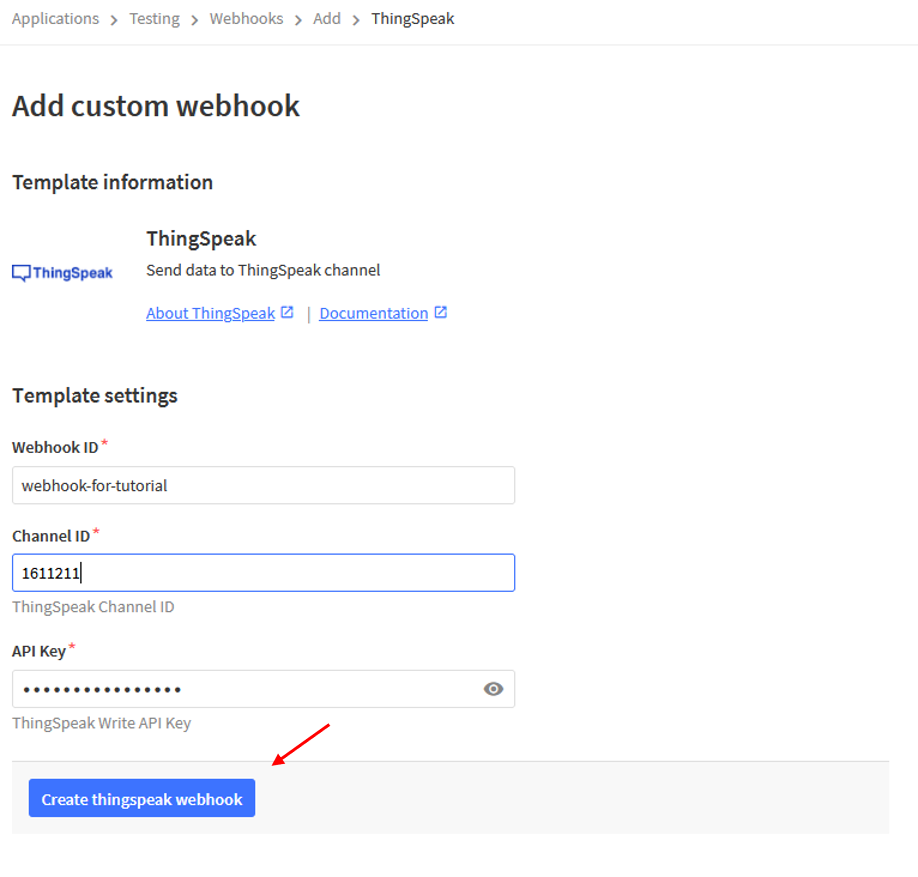
- Choose webhook template "ThingSpeak".
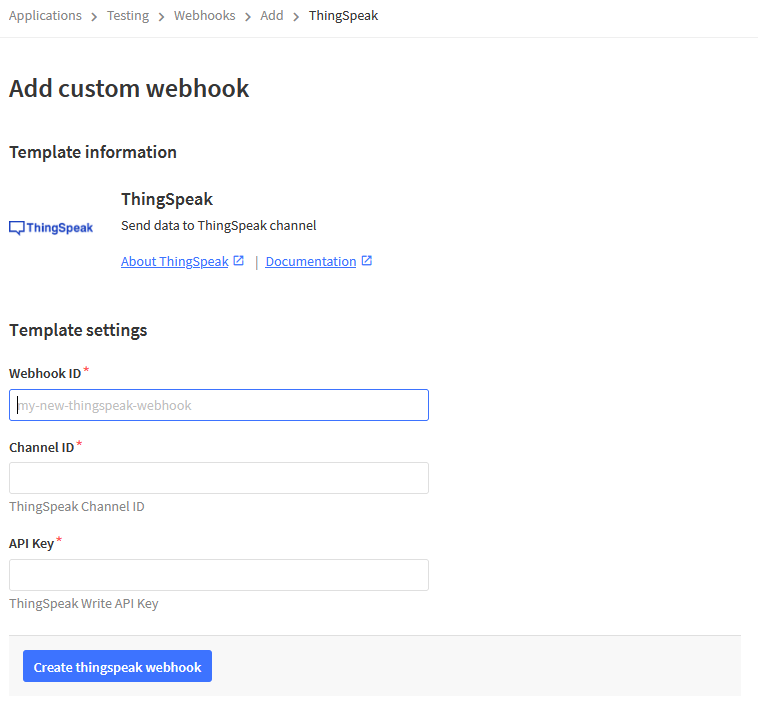
Fill in the Webhook ID. It can be anything that you like.
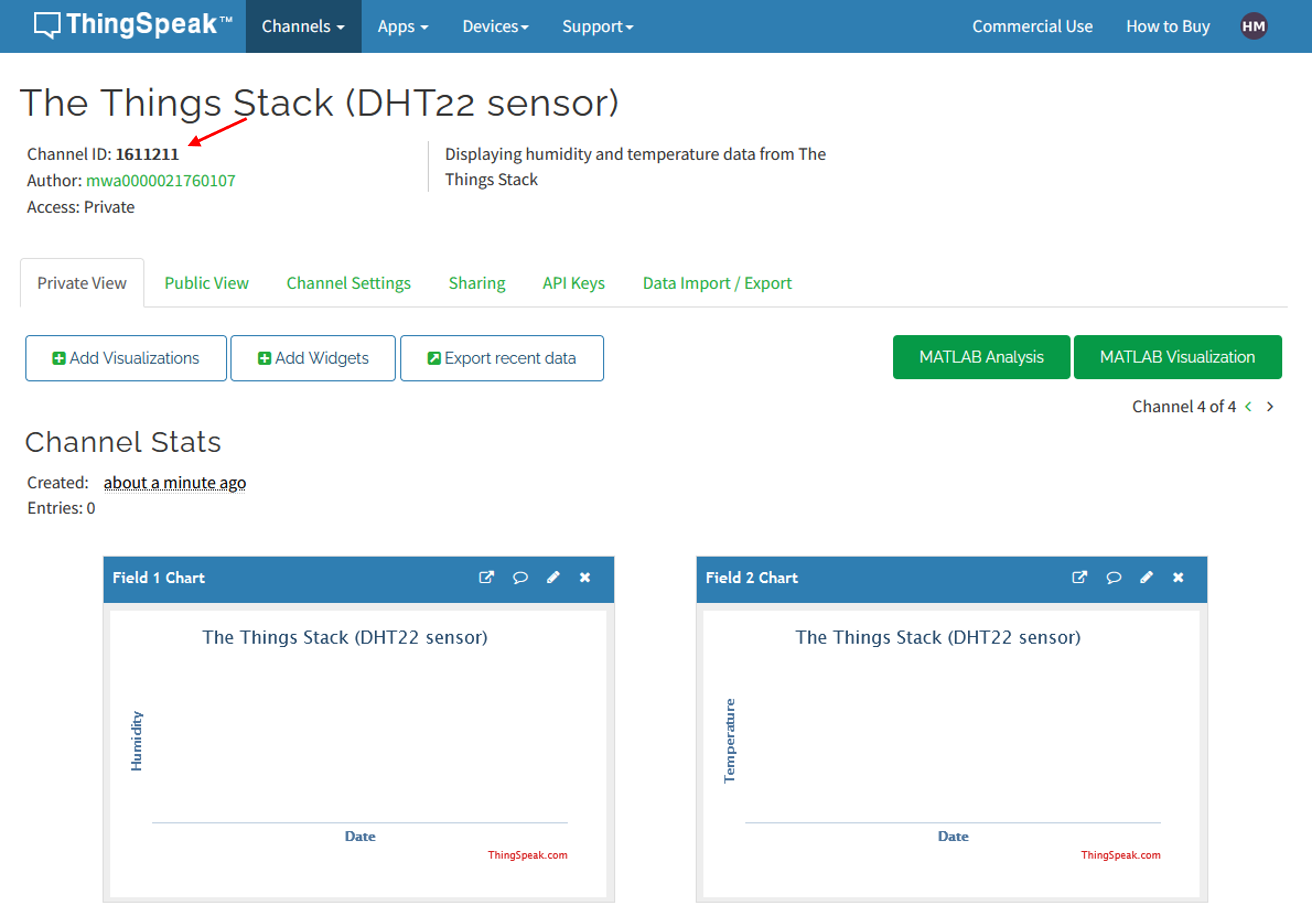
You must go back to the ThingSpeak website to find both Channel ID and Write API Key.
The channel ID can be found at the main page of your channel.
Then go to API Keys menu and copy the Write API Key.

Fill in all the required informations and click Create thingspeak webhook.
For the last step, we need to modify the payload formatter.
- Select your end device in the “End devices Overview” screen.
- Select “Payload formatters”.
- Select “Uplink”.
- Select “Formatter type: Javascript”.
Change data.humidity = humidity/100; line to data.field1 = humidity/100; since we will be using Field 1 in the ThingSpeak to display humidity data.
Then, change data.temperature = temperature/100; line to data.field2 = temperature/100; since we will be using Field 2 in the ThingSpeak to display temperature data.
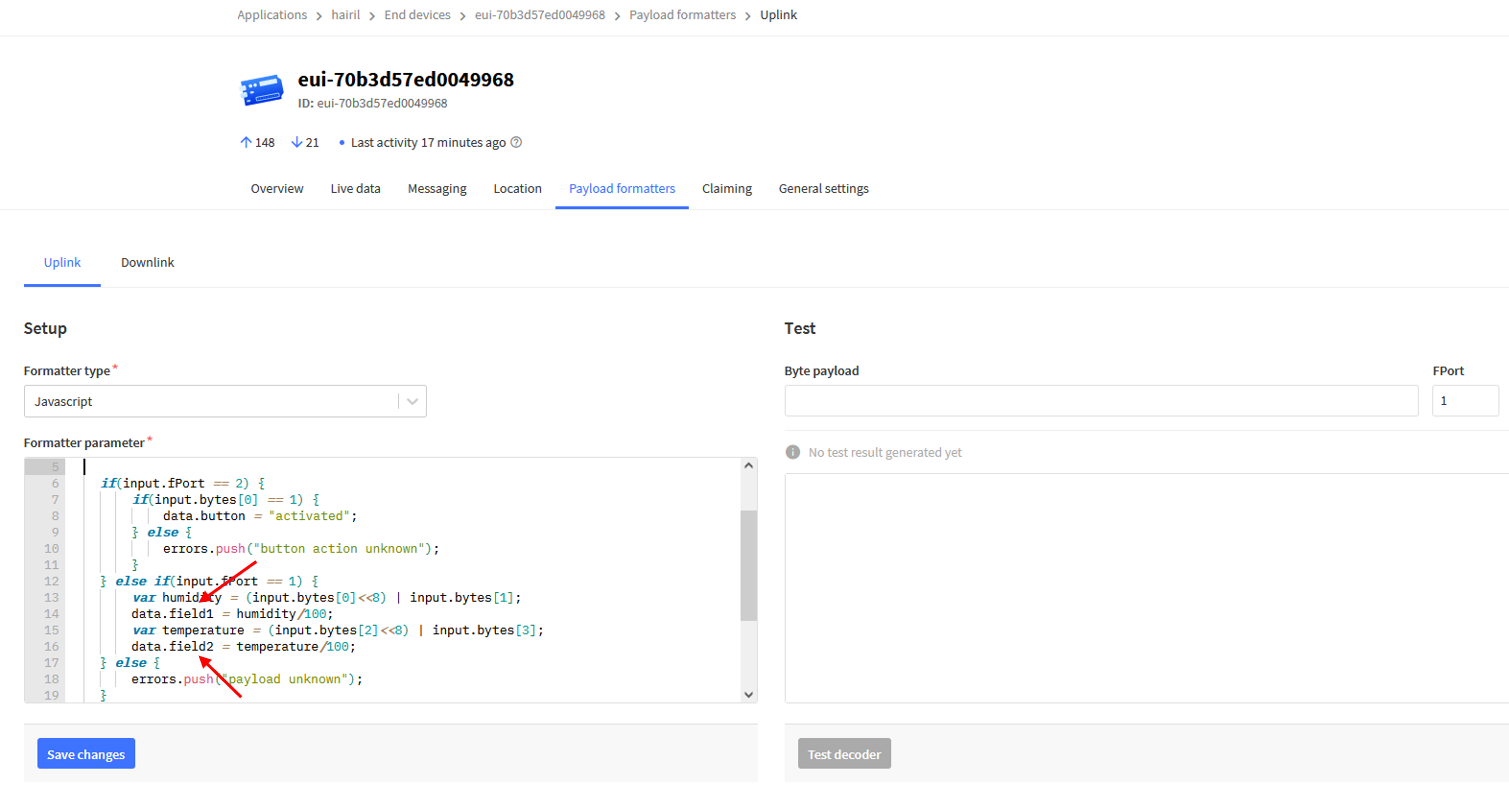
Click Save changes.
Done with all the setup for both The Things Stack and ThingSpeak websites. Once the data has been transmitted to The Things Stack live data, you should see the data in the ThingSpeak website too.
This is the example results of my IoT project that display the temperature and humidity data from DHT22 sensor.
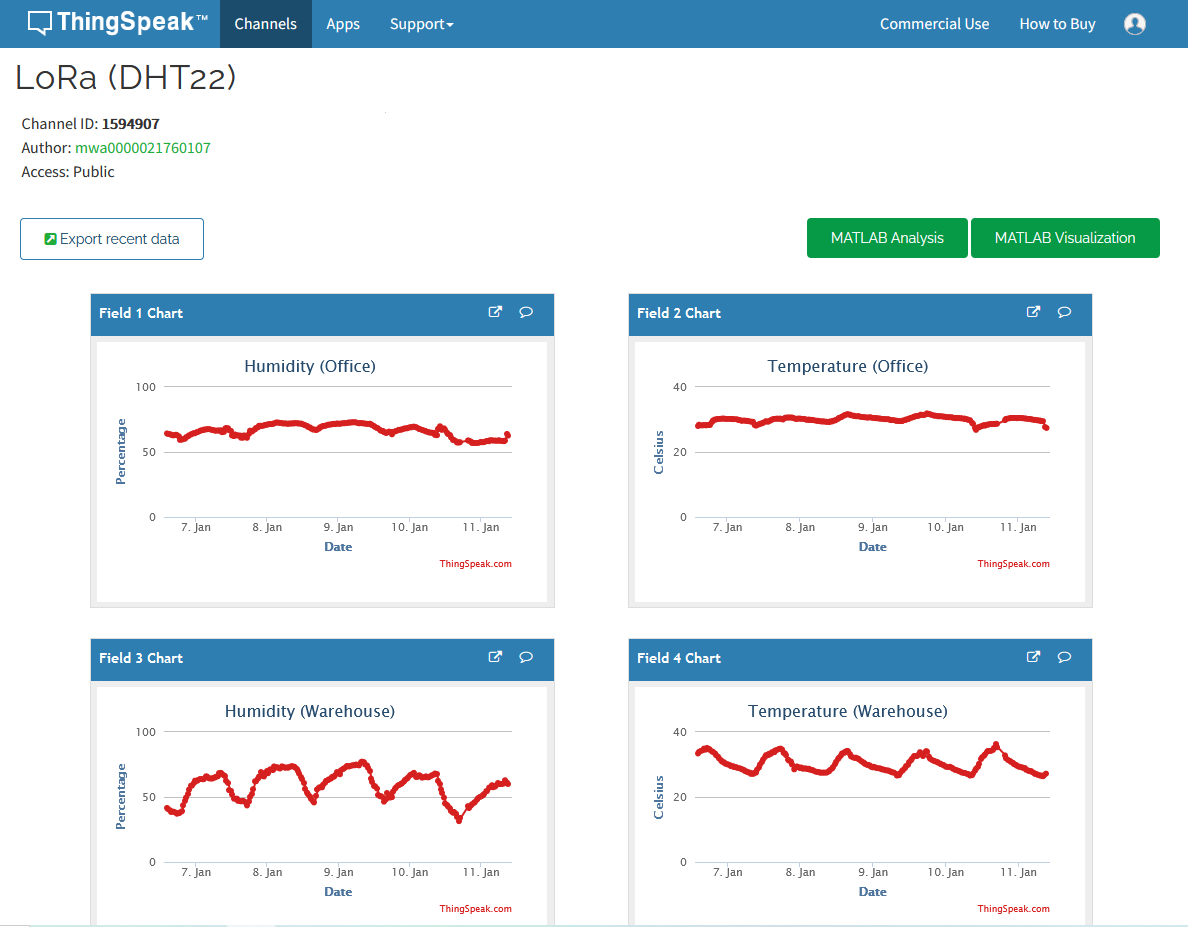
I open this IoT project to a public channel. You can visit to my ThingSpeak channel to observe the live data here.
The tutorial ends here but you can continue your journey in IoT world by exploring and try making great projects by yourself. The ThingSpeak is such a great IoT platform where you can do many great stuffs with the features provided such as MATLAB Anaysis, MATLAB Visualizations, ThingTweet, TimeControl, React, ThingHTTP and of course you must try to explore it by yourself :)
References
- Build LoRa node using Arduino Pro Mini and HopeRF RFM95 LoRa transceiver module (V3)
- LoRa Gateway Setup for RHF0M301 Raspberry Pi with Basic Station
- ThingSpeak public channel