 International
 Singapore
 Malaysia
 Thailand
 Vietnam
รถเข็นของคุณว่างเปล่า!
Displaying text on SSD1315 OLED module via I2C
- Hao Zhen Goh
- 06 Jul 2023
- Tutorial
- Beginner
- 801
This guide will show you how to display text on OLED module using your Robo Pico through I2C on Grove Port or Maker Port.
The figure below shows the available I2C pins on each grove ports, you may look for the pins that are labelled SCL & SCA on the back of the board.
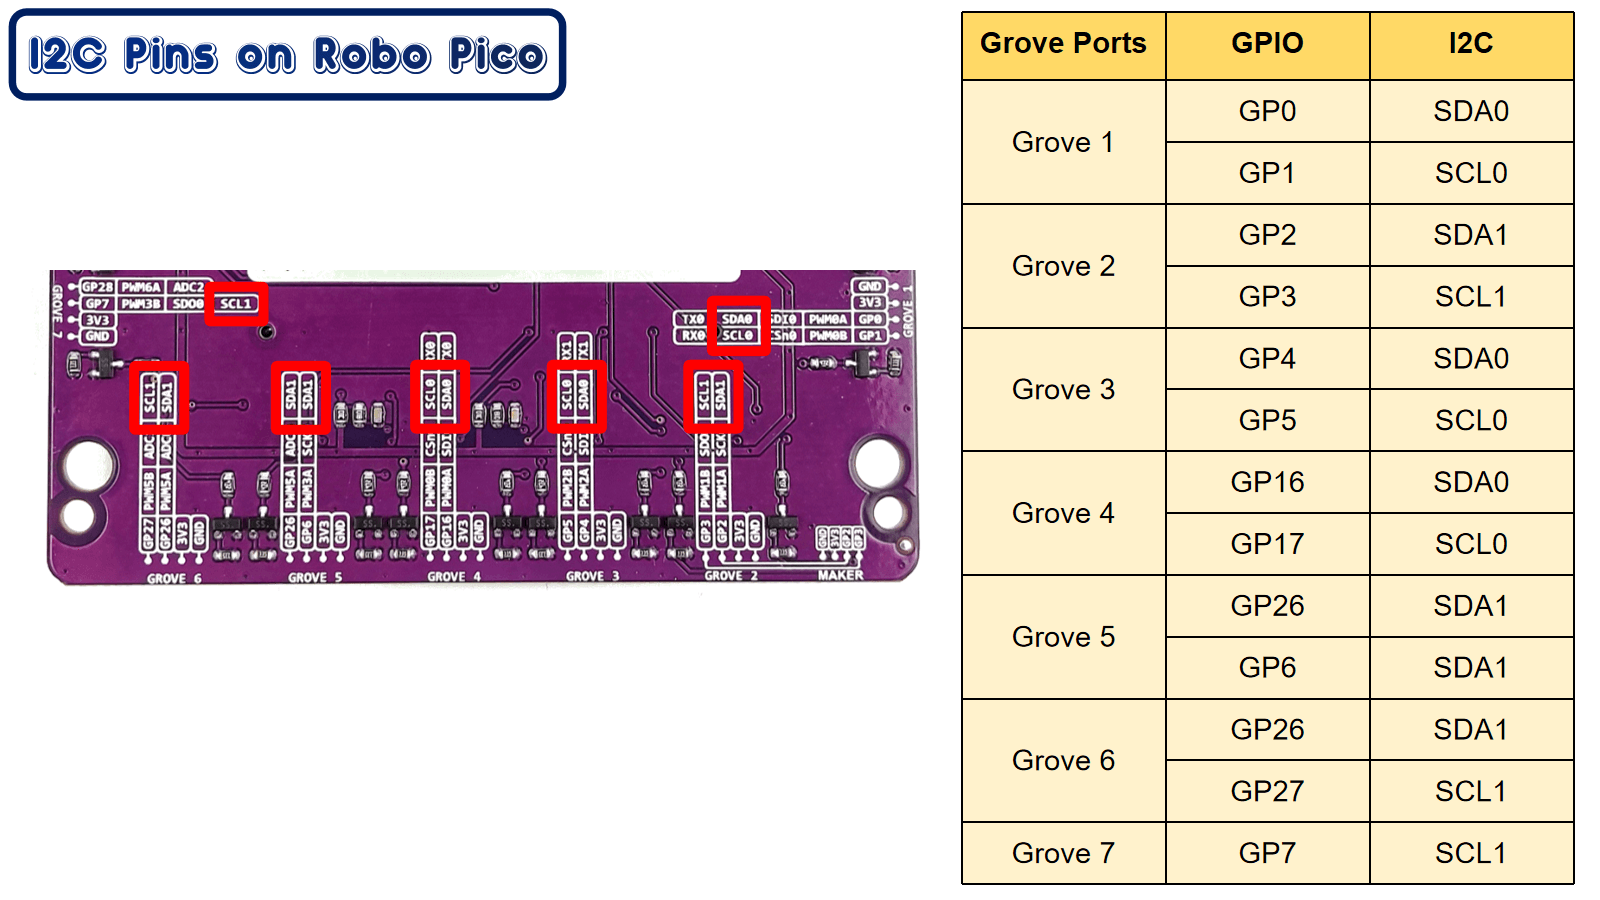
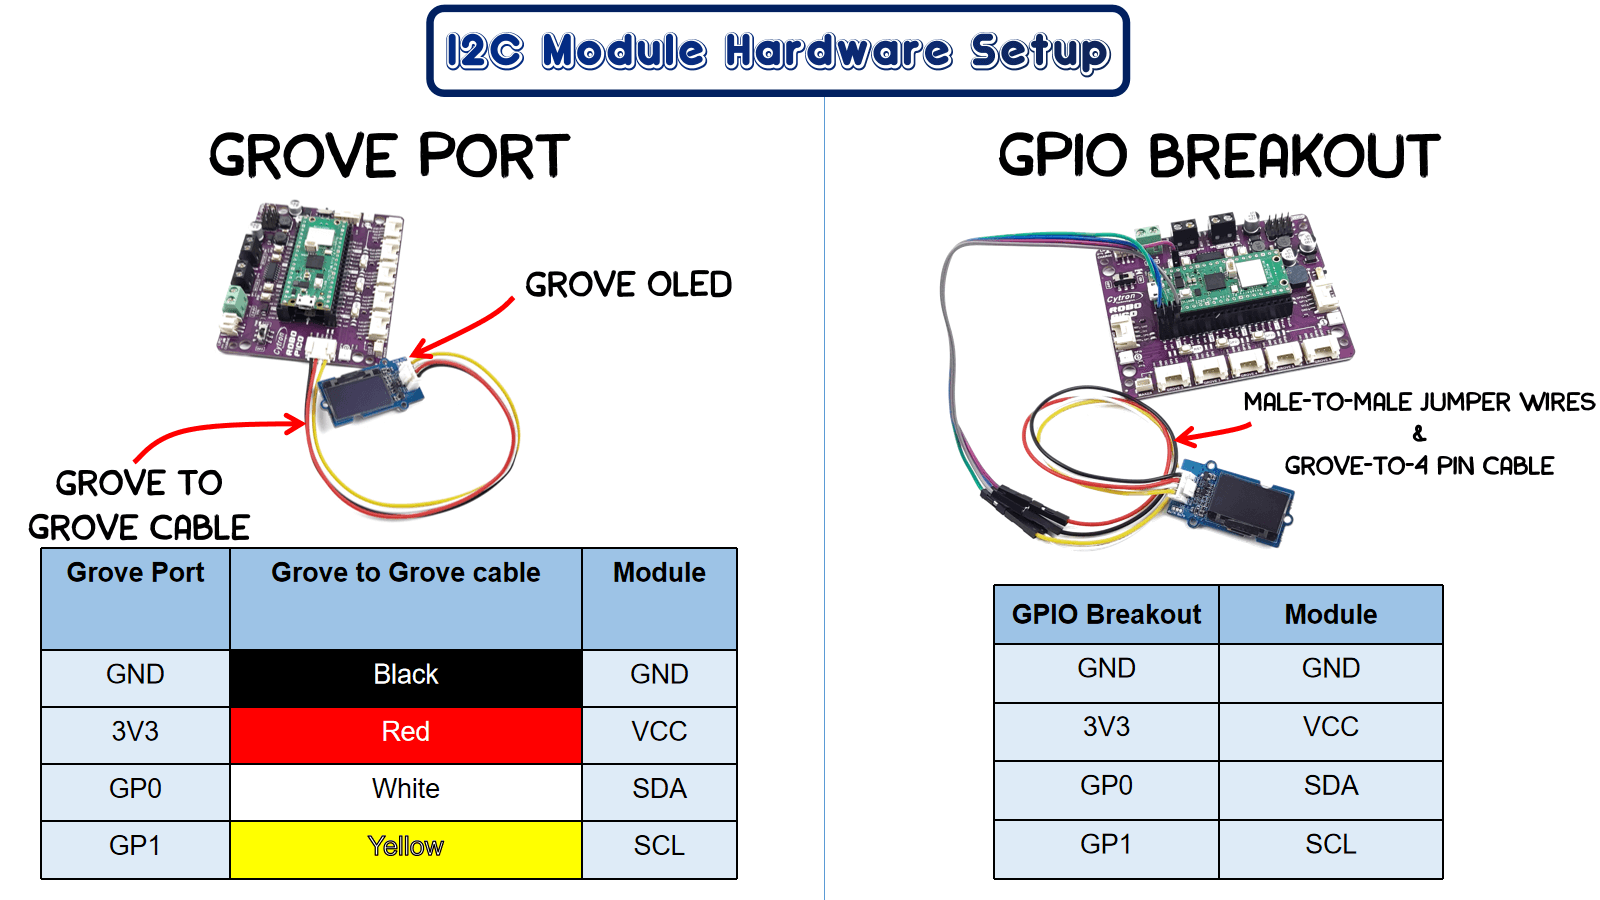
Grove Port
1. While your Robo Pico is connected to your computer, open your editor software (for example Thonny). Select the code.py file in your drive.
2. Connect your OLED module to Grove Port 1 using Grove to 4 female pins / grove cable.
OR connect your OLED module to the GPIO breakout using male-to-female jumper wires.
3. Copy and paste the following code to your editor.
4. Flash the codes to your Raspberry Pi Pico / Pico W. And your CIRCUITPY drive should look like this:
.png )
Library file(s) required:
adafruit_framebuf.mpy, adafruit_ssd1306.mpy
File(s) required:
font5x8.bin
If you don't have this file in your computer, download the lib bundle here and search for this file inside the "lib" folder.
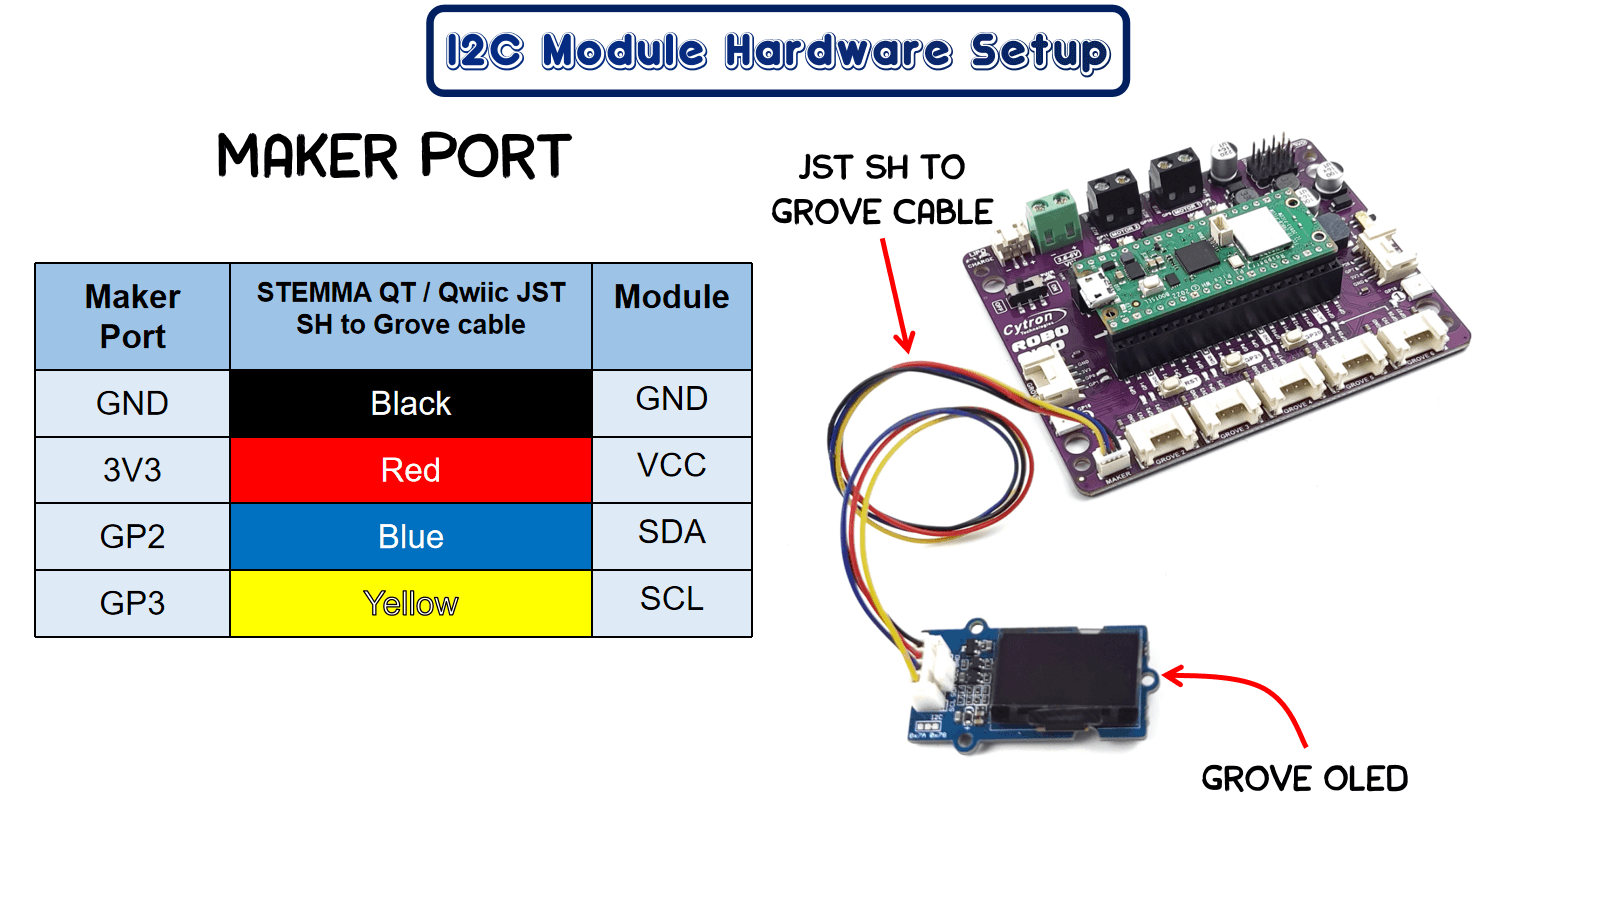
Maker Port
1. While your Robo Pico is connected to your computer, open your editor software (for example Thonny). Select the code.py file in your drive.
2. Connect your OLED module to Maker Port using JST SH to 4 female pins / grove cable.
3. Copy and paste the following code to your editor.
4. Flash the codes to your Raspberry Pi Pico / Pico W. And your CIRCUITPY drive should look like this:
Library file(s) required:
adafruit_framebuf.mpy, adafruit_ssd1306.mpy
File(s) required:
font5x8.bin
If you don't have this file in your computer, download the lib bundle here and search for this file inside the "lib" folder.
อุปกรณ์ฮาร์ดแวร์

Robo Pico: Simplifying Robotics with Raspberry ...
THB499.00 THB466.36
x 1 หน่วย