 International
 Singapore
 Malaysia
 Thailand
 Vietnam
รถเข็นของคุณว่างเปล่า!
Displaying Text on SSD1315 OLED Module via I2C
- Ahmad Noqman Arif Muzafar
- 08 Mar 2024
- Tutorial
- Beginner
- 228
This guide will show to to use the SSD1315 OLED module with your Maker Uno RP2040 to display text. The Maker Uno RP2040 comes with 6 Grove ports and 1 Maker port, making it easy to connect sensor and module for quick prototyping. In this guide, we'll use both Grove and Maker port to connect the OLED module.
The figure below shows the shows the available I2C pins on each grove ports. The Maker port and Grove 6 port shared the same pin connection.
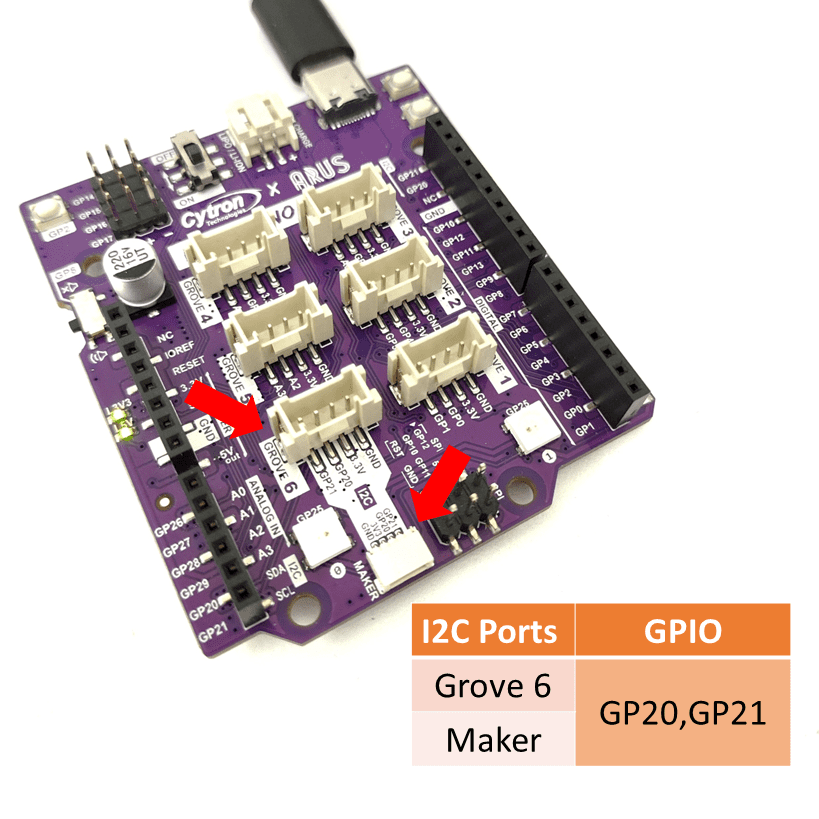
Grove Port
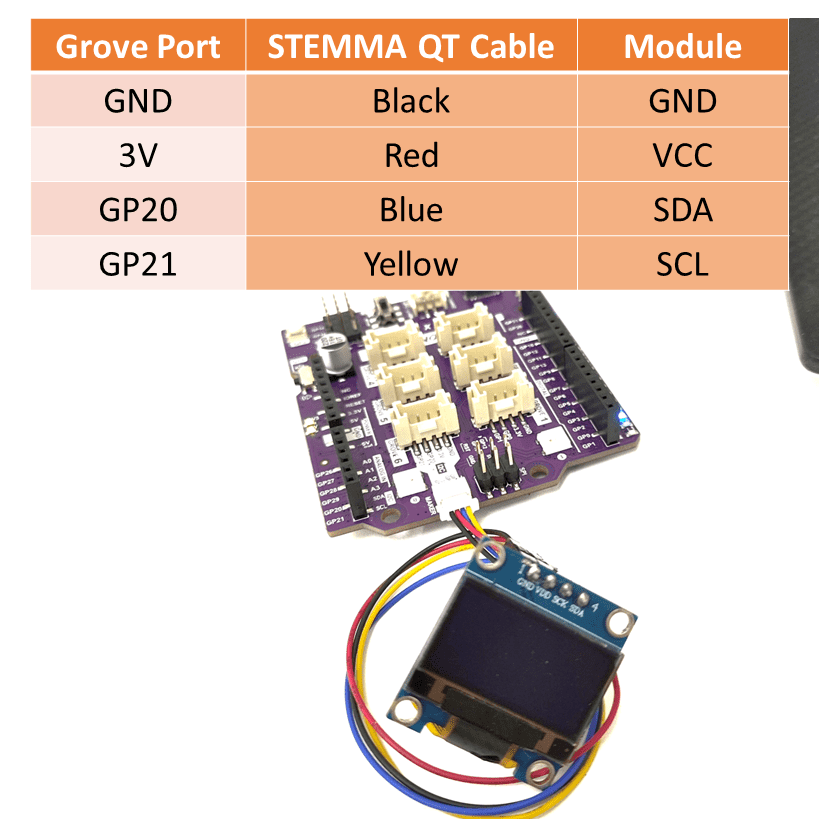
Connect the OLED module to Grove 1 port using a Grove cable or Grove to 4 female pins cable (if the you are using the generic SSD1315 OLED module)

Open the Arduino IDE and make sure the correct board and COM port are selected.
Copy and paste the folowing code to your Arduino IDE.
Verify and Upload the sketch to your Maker Uno RP2040. The expected output is that the OLED module will display "Hello World" on the first line and "Yeah!" on the second line.
Maker Port
Connect the OLED module to Maker port using a JST SH to Grove cable or JST SH to Female pins cable.
Open the Arduino IDE and make sure the correct board and COM port are selected.
Copy and paste the folowing code to your Arduino IDE.
Verify and Upload the sketch to your Maker Uno RP2040. The expected output is that the OLED module will display "Hello World" on the first line and "Yeah!" on the second line.
อุปกรณ์ฮาร์ดแวร์

Maker Uno RP2040
THB503.80 THB470.84
x 1 หน่วย