รถเข็นของคุณว่างเปล่า!

Piano with Maker UNO
INTRODUCTION
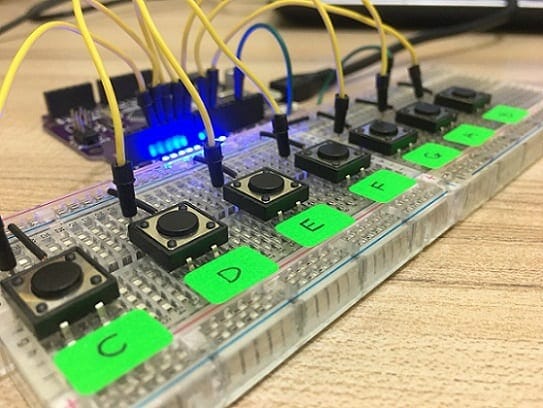
I have a nephew age 10 years old. I tried to make electronic looks easy and fun to him. Since he really like to play a music instrument, I made this small piano for him so that he can learn piano and electronics at the same time. I share this with the hope that you can also enjoy this with your loved one <3
HARDWARE PREPARATION
This tutorial use :
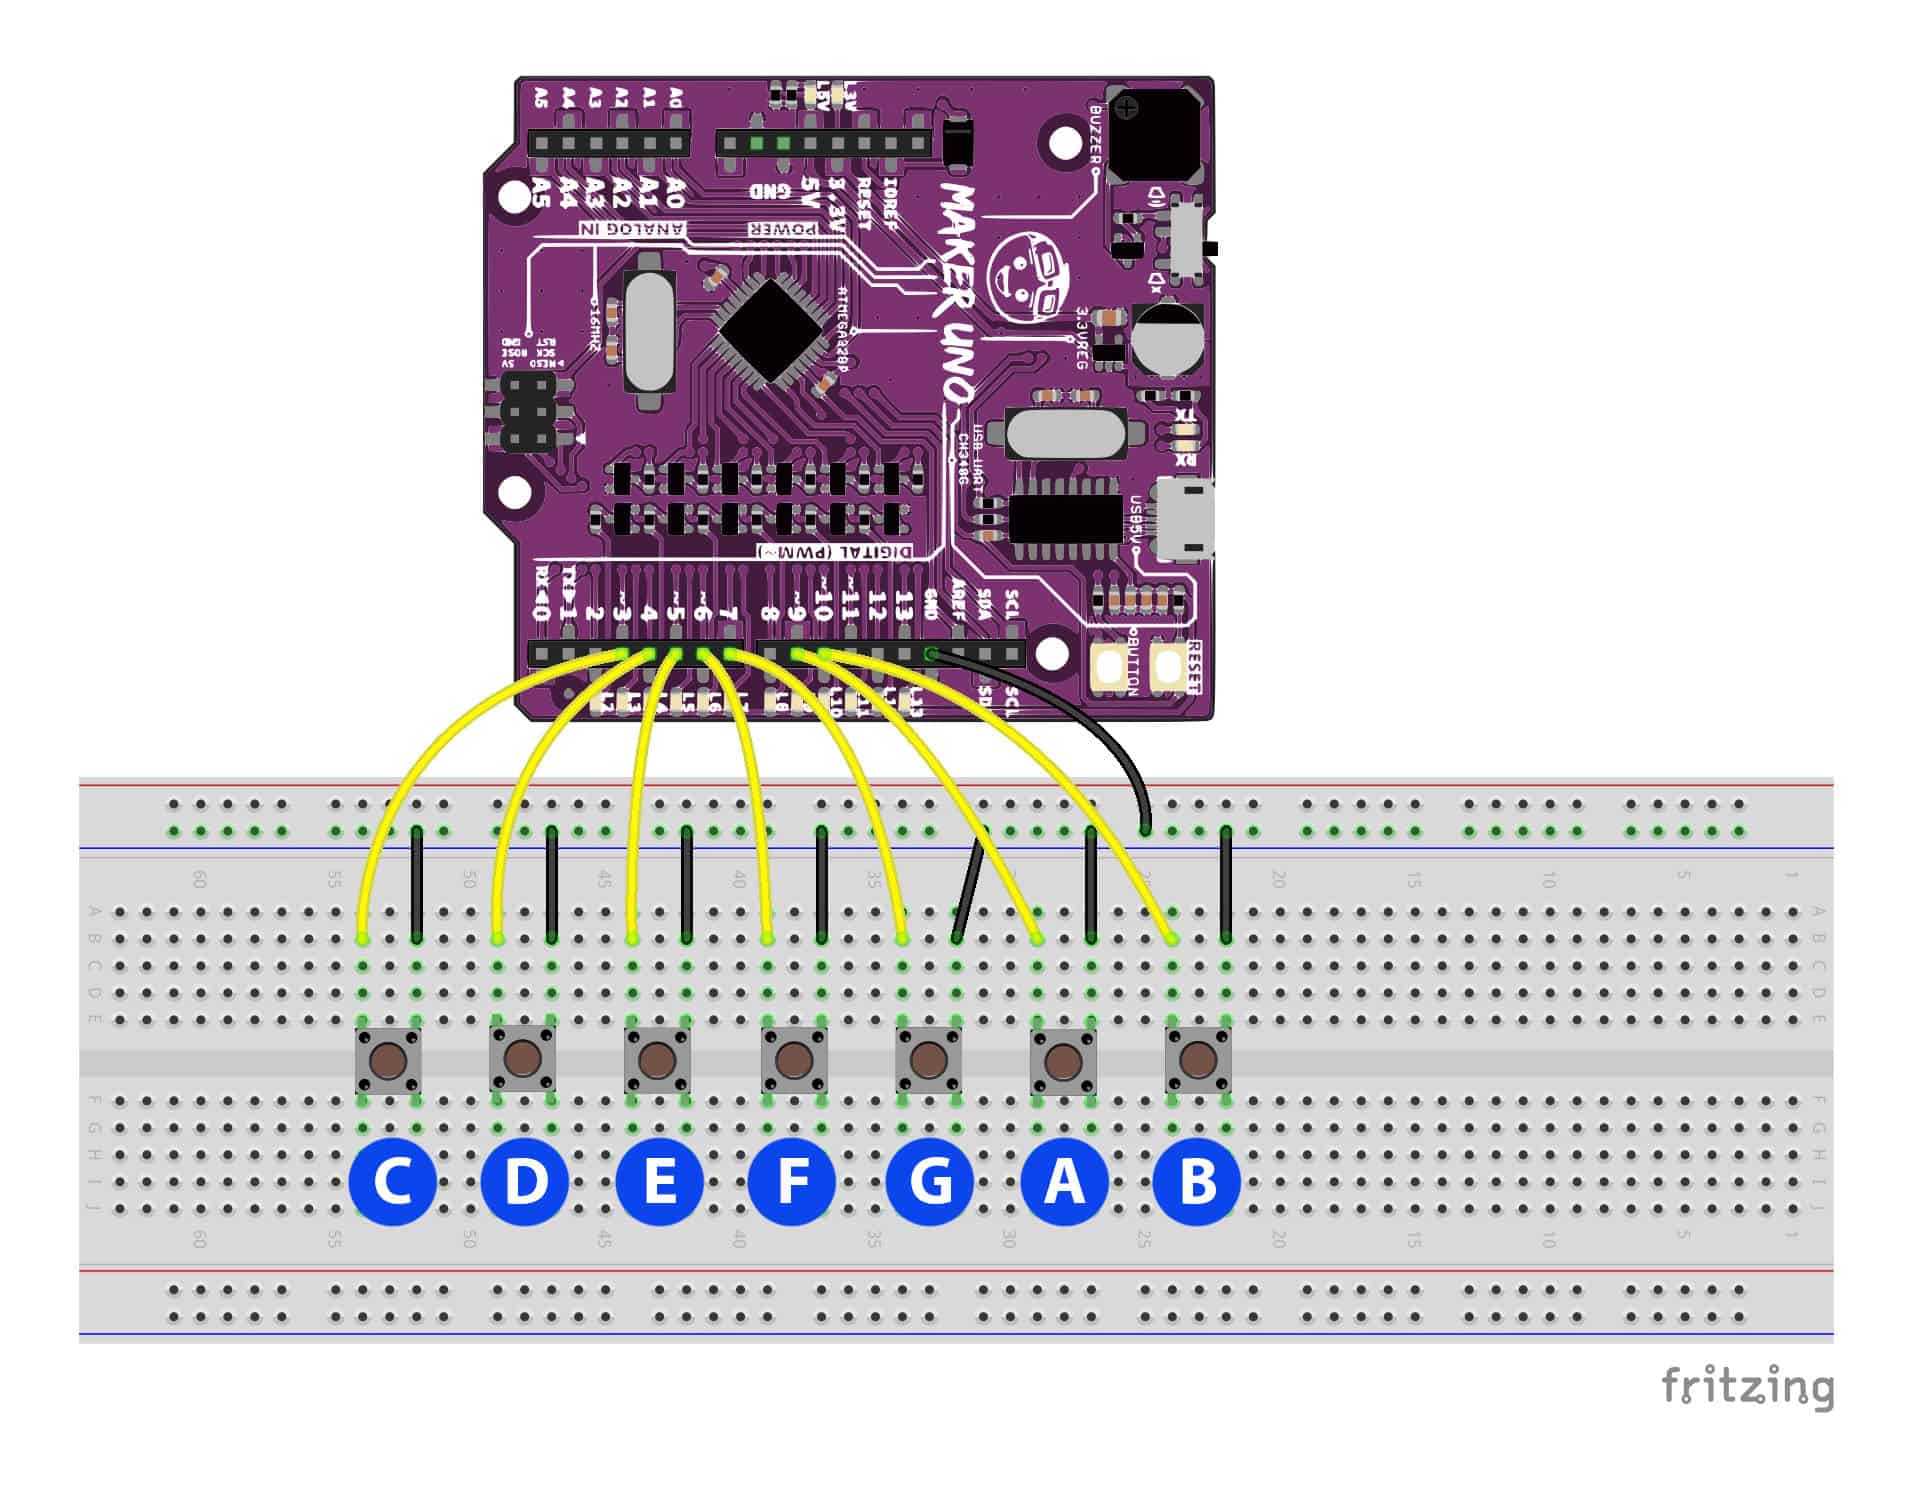
You can make the hardware connection based on the diagram and table below.
| CONNECTION | |
|---|---|
| Maker UNO : GND | Breadboard GND |
| Maker UNO : Pin 3 | Push Button : 1 (C) |
| Maker UNO : Pin 4 | Push Button : 2 (D) |
| Maker UNO : Pin 5 | Push Button : 3 (E) |
| Maker UNO : Pin 6 | Push Button : 4 (F) |
| Maker UNO : Pin 7 | Push Button : 5 (G) |
| Maker UNO : Pin 9 | Push Button : 6 (A) |
| Maker UNO : Pin 10 | Push Button : 7 (B) |
*Another leg of the Push Button is connected to the GND of Breadboard


SAMPLE CODE
This is the sample code used for this tutorial. Try it!
[gist https://gist.github.com/atifahsuad/d0cb71a4796fd779db2a289760e49d45/]
Thank you
Thank you for reading this tutorial and we hope it helps your project development. If you have any technical inquiry, please post at Cytron Technical Forum.
 International
 Singapore
 Malaysia
 Thailand
 Vietnam