 International
 Singapore
 Malaysia
 Thailand
 Vietnam
รถเข็นของคุณว่างเปล่า!
รถเข็นของคุณว่างเปล่า!

Welcome to our comprehensive series of tutorials designed to guide you through an exciting journey with the 1kg Sumo Robot!
This tutorial is derivative from the previous tutorial on Ikedo Mini Sumo Robot Pro. We will repeat the same step from this tutorial but will be aligned with 1kg Sumo Robot. This tutorial also is continuous from previous tutorial on Building a 1kg Sumo Robot. You can visit this tutorial first before going further.
1. Let’s Upgrade your Mini Sumo to 1kg Sumo Robot
2. 1KG Autonomous Sumo Robot Starter Kit User Guide
PART 1: Introduction
As we are going through these lessons, you'll be capable of implementing a variety of fascinating projects with your Sumo Robot. Here's a summary of what you'll achieve:
1. Basic Robot Navigation: Before we can program our robot to fight, we need to familiarize ourselves with a few basic robot navigations.
2. Game Strategies: Next, we'll add a series of strategies that will be used for our sumo robot. It depends on the mission and purpose on the gamefield.
3. Let's Fight!: The final decision for the robot before we enter into the gamefield
Step 1: Arduino Installation (Prerequisite). In this part, we recommend for first time users or beginner level to take a look at the Arduino Learning Guide to install Arduino IDE (a software to write your coding) and the install USB driver (Maker Mini Sumo Controller need driver for serial port).
You can skip it if you already have Arduino IDE and USB Driver installed on your PC.
Step 2: First of all, launch the Arduino IDE that you have just installed. We will use our own Cytron Maker Sumo Library in our programming. It will help us a lot during this coding session. Let's follow this step.
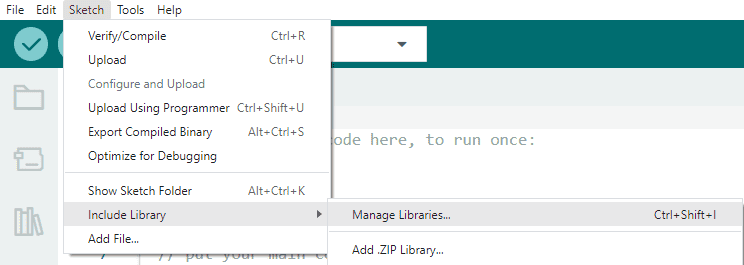
Go to Sketch > Include Library > Manage Libraries…
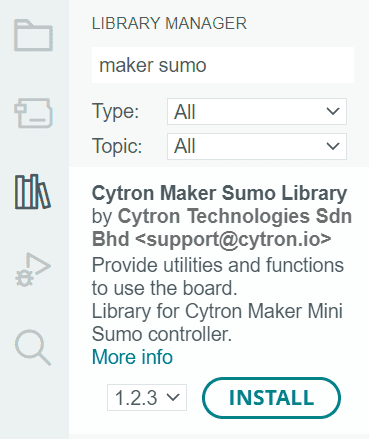
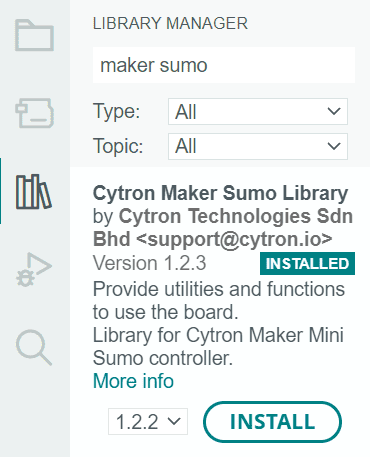
Step 3: Search for "maker sumo" on Library Manager, then click "Install". You may install ALL the library dependencies together with this library.
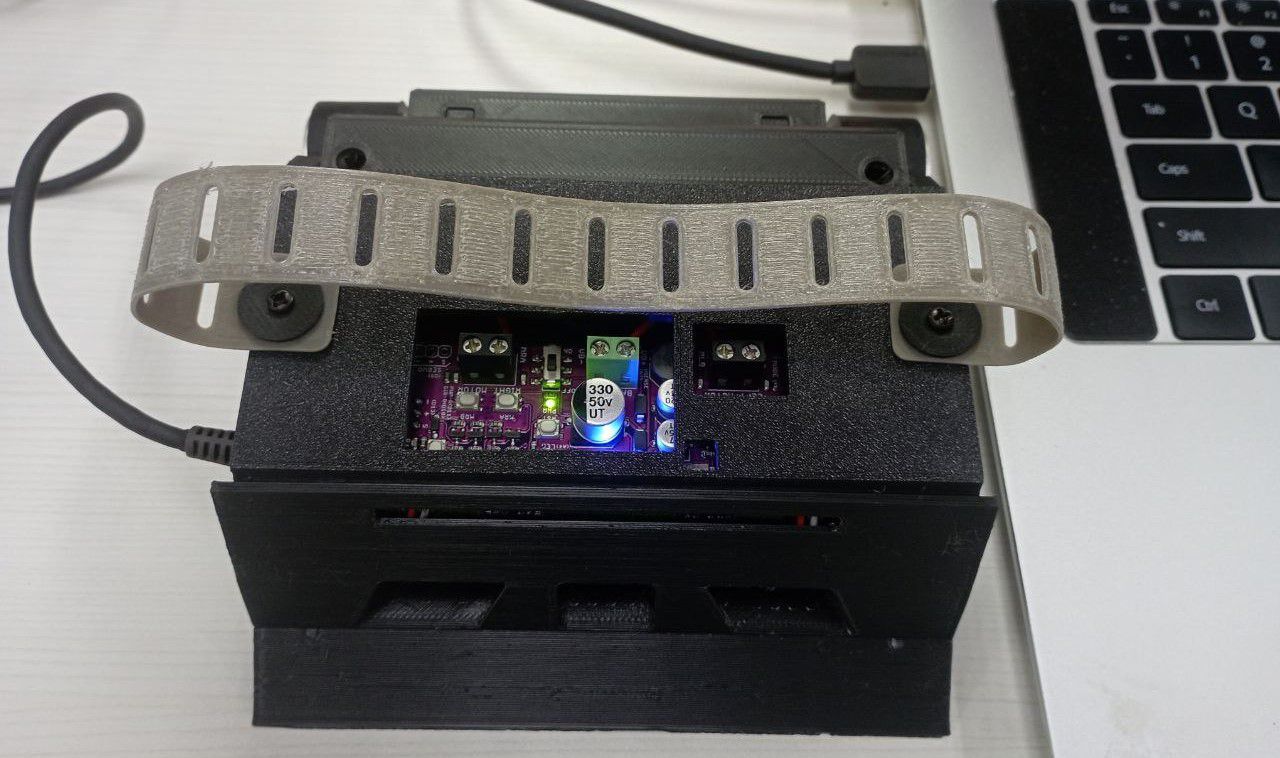
Step 4: Connect the USB cable on the PC and your Maker Mini Sumo Controller.
Step 5: Select Board which is, Arduino Uno (Maker Sumo Controller using the same chip as Arduino Uno) and your serial port. Make sure you already install the USB Driver through the Arduino Learning Guide before. In my case, my serial port is COM5. Then click OK

Step 6: Once finished all the setup, then you are ready for coding!

THB5,000.00 THB4,672.90
